
Our Render Crack repair Kit offers the hard to obtain components required to permanently repair cracks in rendered walls. These items are then sold at a discount.
If you wish to seal between rendered surfaces and timber, please see our Timber Crack repair Kit. That kit will prime both timber and hard surfaces such as render very effectively.
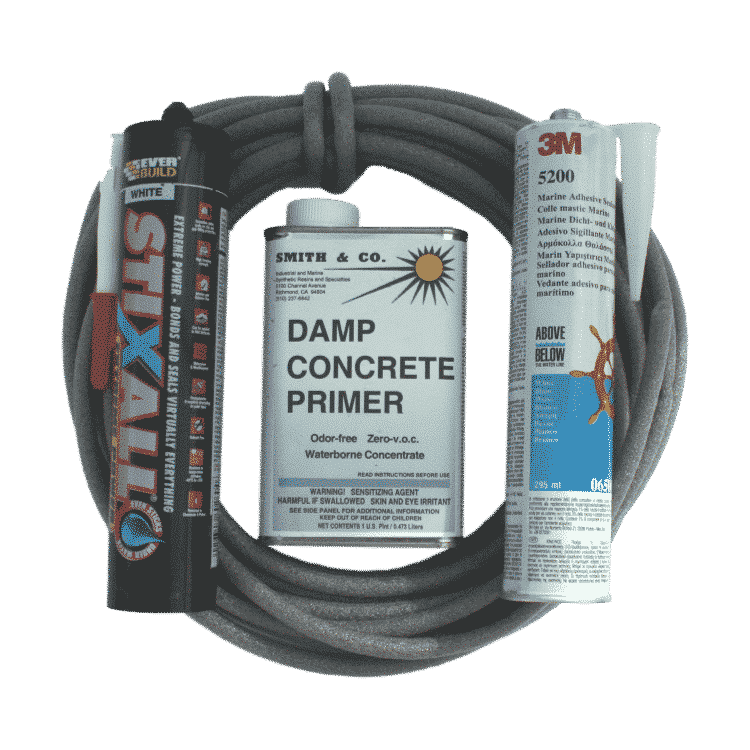
The render crack repair kit contains a can of Smiths Damp Concrete Primer one or more pack of Backer Rod (Choose diameter) and it is sold at a discounted price.
You may also choose to buy a discounted mortar rake from us to complete your render crack repair kit.
You WILL need to buy sealant caulk to finish the job. Flexible adhesive sealant, either 3M 5200 Sealant and/or Everbuild Stixall which is readily available.
For full instructions on how to affect a repair to a crack in a rendered wall, see here. Our full range of Crack Repair Kits can be found here.
Render Crack Repair FAQ
Why do I need Backer Rod?
If you do not open the crack up to a sensible width, then no caulk will be flexible enough to accomodate the movement in the crack. Let’s assume there is 1/2mm movement. That’s not much. In a 1mm crack it’s 50% of the crack. Enormous force is required to stretch your caulk from 1 to 1.5mm, or compress it from 1 to .5mm. If the caulk is 8mm wide, and thin in the middle as it sits on backer rod, then compressing it to 7.5mm, or expanding it to 8.5mm is relatively easy.
Please remember your crack is in render, that render can be easily pulled apart, it has little tensile strength.
Why do I need a primer to repair a crack in a render wall?
The use of a proper primer will make it far harder to seperate the caulk from the render surfaces to which it must adhere. That improved adhesion means it is far more likely that the caulk will stay attached to the substrate, and that your repair will last.
Render Crack Repair Kit Coverage
There is no such thing as a standard crack, however the tin of Smiths Damp Concrete Primer is likely to contain enough to treat around two hundred metres of crack. You should only mix as much as you need to perform the job in hand of this substance, as once mixed it does not keep.
Since a standard caulking cartridge will fill a volume of crack of just over 300ml without waste, this will not last for as long as the Smiths Damp Concrete Primer.
You can buy as many Stixall, 3M 5200 and packs of Backer Rod as you may require discounted in as part of this kit to repair further cracks and use your remaining Smiths Damp Concrete Primer.
Any remaining Damp Concrete Primer is also ideal for priming floors prior to using epoxy or polyurethane floor paints.
Select the size of Backer Rod that is most appropriate to fit into the bottom of your crack, fill the void between the two sides, whilst leaving space on top for the adhesive sealant to adhere to the crack sides.
If your crack varies in size, or you need more, we sell backer rod separately. it is much cheaper than even the cheaper of our adhesive sealants, Stixall, which it is displacing of course.
Opening the crack up to take sealant
V Cut Cracks
If your crack is v shaped, and is ground out to be as wide on the surface as the render is deep, the following table will estimate coverage of a single tube of Sealant without Backer Rod:
| Crack depth (cm) | Crack Width (cm) | Approx Crack Length (m) |
| 0.5 | 0.5 | 24.0 |
| 1 | 1 | 6.0 |
| 1.5 | 1.5 | 2.7 |
| 2 | 2 | 1.5 |
| 2.5 | 2.5 | 1.0 |
Parallel Cut Cracks
Use the following table to estimate sealant coverage if you are grinding parallel slots into your render crack. A mortar rake is the ideal tool to use to do this. An 8mm standard mortar rake grinder blade is ideal for 10mm backer rod, which stays firmly put in the resultant slot.
An 8mm wide groove should accommodate a crack movement of around 1mm. For greater movements please grind wider cracks.
| Crack depth (cm) | Crack Width (cm) | Approx Crack Length (m) |
| 0.5 | 0.5 | 12.0 |
| 0.8 | 0.8 | 4.7 |
| 1 | 1 | 3.0 |
| 1.2 | 1.2 | 2.1 |
| 1.5 | 1.5 | 1.3 |
Crack recommendations
I would always recommend using a parallel crack if you can.
- They are easy to cut, just add the ‘mortar rake’ to our render crack repair kit if you don’t already own one
- They are easy to fit backer rod to as 10mm rod is a tight fit in an 8 – 10mm crack
- They use little expensive sealant
Sealant Choice in our Render Crack Repair Kit
Whilst investigating alternative sealants to the expensive 3M 5200 marine polyurethane (a water cured one part polyurethane), we discovered Everbuild Stixall. That sealant binds very aggressively to hard surfaces treated with Smiths Damp Concrete Primer, although the application procedure is slightly different.
If using Stixall you MUST let the Damp Concrete Primer (DCP) dry completely prior to applying the sealant. This is actually easier to use, as you are not trying to catch the DCP at a specific tacky stage. Applying sealant the day after applying the DCP is normally entirely safe, although earlier application may be OK in hot weather.
Sealant Comparison
We offer the following comparison of the attributes of the various sealants recommended for use with our render crack repair kit.
- Cost: Stixall is far cheaper than 5200
- Colours: Stixall is available in White, Black and Clear.
- Paintability: Both sealants can be overpainted ( Stixall recommends using water based paints and testing first)
- Sandability: 5200 can be sanded once cured, Stixall does not sand well when set (although this is offset by it’s easier tooling before cure)
- Flexibility: 3M 5200 has greater flexibility than Stixall, This means less force to accommodate a given amount of movement. Allow a thicker groove for Stixall to accommodate movement in the crack
- Ease of Tooling: Stixall is easier to tool than 5200
- UV Resistance: Stixall appears to suffer less yellowing with exposure to high UV than 5200
- Sag: Stixall is thicker than 5200, making it less likely to sag during application on large cracks.
- Durability: We have no valid comparison data for ultimate durability of these products. 5200 has a very long history as a world class marine sealant, Stixall comes with a manufacturer 40 year warranty, although the terms associated with this are unclear. See manufacturers sites for further information.
- Shrinkage: Stixall declares shrinkage of less than 2%. To minimise the visible effects of this shrinkage we recommend filling the crack reasonably close to the top with backer rod.
Note on the use of 5200 – We do not recommend using 5200 Fast Cure on cracks in houses as it can bubble if exposed to too much moisture during curing.
Sealant Recommendation
If you can use Stixall we would recommend that you do.
Assuming:
- You are using a mortar rake to cut an 8 – 10mm channel
- You will fill the bed of the crack to near the top with backer rod
If the crack you are buying our render crack repair kit to fix moves:
< 1mm. You will be fine with Stixall
>= 1mm. We recommend you use 5200, or perhaps cut a wider channel if the movement is very large
It is both easier to use and significantly cheaper if you can use the Stixall.
Professional Users
Download MSDS from:
Everbuild Stixall Extreme Power SDS


dean.spiers28 (verified owner) –
Being a competent DIY er the product and kit made me feel like a professional, the step by step guide is easy to follow and ensures the task at hand goes to plan . The repair was in an extremely exposed coastal position the crack in the smooth render and pebble – dashed finish extended some 20 feet , and allowed water penetration into the cavity and subsequently on top of window lintels which tracked inside the property .
I ‘V’ cut the crack and followed the instructions to the letter , inserting the foam backer rod prior to the primer & then caulking. I used a pallet knife to spread the filler into the sides to ensure adhesion prior to filling the crack to the top. A gloved finger finished the job.
I used the Stixall , ( the next day) which proved easy to use and suited both the pebble dash & the smooth render finish I needed to achieve. The drying time allowed me to re- pebble dash by pushing pebbles into the adhesive and working the adhesive around the pebbles with my gloved finger.
So far so good we await the winter storms but all in all a job well done !
Dean from Dorset