This article describes how to repair cracks or joints in exterior timber It says why they happen and under what circumstances never to try to seal them with fillers.
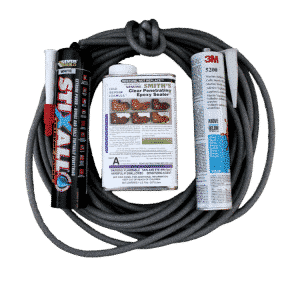
Timber Joint Sealing Kit
If you need to seal joints in exterior timber against the weather, we have assembled a kit for you at a discounted price, just click this link: Timber Joint Sealing Buy our Timber Crack Repair Kit. Please read on to find out why wood cracks, and why it works so well, and under what circumstances it is possibly not appropriate.
Why Does Timber Crack?
We all know that wood is a natural substance, and the splitting that occurs in wood is a result of changes in moisture levels, and consequent changes in different dimensions of the wood.
When a tree is first felled it is referred to as ‘Green Wood’, and will typically contain around 50% of it’s weight as water. This water can be loosely grouped into two types, free water and bound water.
- The free water is easily lost, it is held in the wood by capillary action alone
- The bound water is chemically bonded within the wood, held by hydrogen bonds between the cellulose and water
Drying of timber is designed to dry the timber to the point where it is at equilibrium with it’s surroundings, around 25 to 30% moisture content.
However, the wood will always try to reach equilibrium with its environment, which means that it will absorb water during the wetter months, and lose water during the summer months.
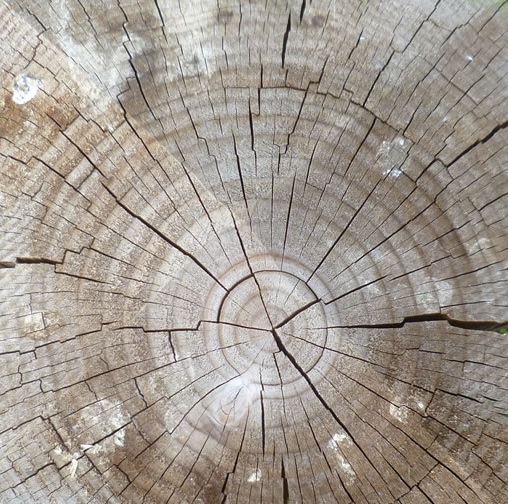
Cracks appear in wood because of changes in the moisture content of the wood. These cracks appear radially in larger sections of timber as a result of the differential drying of the outer and inner sections of the wood, as beautifully illustrated by the photo below:
Why Do Timber Joint Seal Repairs Often Fail?
Timber Joint Seal Repair Using Solid Fillers
Timber crack repairs are sometimes done using hard materials; when I purchased my house there were various cracks that were filled using render. Clearly any hard material will fail to move with the timber, as it adjusts to the variations in moisture that occur daily and seasonally. The repair WILL crack, separate from the timber and ultimately fail. In the meantime it is almost guaranteed to provide a means for moisture to accumulate and encourage the start of the rot that you were hoping to stop.
Timber Crack Repair Using Flexible Fillers
Wood crack repair that is performed using flexible fillers; caulks, silicone or butyl rubbers etc. at first glance should be expected to work well. However these repairs are nearly always only temporary, allowing the ingress of water after a year or two at best. The filler is indeed flexible, ie it can be compressed or extend by a certain amount, but it is not indefinitely compressible or stretchable, it has elastic limits. Two common failures exist with flexible fillers used to affect wood crack repairs:
- The caulk does not bond strongly to the timber surface, and consequently is separated from it as the timber surface moves during the constant expansion and contraction of the crack. Bearing in mind that the inner surface of the crack is likely to have been exposed to the elements prior to the repair being attempted, this is hardly surprising.
- If a flexible filler is pushed deep into a crack, as the crack contracts the filler may be unable to be compressed below a certain point, which causes stresses in the timber, and opens another crack elsewhere.
Timber Crack Repair Using Sealers
If you are faced with shakes in wood, these will typically taper to nothing, It is impossible to fill these with flexible fillers and backer rod, and very easy to just force the timber to open up elsewhere. For defects of this nature, if additional waterproofing is reuired, either to stop the ingress of water into the property or to protect the timber itself, we recommend Smiths CPES be used on the internal surfaces of the shakes.
Example Timber Cracks Requiring Repair
The photos below are all taken during restoration of my house, which has a solid timber frame of around 130 years age. You can double click on any image on this page to see a higher resolution picture in greater detail. This is the laboratory, the commute to work is short at least, although there is always much to do when there:

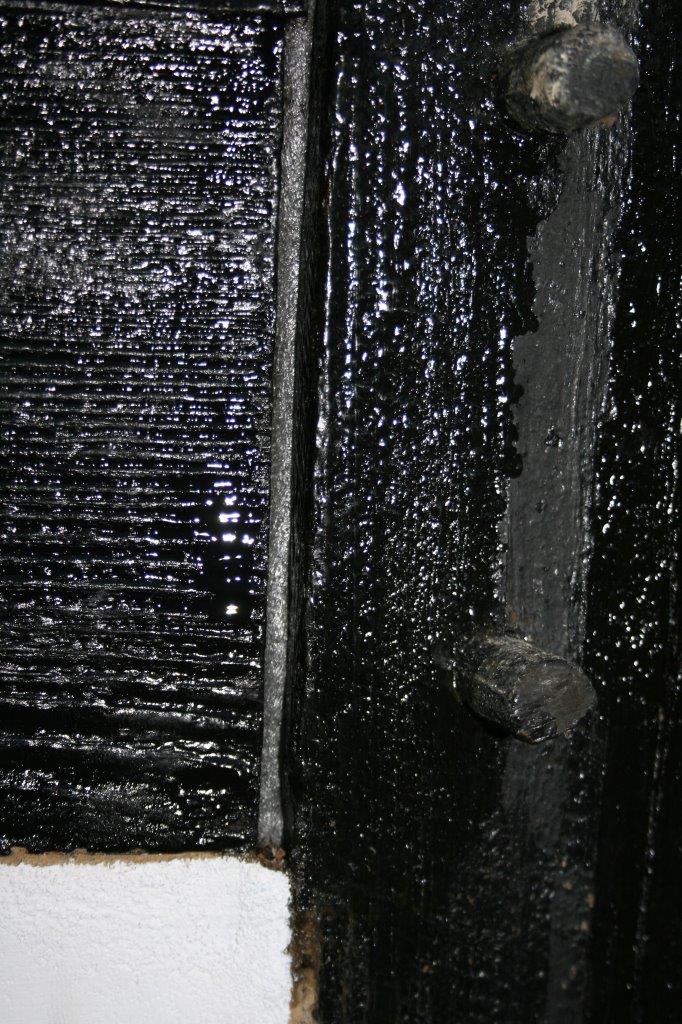
The below shows a wood crack that has taken considerable weather damage, as it collects rainwater being on an exposed end of a horizontal timber.
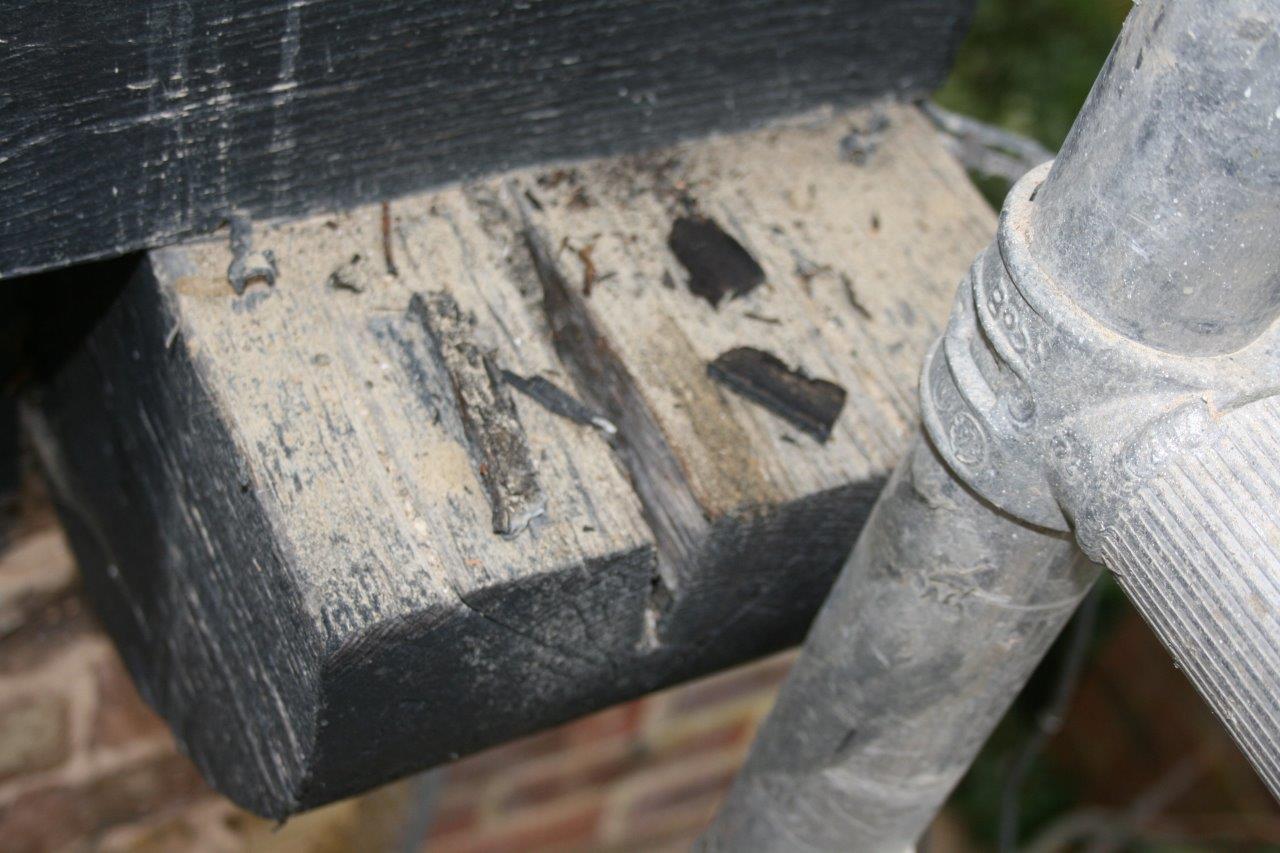
The next photo shows a timber joint of the frame, which was filled when the house was built using slivers of timber and hard fillers. A crack which runs vertically has been filled later with hard fillers. Both of these do not seal now.

Timber Joint and Crack Repair To Last Forever
The following details how to repair these sections, permanently, using techniques and materials borrowed from the marine world. These same materials and techniques can keep a hull watertight on a wooden boat and with minor modifications can affect permanent repairs on houses too.
Make The Flexible Filler Stick To The Timber
Here there are really two requirements. We must give the filler a firm surface that it can bond to that will not degrade over time, and we must use a filler that will then adhere permanently to that firm surface. Our aim is a bond that lasts forever.
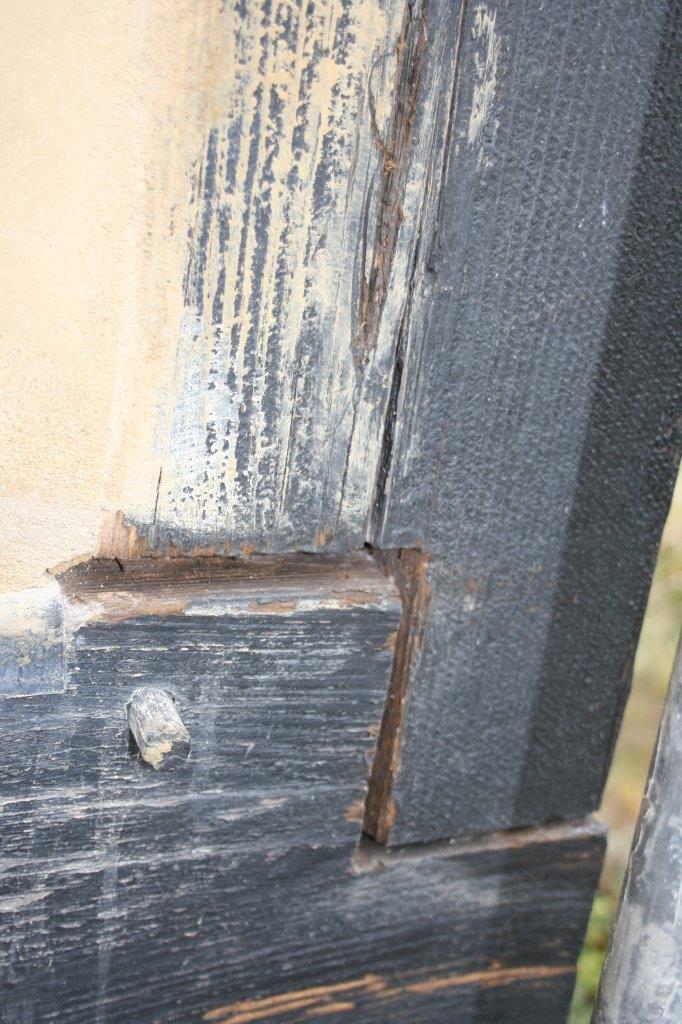
We achieve the firm surface by using Smiths Clear penetrating Epoxy Sealer (CPES). CPES is made from resins largely derived from wood, it penetrates deeply, cures rot and will consolidate the fibres of the wood like no other product. Once set it will flex with the wood, and offer an ideal surface for a permanent caulk to adhere to. Any old repairs are removed first:
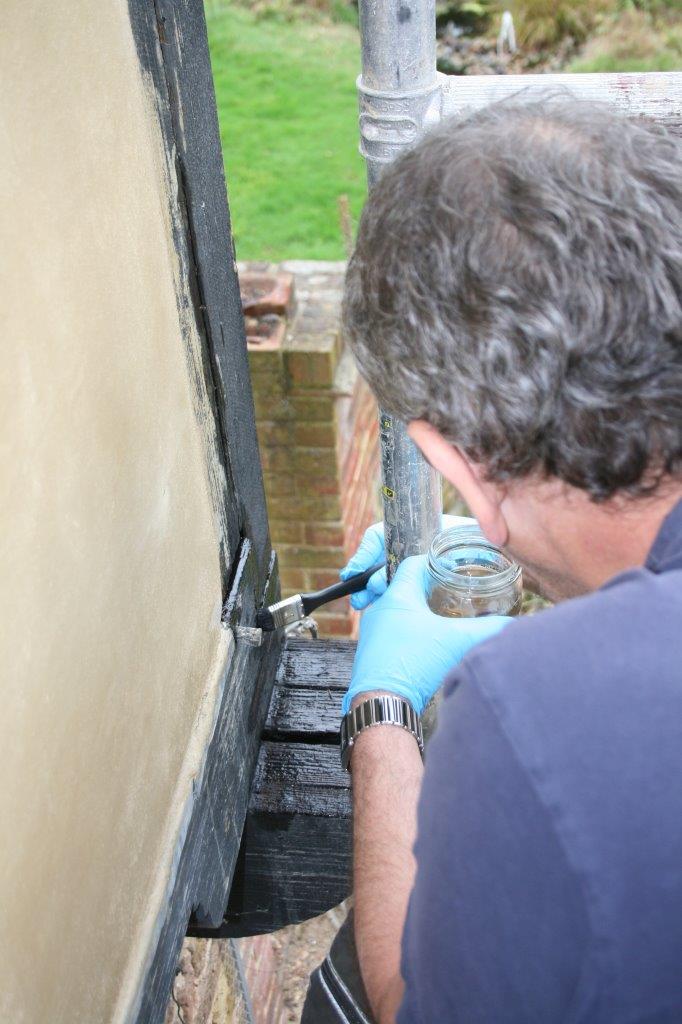
And then the surfaces of the wood are sealed using CPES. Three coats were applied, all in the space of a few hours, allowing the solvents to evaporate between applications. If the wood shows little degradation, then you may well get away with a single coat.
The CPES will consolidate all of the surface of the timber, will stop any existing rot and offer a surface that the sealant will adhere to permanently. This repair will only have to be done once!
Use Backer Rod To Partially Fill The Wood Crack Next.
The next requirement that we must consider is that our cracks move, and that they also taper to nothing in places. If we put filler into the bottom of the crack, we will stress the timber and may cause other cracks to open as it moves. Backer Rod is a foam tube available in a variety of sizes, that can be pushed into a crack to limit the depth to which the caulk will penetrate. This offers the following advantages:
- It gives a firm surface to push against to ensure the caulk is firmly adhering onto the timber.
- It stops the caulk filling the very bottom of the crack, which stops the timber cracking elsewhere as it moves
- It is far cheaper than even cheap caulk
- It makes the finishing of the job far easier, as the filler is much easier to tool flat with a solid base behind it
Two diameters of Backer rod are being used in this repair, as the crack varied in width along it’s length. The Backer Rod is cut to length and pushed into the crack or joint once the solvents have fully evaporated from the CPES. This is typically done the next day:

The next photo shows the Backer Rod in the bottom of the joints and cracks, there is sufficient space above the rod for the sealant to adhere to the CPES treated timber:
Applying The Caulk To The Wood Crack Repair
For permanent caulking of wood, there is no substitute for 3M 5200 Marine Adhesive Sealant. The only criticism that I have ever heard (other than its price of course) is that it bonds so strongly to wood treated with CPES that you may destroy the wood trying to separate it. I do not consider this to be criticism, I want a truly permanent repair. Partially fill the joints and cracks with caulk to start:
However, as the price of 3M 5200 is somewhat prohibitive, we have investigated a variety of different caulks, and can now also recommend Everbuild Stixall. This is a vinyl composite adhesive, it is slightly less flexible than the polyurethane 5200, but far cheaper. It adheres so strongly, like 3M 5200, to CPES treated surfaces (timber, render, you name it) that it’s adhesive force far exceeds it’s cohesive force. In reality this means that you will never get it off, and that pulling the caulk out pulls the caulk to bits, leaving caulk stuck to the CPES treated sides of the crack
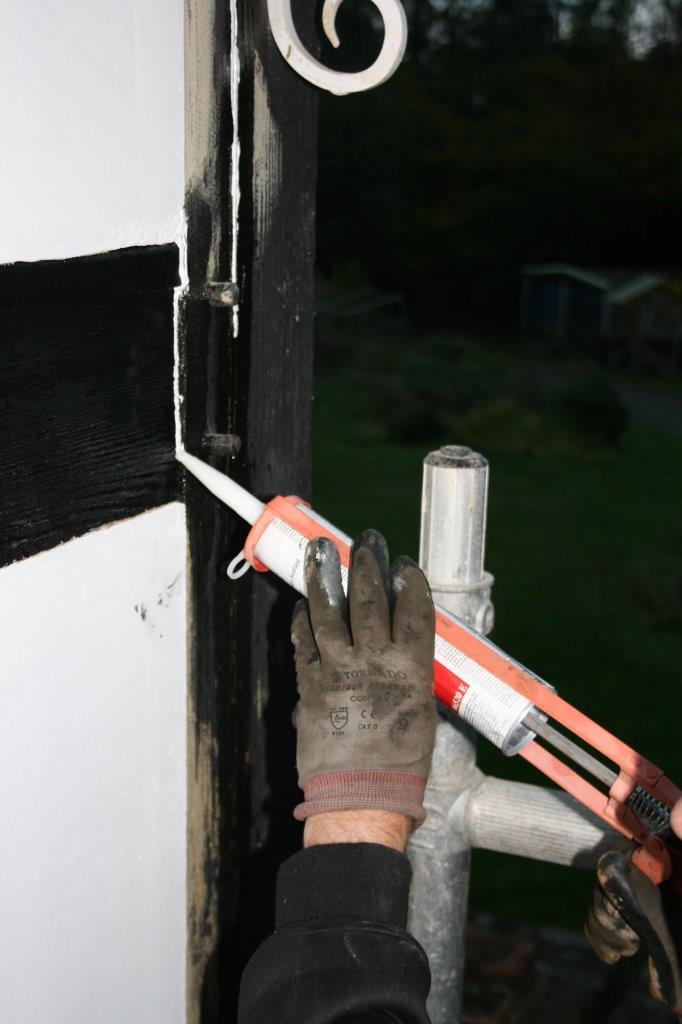
As with all caulking repairs, the caulk must be pushed firmly into the sides of the joint, use a palette knife, scraper or other suitable tool:
Refill the cracks and joints with caulk:

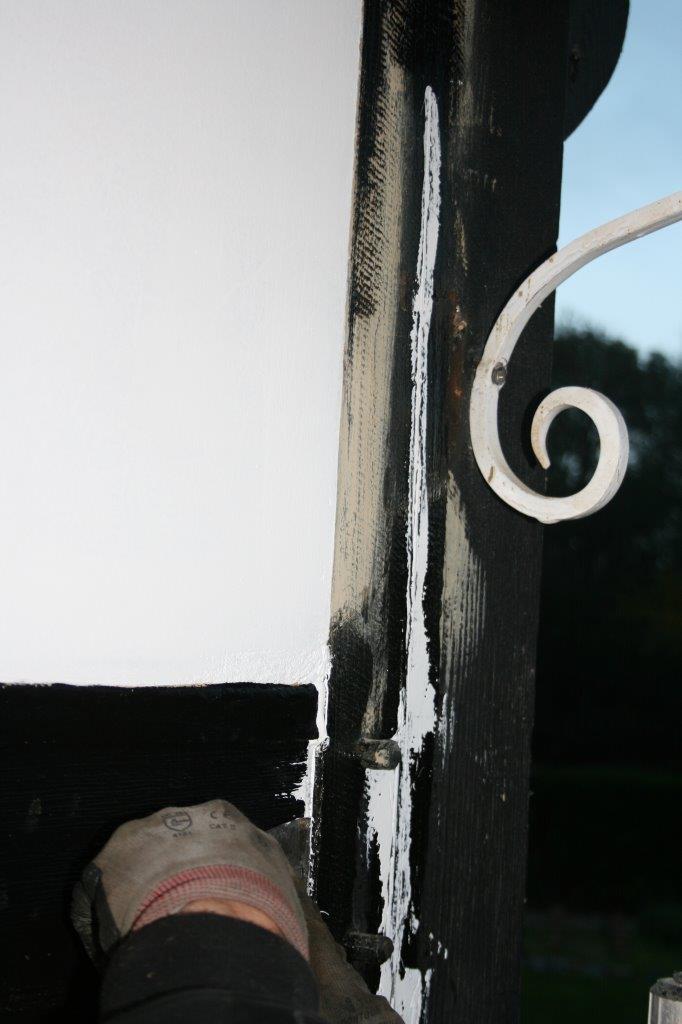
And finally tool the caulk joints flush to achieve the desired finish:

The 3M 5200 may be overpainted once dry, one coat on here, one more to go:
Buy a Wood Crack Repair Kit
We sell a timber crack repair kit containing Smiths Clear Penetrating Epoxy Sealer, Backer Rod and 3M 5200 Sealant, all you need in one pack to repair cracks permanently in exterior timber.
-

-
Price range: £8.50 through £9.00 Select options This product has multiple variants. The options may be chosen on the product page
We sell a broader range of Crack Repair Kits here.
Safety Whilst Repairing Your Cracked Timber
Please do not get chemical products on your bare skin, and do not to breathe the smell of any chemical product. Have a fan at your back if you are working in a confined area. Use these or any chemical products with adequate ventilation, and use gloves when working. Even if the labels on the containers don’t say, many resins are chemical irritants at best, meaning are hazardous if you get them on your skin a lot (or sometimes for some people, only a little). They are quite safe when used wisely, in accordance with proper safety procedures and following the information on the container labels.
Copyright Stephen Dakin, 2015. All rights reserved.