This article describes the importance of priming to make varnish or paint finishes last. It describes how you can manage to keep a varnish finish intact on exterior timber for up to twenty years in the most extreme environments.
Varnish Outdoor Wood. Your Aims – Long Lasting Varnish Or Paint
When you varnish outdoor wood your goal is to have your paint or varnish stick well to your old or new wood, last a long time, look beautiful and protect the wood. It is to have your varnish job look great, year after year. This advice comes from 40 years of real world experience using CPES and anyone’s varnish or paint, and getting great results. If you are going to varnish outdoor wood, this article will save you time and money.
We think the finish that you want is like the below; a beautiful gloss varnish that lasted nearly 20 years before it needed to be redone.
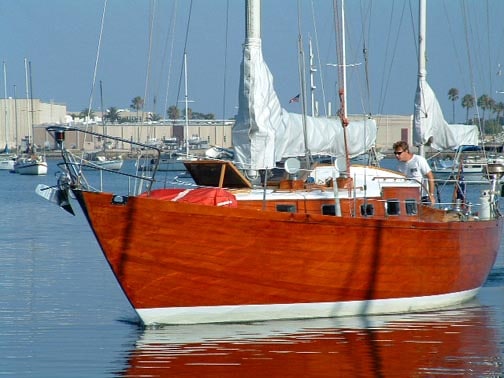
You can read the testimonial of Christian, the owner of Taurus, here.
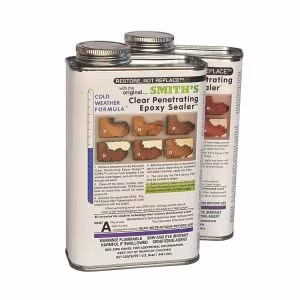
This article describes how to use Smith and Co’s Clear Penetrating Epoxy Resin, also known as CPES, MultiWoodPrime and Lignu in Scandinavia, to reduce the maintenance cost of your wood and enhance it’s working life and beauty. Preservation is always far cheaper than restoration
Preparation of the wood
Before we varnish outdoor wood we must start with dry wood and keep it away from water, rain or dew through the entire priming and painting process. Sometimes we have to use a paint stripper to remove old paint or varnish in fine detailed woodwork. Sanding or a heat gun is far preferable, as they leave no chemical residues in the wood. If you must you can also use the common solvent MEK (also known as Methyl Ethyl Ketone or 2-butanone) as an effective paint stripper.
Now, with the wood clean and dry, we are ready to start the priming process. A chain is only as strong as its weakest link, so remove any old finishes. Small flakes of old varnish down in the grain of the wood are usually not a problem, as they end up glued down and encapsulated.
Sand the wood to a moderately smooth finish; grits finer than 220 are unnecessary. Brush or vacuum to remove wood dust.
Finished colour and staining
The application of any clear finish to wood will darken the wood. This means it enhances the rich natural colour of the wood. Here is how that works: The clear resins fill up the spaces between the wood fibres. Light is guided down in-between the wood fibres now where it is reflected off of the coloured resins inside the wood. Light scatters off the surface fibres of unfinished wood, so it looks lighter in colour.
If staining is desired, use an “oil-base” stain. We definitely do not recommend any water-borne stains, water-cleanup stains or latex stains. The sealer doesn’t bond to the acrylic resins used in latex products. and acrylic resins would be coating the wood fibres. If the sealer cannot soak into the wood and glue onto the surface fibres of the wood then the bond will be weak, and this is the bond that holds the varnish to the wood. Allow the stain to fully chemically cure before proceeding. This usually takes 3-4 days.
Important: Some stains have dyes which bleach with time. It is your responsibility to choose a durable stain. Also, a finished varnish film too thin will show early wood bleaching from the ultraviolet from the sun. Fluorescent lighting has about fifteen percent of the ultraviolet of sunlight.
Priming the wood for Paint or Varnish
After the first saturating application, Sand lightly, only if necessary, using 220~320 grit paper. This removes any raised grain or foreign material, and takes down the high points. Wipe with surface-prep cleaning solvent and paper towels to remove sanding debris. While invisible, it can cause “craters” or “holidays” in the varnish. It will surely cause little bumps.
-
Price range: £63.75 through £353.00 Select options This product has multiple variants. The options may be chosen on the product page
Now apply one more coat of the CPES. If the wood was so porous that some does soak in, repeat the application. When the wood shows a glossy film everywhere, meaning it no longer soaks in, the surface is sealed. Now allow enough drying time that film shrinkage from final solvent evaporation does not telegraph the grain pattern to the surface. Telegraphing is a technical term, commonly used. It means waves and cracks below will show up on the surface above, and this can go on, coat after coat. It is one of the reasons people sand between coats.
Dealing With Abnormally Porous Wood
With very porous wood, the sealer may soak into porous rings and build up on the more dense growth rings. After a few applications of CPES it may be necessary to sand with 180-220 grit to entirely level the surface. In that case wipe afterwards with a suitable cleaning solvent such as painter’s naphtha. Once dry apply another coat of CPES.
You must pay attention to the condition of the wood and the behaviour of the CPES during application. If you do not seal the wood porosity, then you will have bubbles in the varnish.
Final finishing of the Primer
Sanding the CPES smooth and filling all the grain of the wood with this resin system gets the grain flat. That then is how one obtains a mirror-smooth varnish topcoat. The old way of varnishing, the “traditional” way, is to sand the topcoat layer by layer. This is a hard way to obtain a mirror-smooth varnish topcoat. The modern, efficient way is that one starts varnish application with an adequately smooth surface. Grain-filling of the wood is done with the CPES resin system, not the varnish. Smiths CPES leaves a hard finish to the wood. It is very much easier to sand flat than multiple varnish layers.
Irregularities in the varnish topcoat are normally handled by spraying from the correct distance, thus avoiding orange-peel, and enough of a slow-evaporating solvent in the topcoat to give film levelling. Brushed finishes are often adequate. Varnish is usually sanded between coats because the varnish itself does not stick to the prior coat without sanding. Some modern varnishes have remedied this deficiency. It is still common to sand between coats of varnish because dust, bugs and weed seeds often end up blown into a fresh coat of varnish. The same problem exists with the CPES primer. The whole point of multiple coats and sanding here is to start varnishing with a smooth surface.
There must be adequate time after application of CPES for the solvents to evaporate, such that there is no further film shrinkage into the grain of the wood. Even with adequate film drying, the wood itself must be properly conditioned to not exhibit shrinkage and loss of volatiles, or there will be unavoidable grain telegraphing.
Bonding the Paint or Varnish to the Primer
The final coat of CPES is the adhesion-promoting primer. Apply the first coat of varnish after the solvents have evaporated, but before the CPES resins have fully cured. DO NOT SAND AFTER THIS LAST COAT OF CPES. If you apply that last coat of CPES in the afternoon, then apply the first coat of varnish the next day. DO NOT SAND. CPES works as an adhesion-promoting primer because it cures very slowly indeed. It actually takes several days, so it finishes curing after the first varnish coat has cured, and thus glues down the varnish with a flexible epoxy glue. Sanding would have removed the glue that you need to glue down the varnish.
CPES is available as a Warm Weather Formula and a Cold Weather Formula. If you are working in a day-to-night temperature range from freezing to 20 centigrade or a bit more (30-70F), use the Cold Weather Formula. If you are working in a day-to-night temperature range around 15 to 35 centigrade (60-90F), use the Warm Weather Formula.
Varnishing Outdoor Wood After Priming
You may apply your varnish in any manner you see fit, and with the guidance of varnishing professionals. This application note is to help their advice to be more effective, in giving you an excellent varnish finish that really lasts.
There is one final bit of advice about varnishing, and that is to use enough of it that you end up with a minimum adequate film thickness on the wood, that there is enough of the ultraviolet absorbers in the varnish to protect the underlying wood. A pint of varnish used over no more than every ten square feet usually gives an adequate film thickness.
It does not matter how many coats you apply, or how much you thin the varnish, or how little. What matters is the dry film thickness. If you do a lot of sanding between coats, you are removing some of that dry film thickness and you need to use more varnish. If you sand off half the varnish you apply, for example, then you will need to budget a pint for every five square feet.
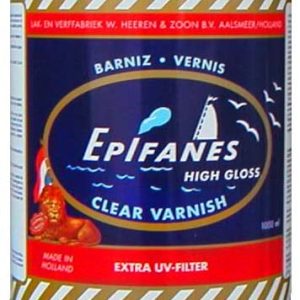
We recommend Epifanes High UV protection varnish for varnishing outdoor wood.

The UV blockers in varnish are degraded by exposure to UV light. It is thus important to apply further coats of varnish periodically to restore the UV protection. Exterior wood primed with CPES will provide a firm base for the varnish that ensures you can just add additional coats, without having to sand and refinish.

We have just published detailed instructions on how to achieve the finish described above, and to get the durability that is described. Our house sign was the subject of this restoration.
We restored it from badly aged bare wood back to the wonderful lustrous highly UV resistant specimen you see here.
Read all about how to achieve this look, and the specific benefits of priming with Smiths CPES in our article restoring our exterior wooden sign.
Purchase
-
Price range: £63.75 through £353.00 Select options This product has multiple variants. The options may be chosen on the product page
-
 Price range: £22.75 through £41.00 Select options This product has multiple variants. The options may be chosen on the product page
 -
We maintain a list of worldwide distributors on the about page
© copyright 1972 – 2014, The Brain Trust, a California irrevocable trust, reprinted with permission