Many of our customers are using epoxy sealed wood without varnish outdoors to extend the life of their timber. This is done typically to seal and preserve hardwood decking, teak boat decks or other expensive timber.
We call this technique ‘Sacrificial Sealing’ as we acknowledge that the UV light in sunlight will degrade the epoxy over time. As a result the surface will need replenishing periodically.
We are studying long term cost of ownership and maintenance requirements. It will log maintenance requirements and appearance with a full visual record.
Why Use Bare Epoxy Sealed Wood Outdoors?
This is actually a great question, as we know the epoxy will be degraded by the UV light.
If you know how to varnish properly you can of course achieve 20+ year lifespan on your varnished finish. You will however have to undertake significant maintenance on that finish over that time.
We present a brief comparison of epoxy sealed wood, our Sacrificial Sealing’, versus a properly applied and maintained varnish finish, such as you get if you use our permanent exterior varnish kit.
Benefits
- Secure to walk on when wet as it’s not a gloss finish.
- A more natural looking finish than a varnished finish.
- Much simpler application than varnishing.
- Much simpler maintenance than varnish.
- Failure is not catastrophic. If the finish is not maintained there is no requirement to sand back and start again.
Disadvantages
- Cost – Smiths CPES is not a cheap product
- There will inevitably be silvering of the outer fibres of your timber with this technique. A properly varnished and maintained finish will not suffer this effect*
* – Reapplying epoxy makes this silvering disappear to the eye and restores the colour and grain of the wood.
Our Sacrificial Sealing Example
A customer sent in some fabulous pictures of a her epoxy sealed hardwood decking. It is so stunning that we decided to undertake a real life cost of ownership study to assist people in deciding if this technique is appropriate for them.
We already have one of these studies for a fully primed and varnished finish. This details preperation, the finish itself and it’s long term durability and maintenance requirements. You can read about it here: how to varnish and maintain wood properly.
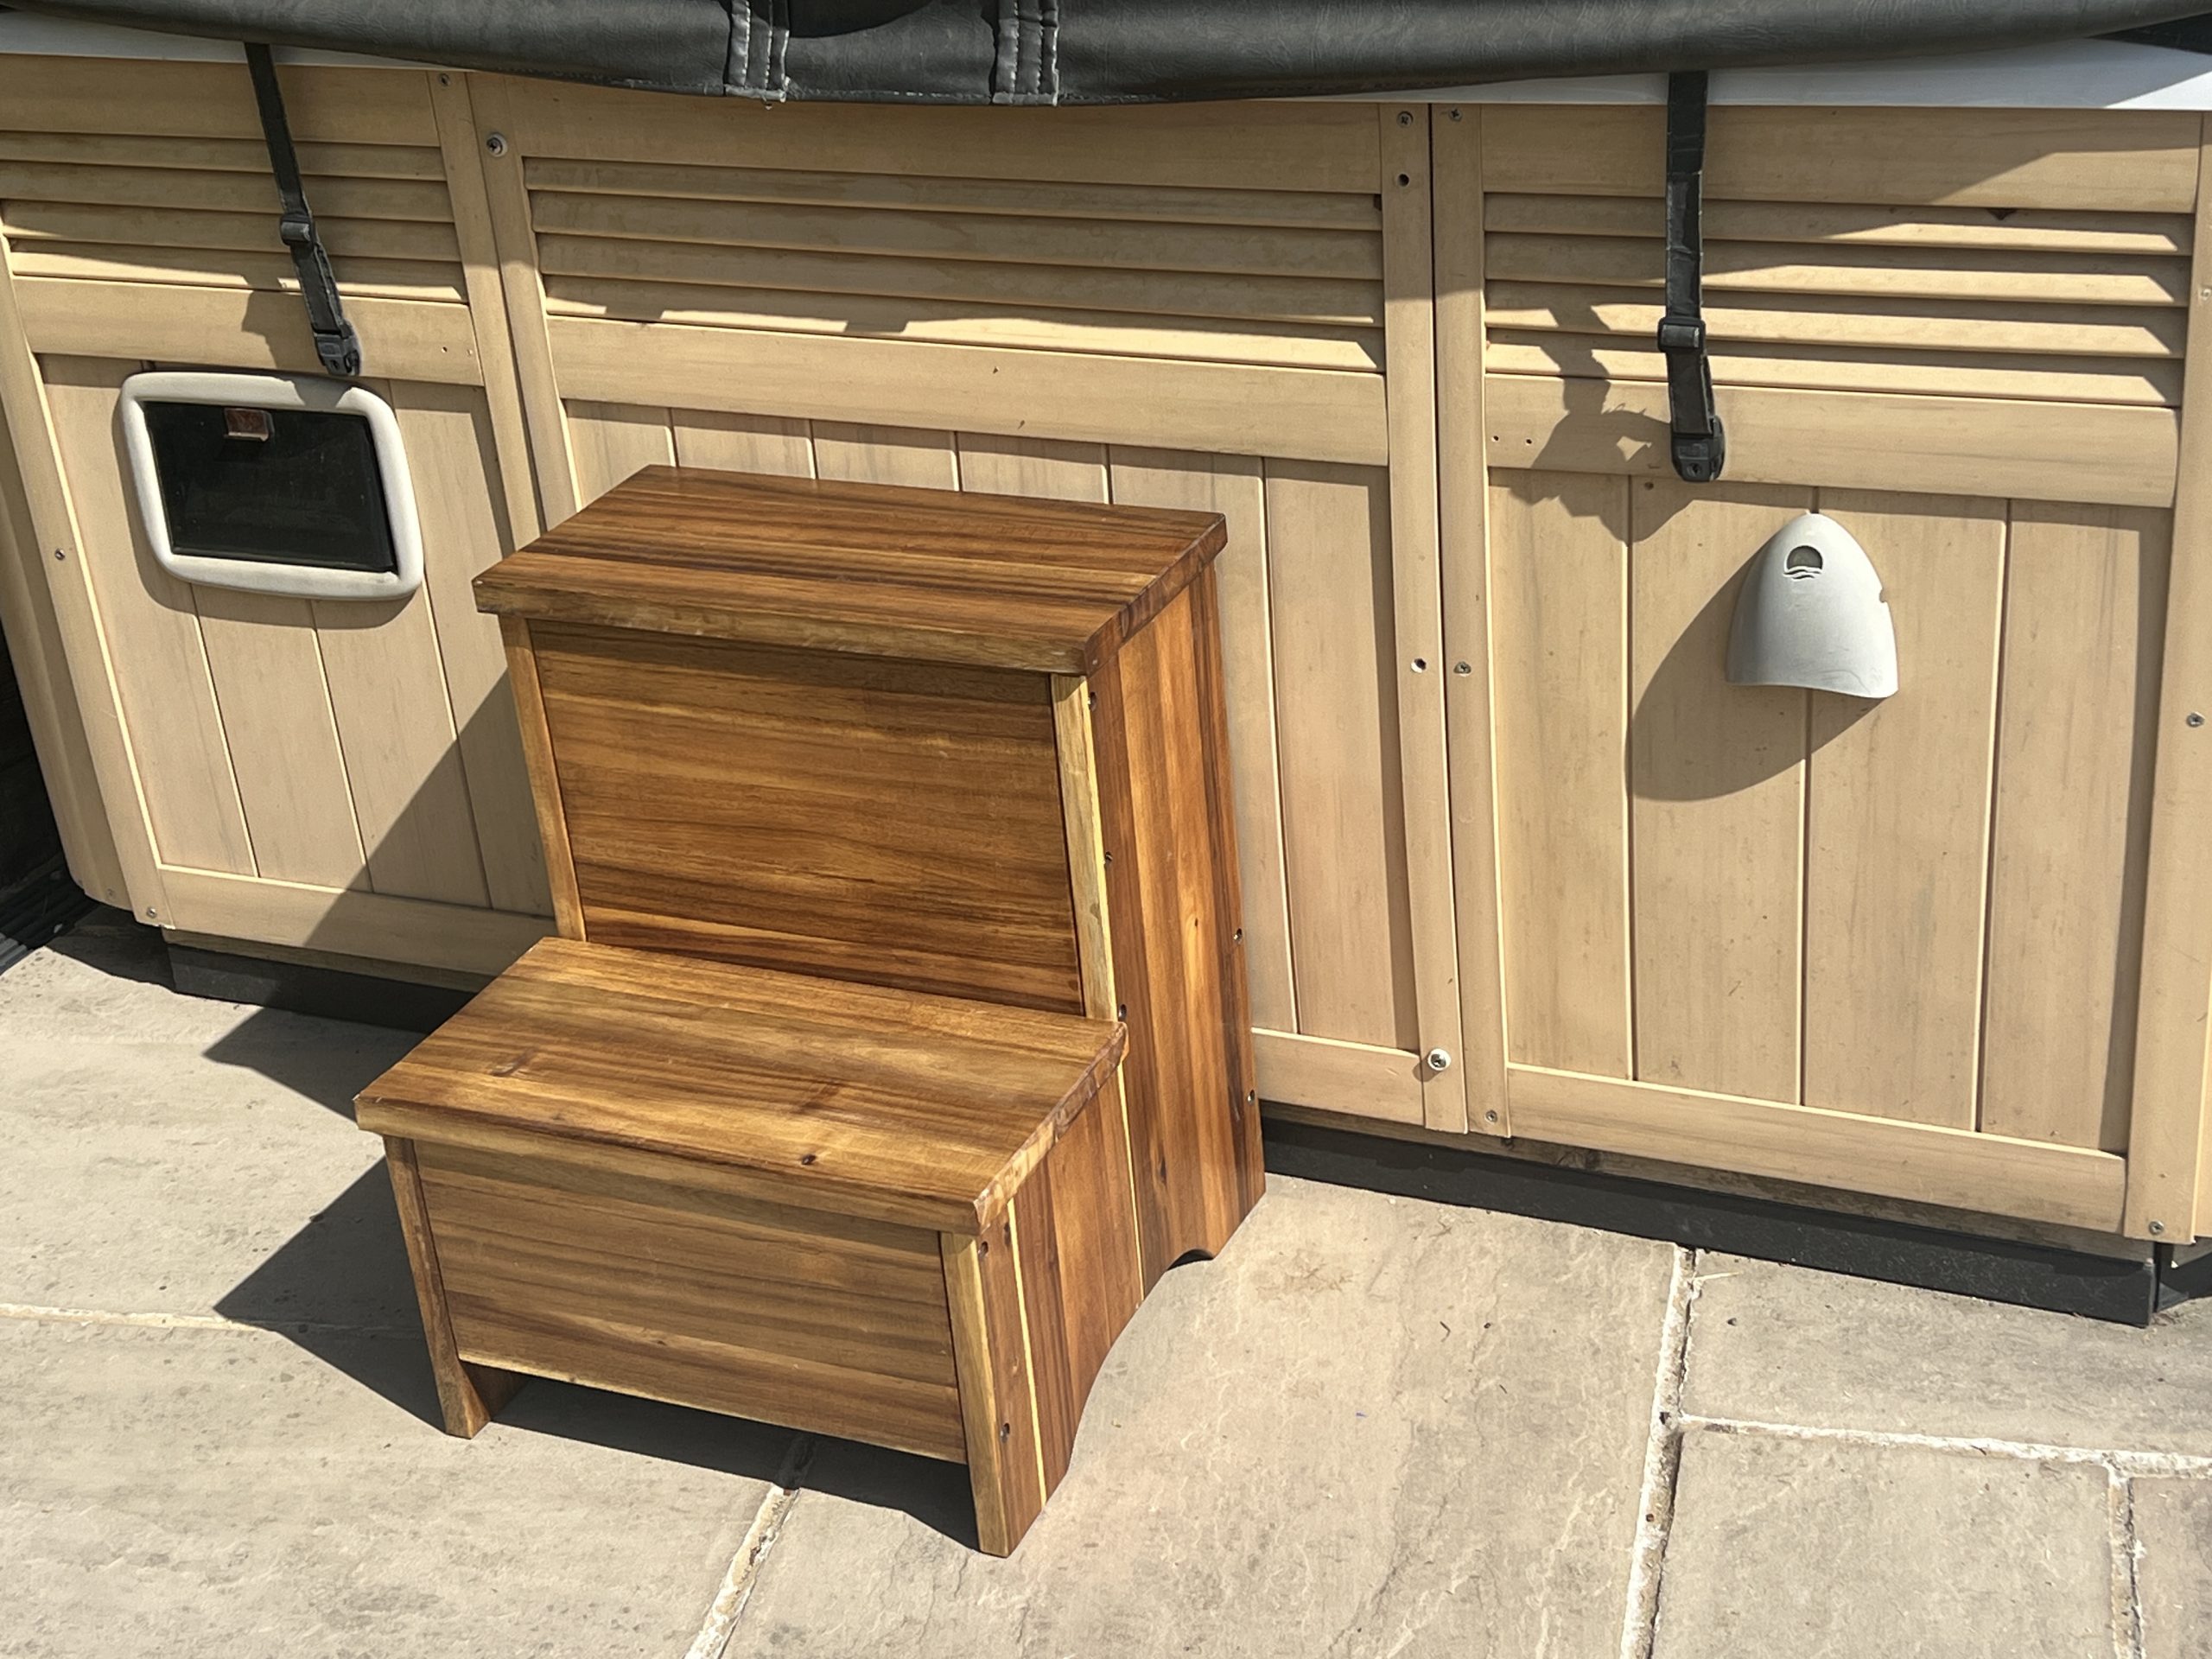
I bought a set of big name acacia steps for my hot tub last year. The finish on the steps was very poor with not much coloured varnish (often referred to as stain in the UK) of a rather unpleasant colour and little or no priming. The steps sit in full sun all year round. We chose them for our long term ownership and maintenance of epoxy sealed wood outside because:
- Exposed to full sun in Kent year round
- Hardwood construction
- Existing finish had failed
- Matt finish highly desirable as continually used when wet
To enlarge images, just click on them. Use the back button on the browser to return.
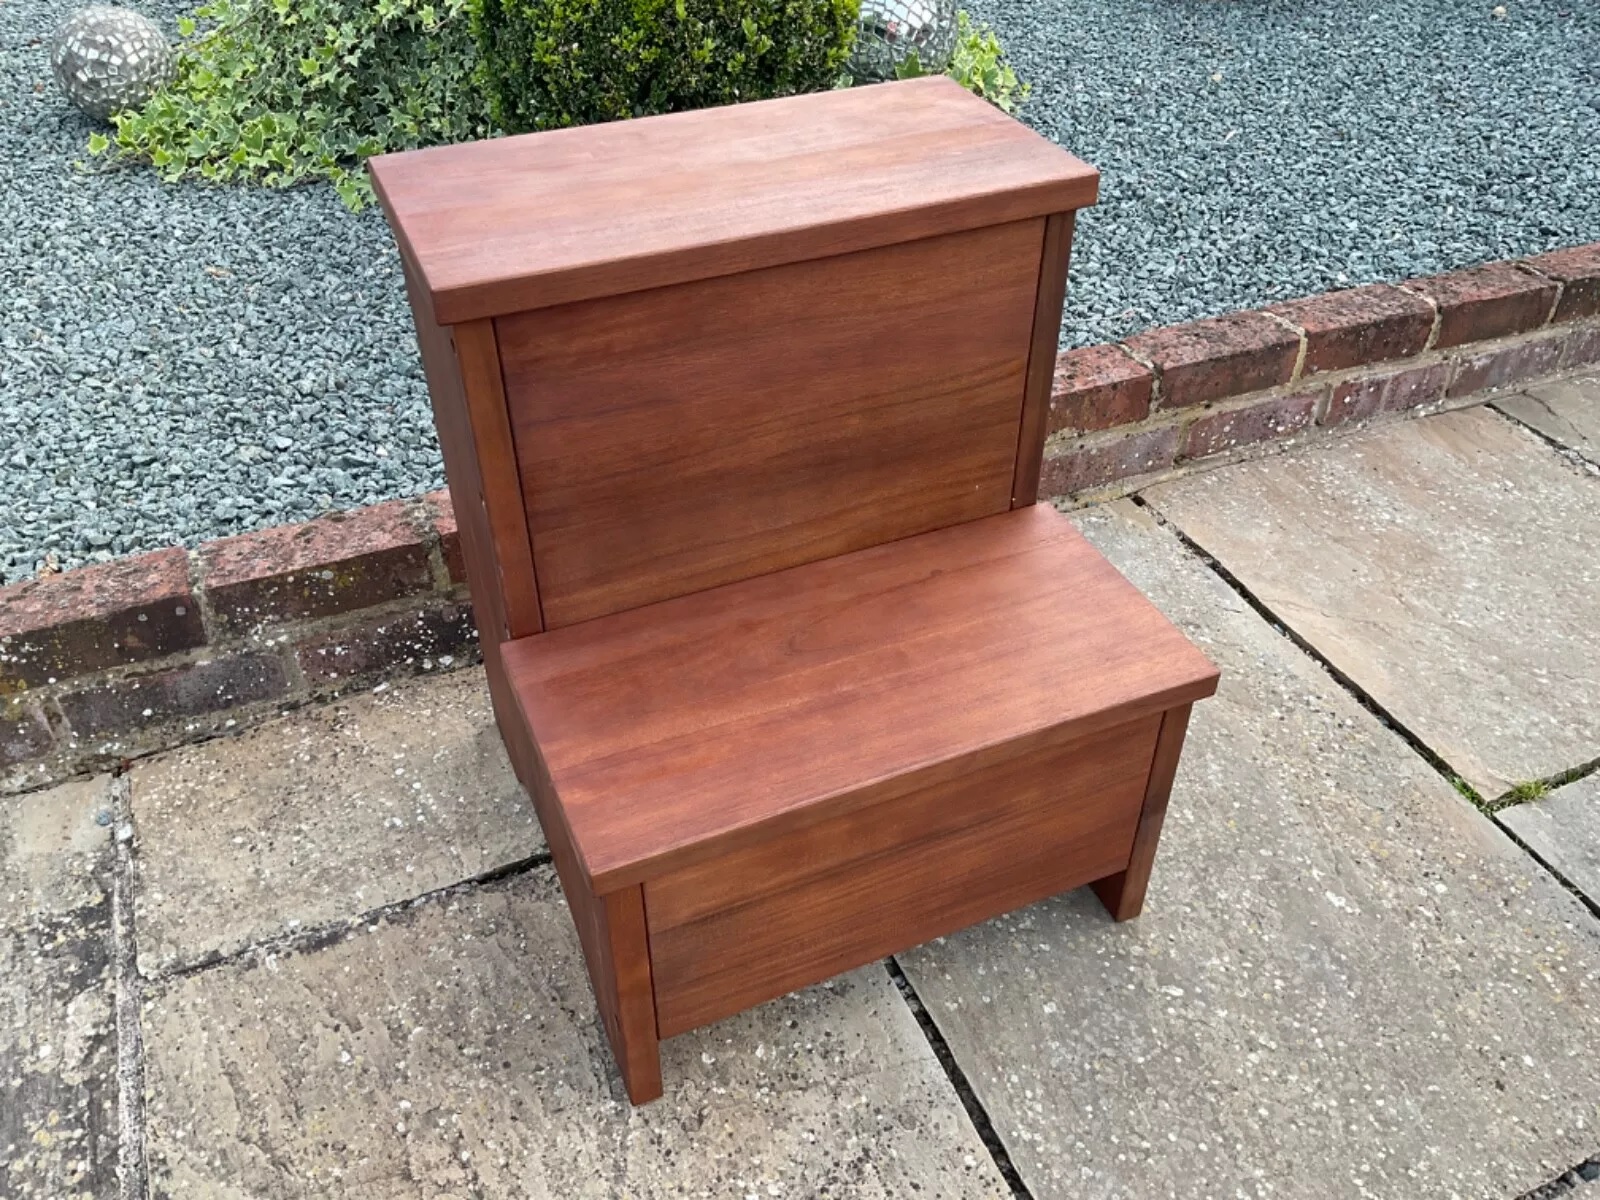
In February 2024 they looked like this:
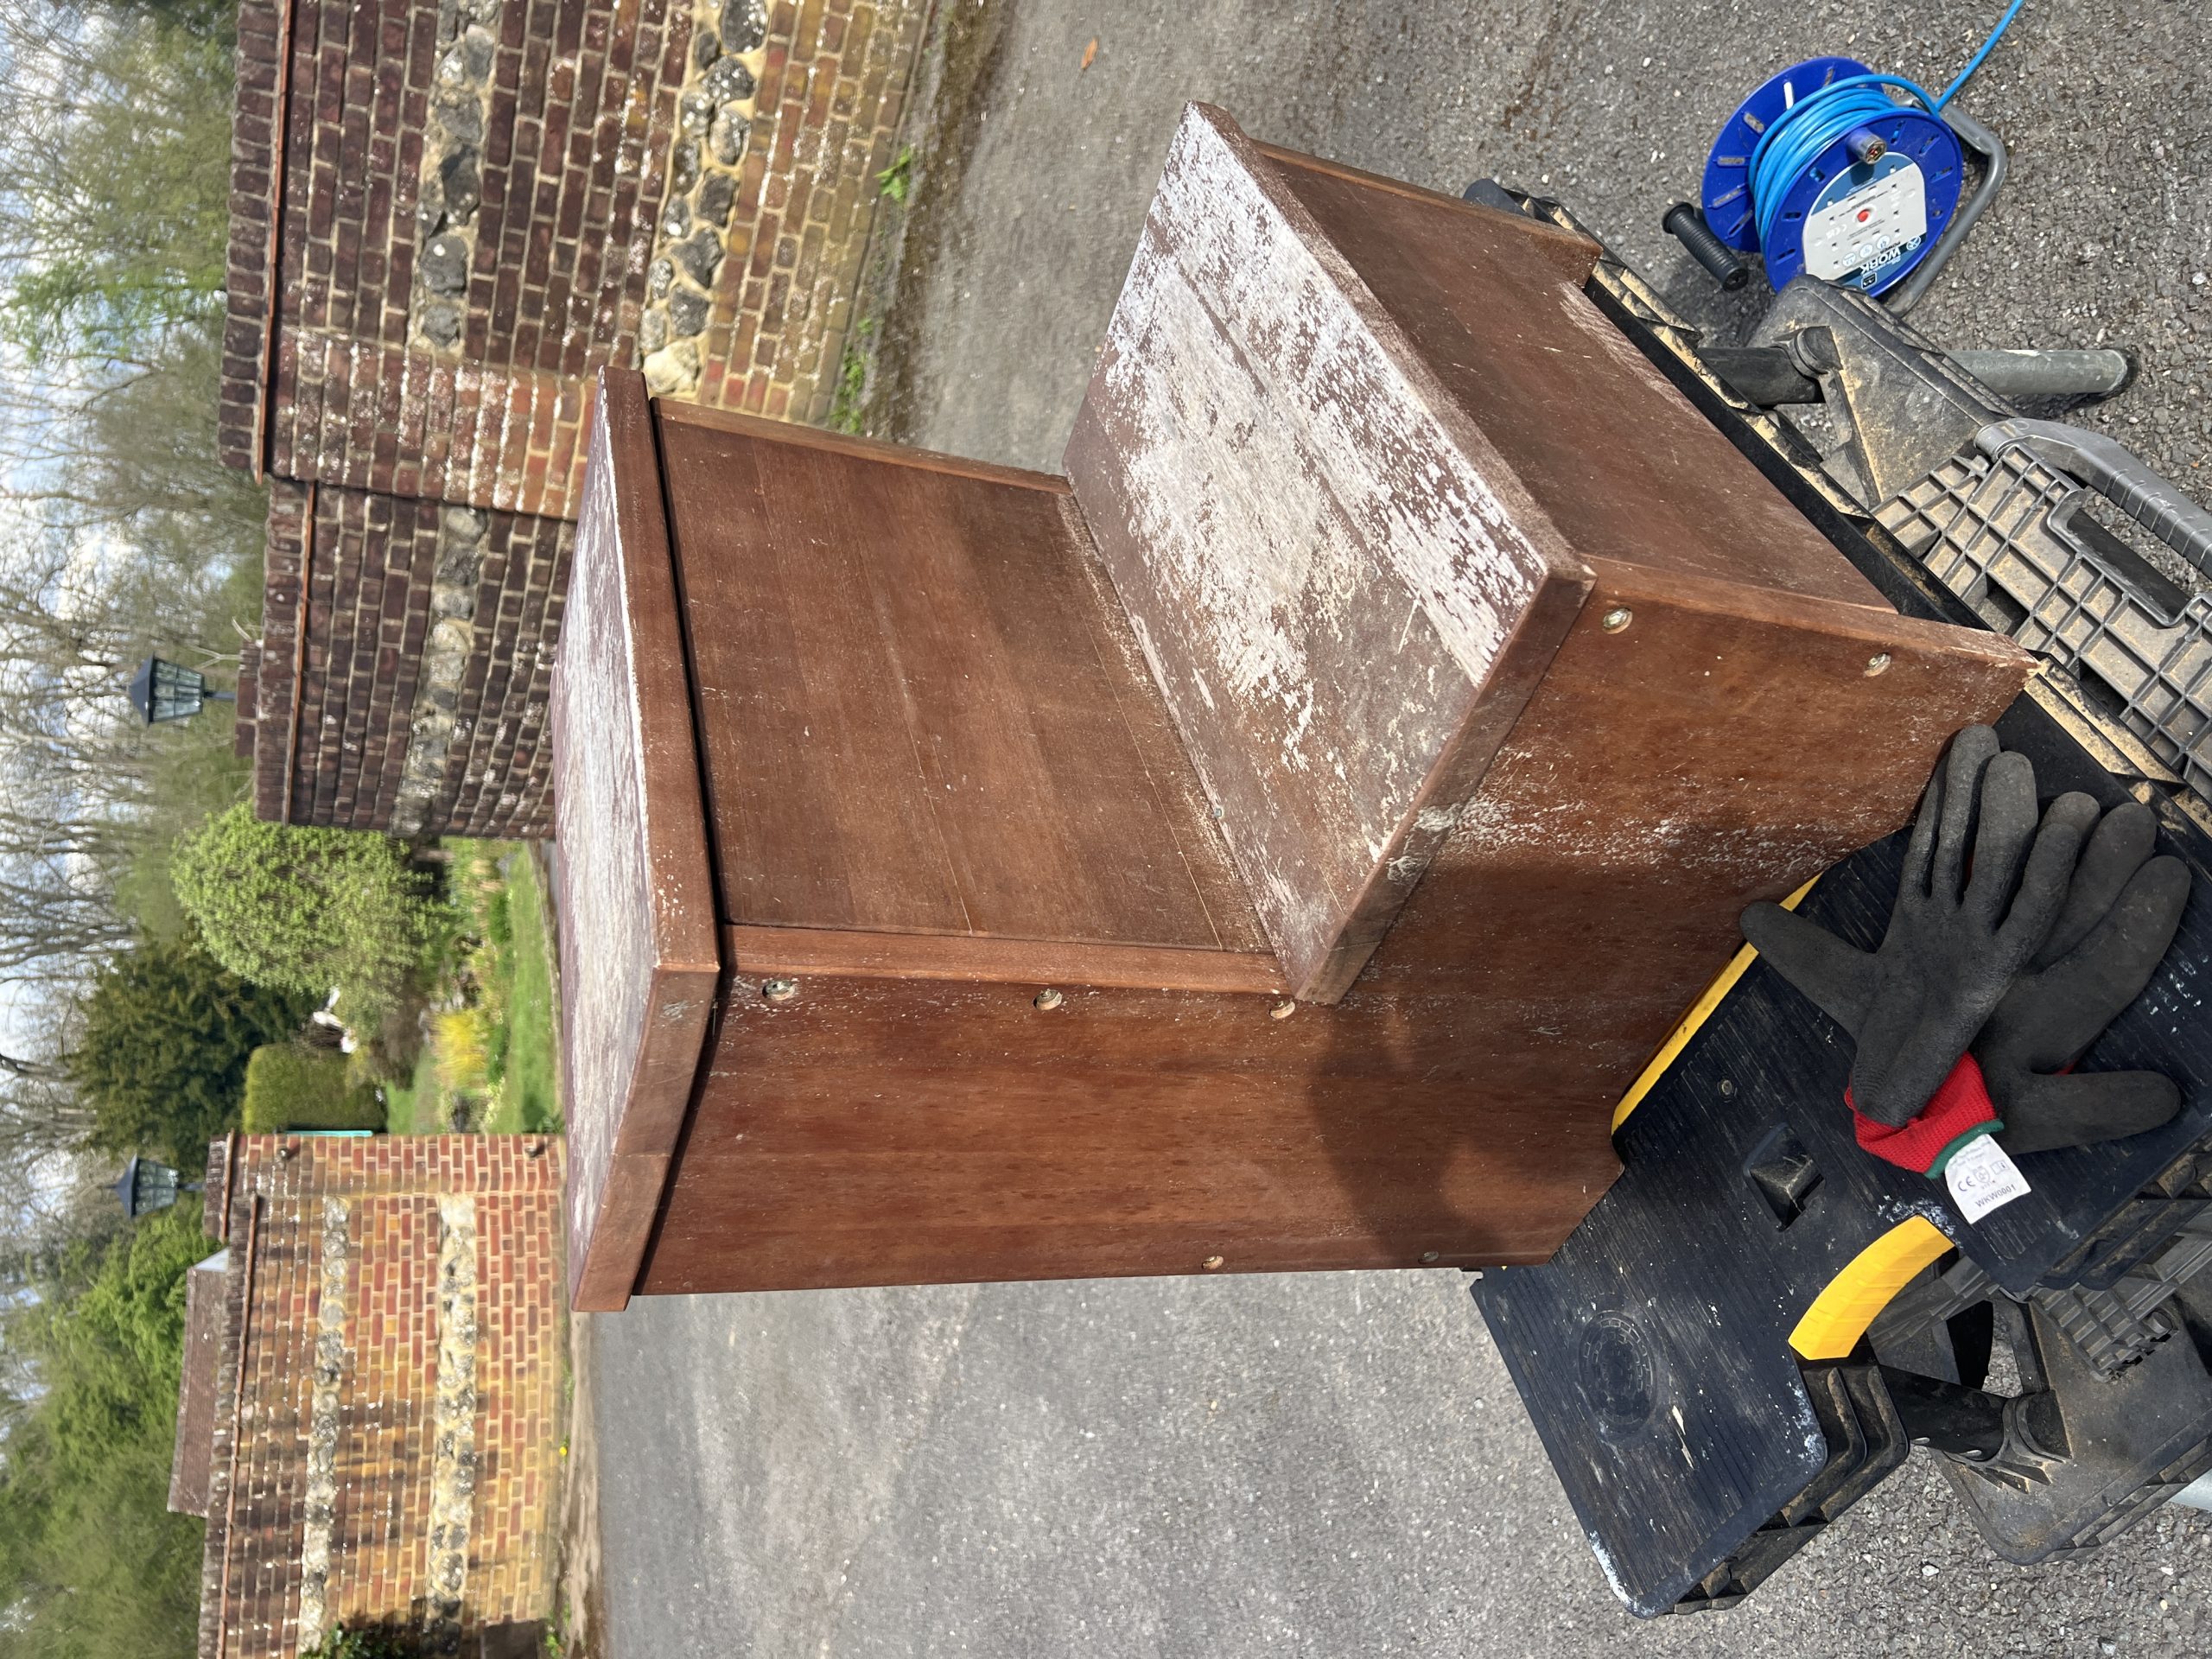
However, by March 2025, after just 13 months in Kent, they looked like this. They make pretty much a perfect example of how not to varnish exterior hardwood:

Restoring a failed varnish finish
When varnish goes bad – there is only one cure. You have to sand back to bare wood and start again. This is one of the advantages of using bare epoxy sealed wood outdoors – it does not fail catastrophically, it just requires maintenance.
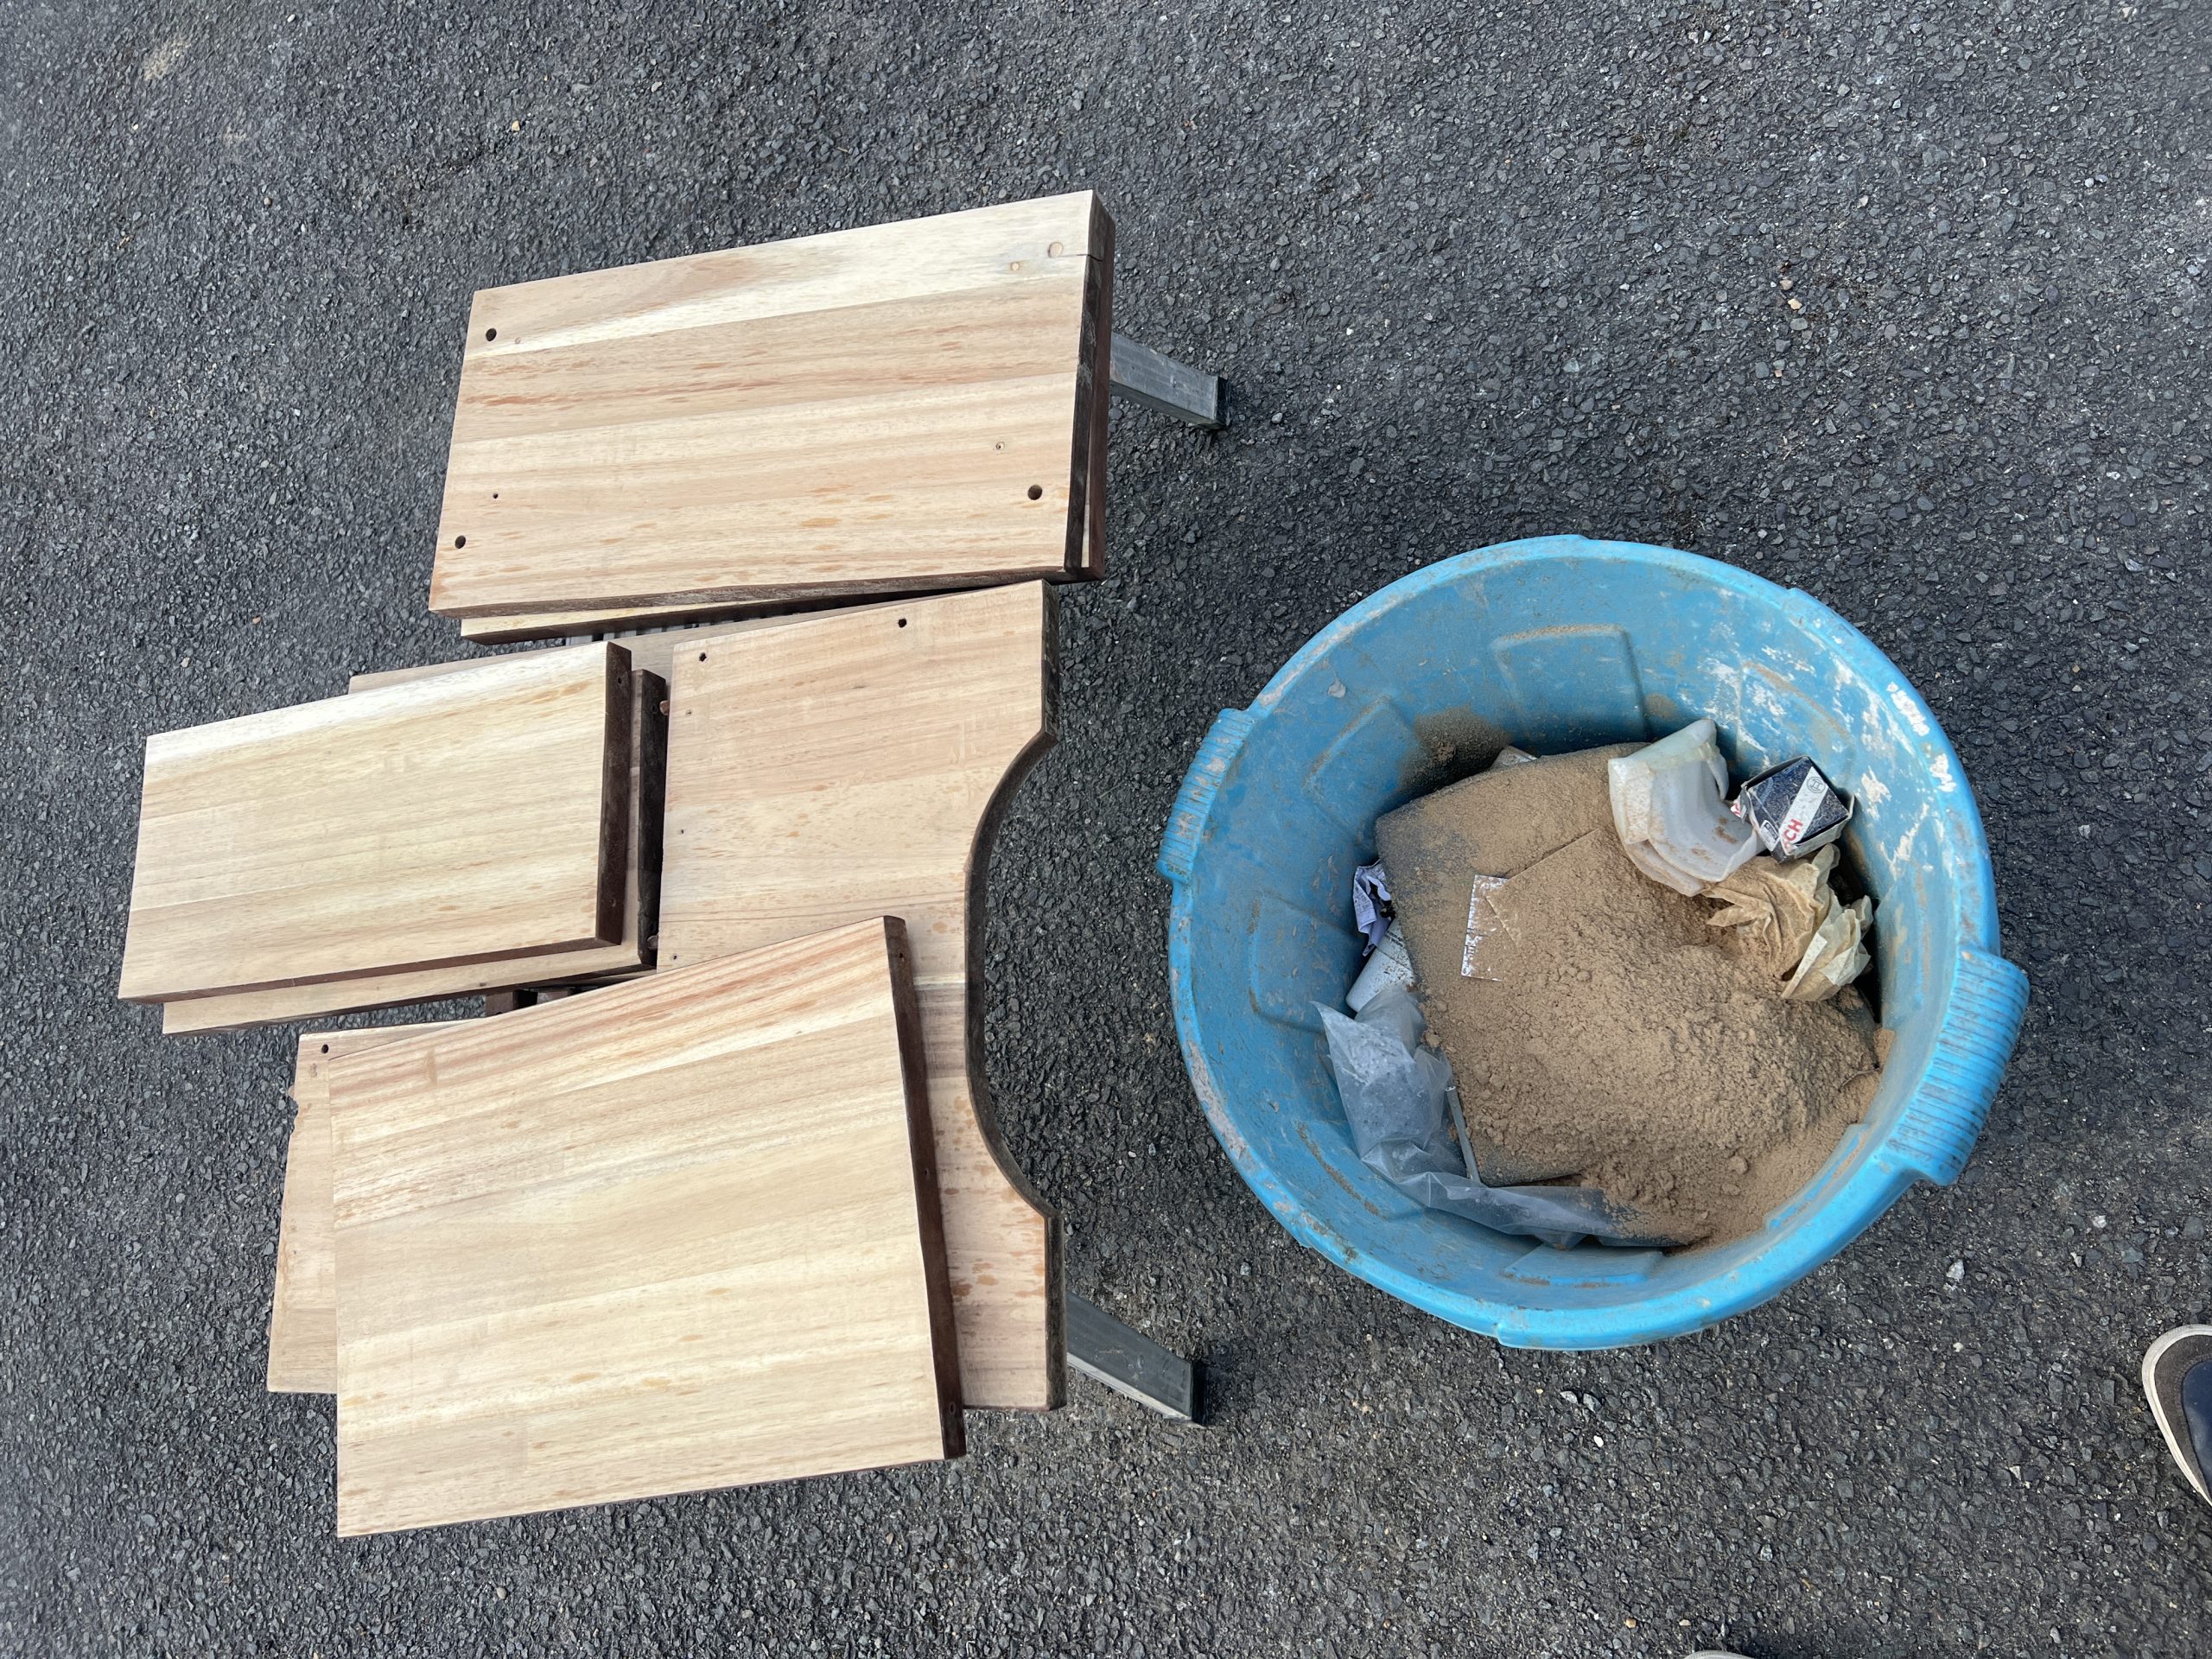
We completely dismantled the steps. The cheap metal fasteners holding it together were rubbish, so we ordered some new stainless steel ones.
To remove damaged fasteners I used x out type screw extractors to remove the damaged screws from the steps. These ones are quick and easy to use, very reliable and fast. Highly recommended.

Then comes the belt sander. I fitted it with a 120 grit belt, and used it across the grain for rapid stock removal. This removes the varnish, any surface irregularities and offers clean timber so that we do not seal stains in when we treat our epoxy sealed wood steps.
The same belt used with the grain leaves a decent finish ready for sealing later.

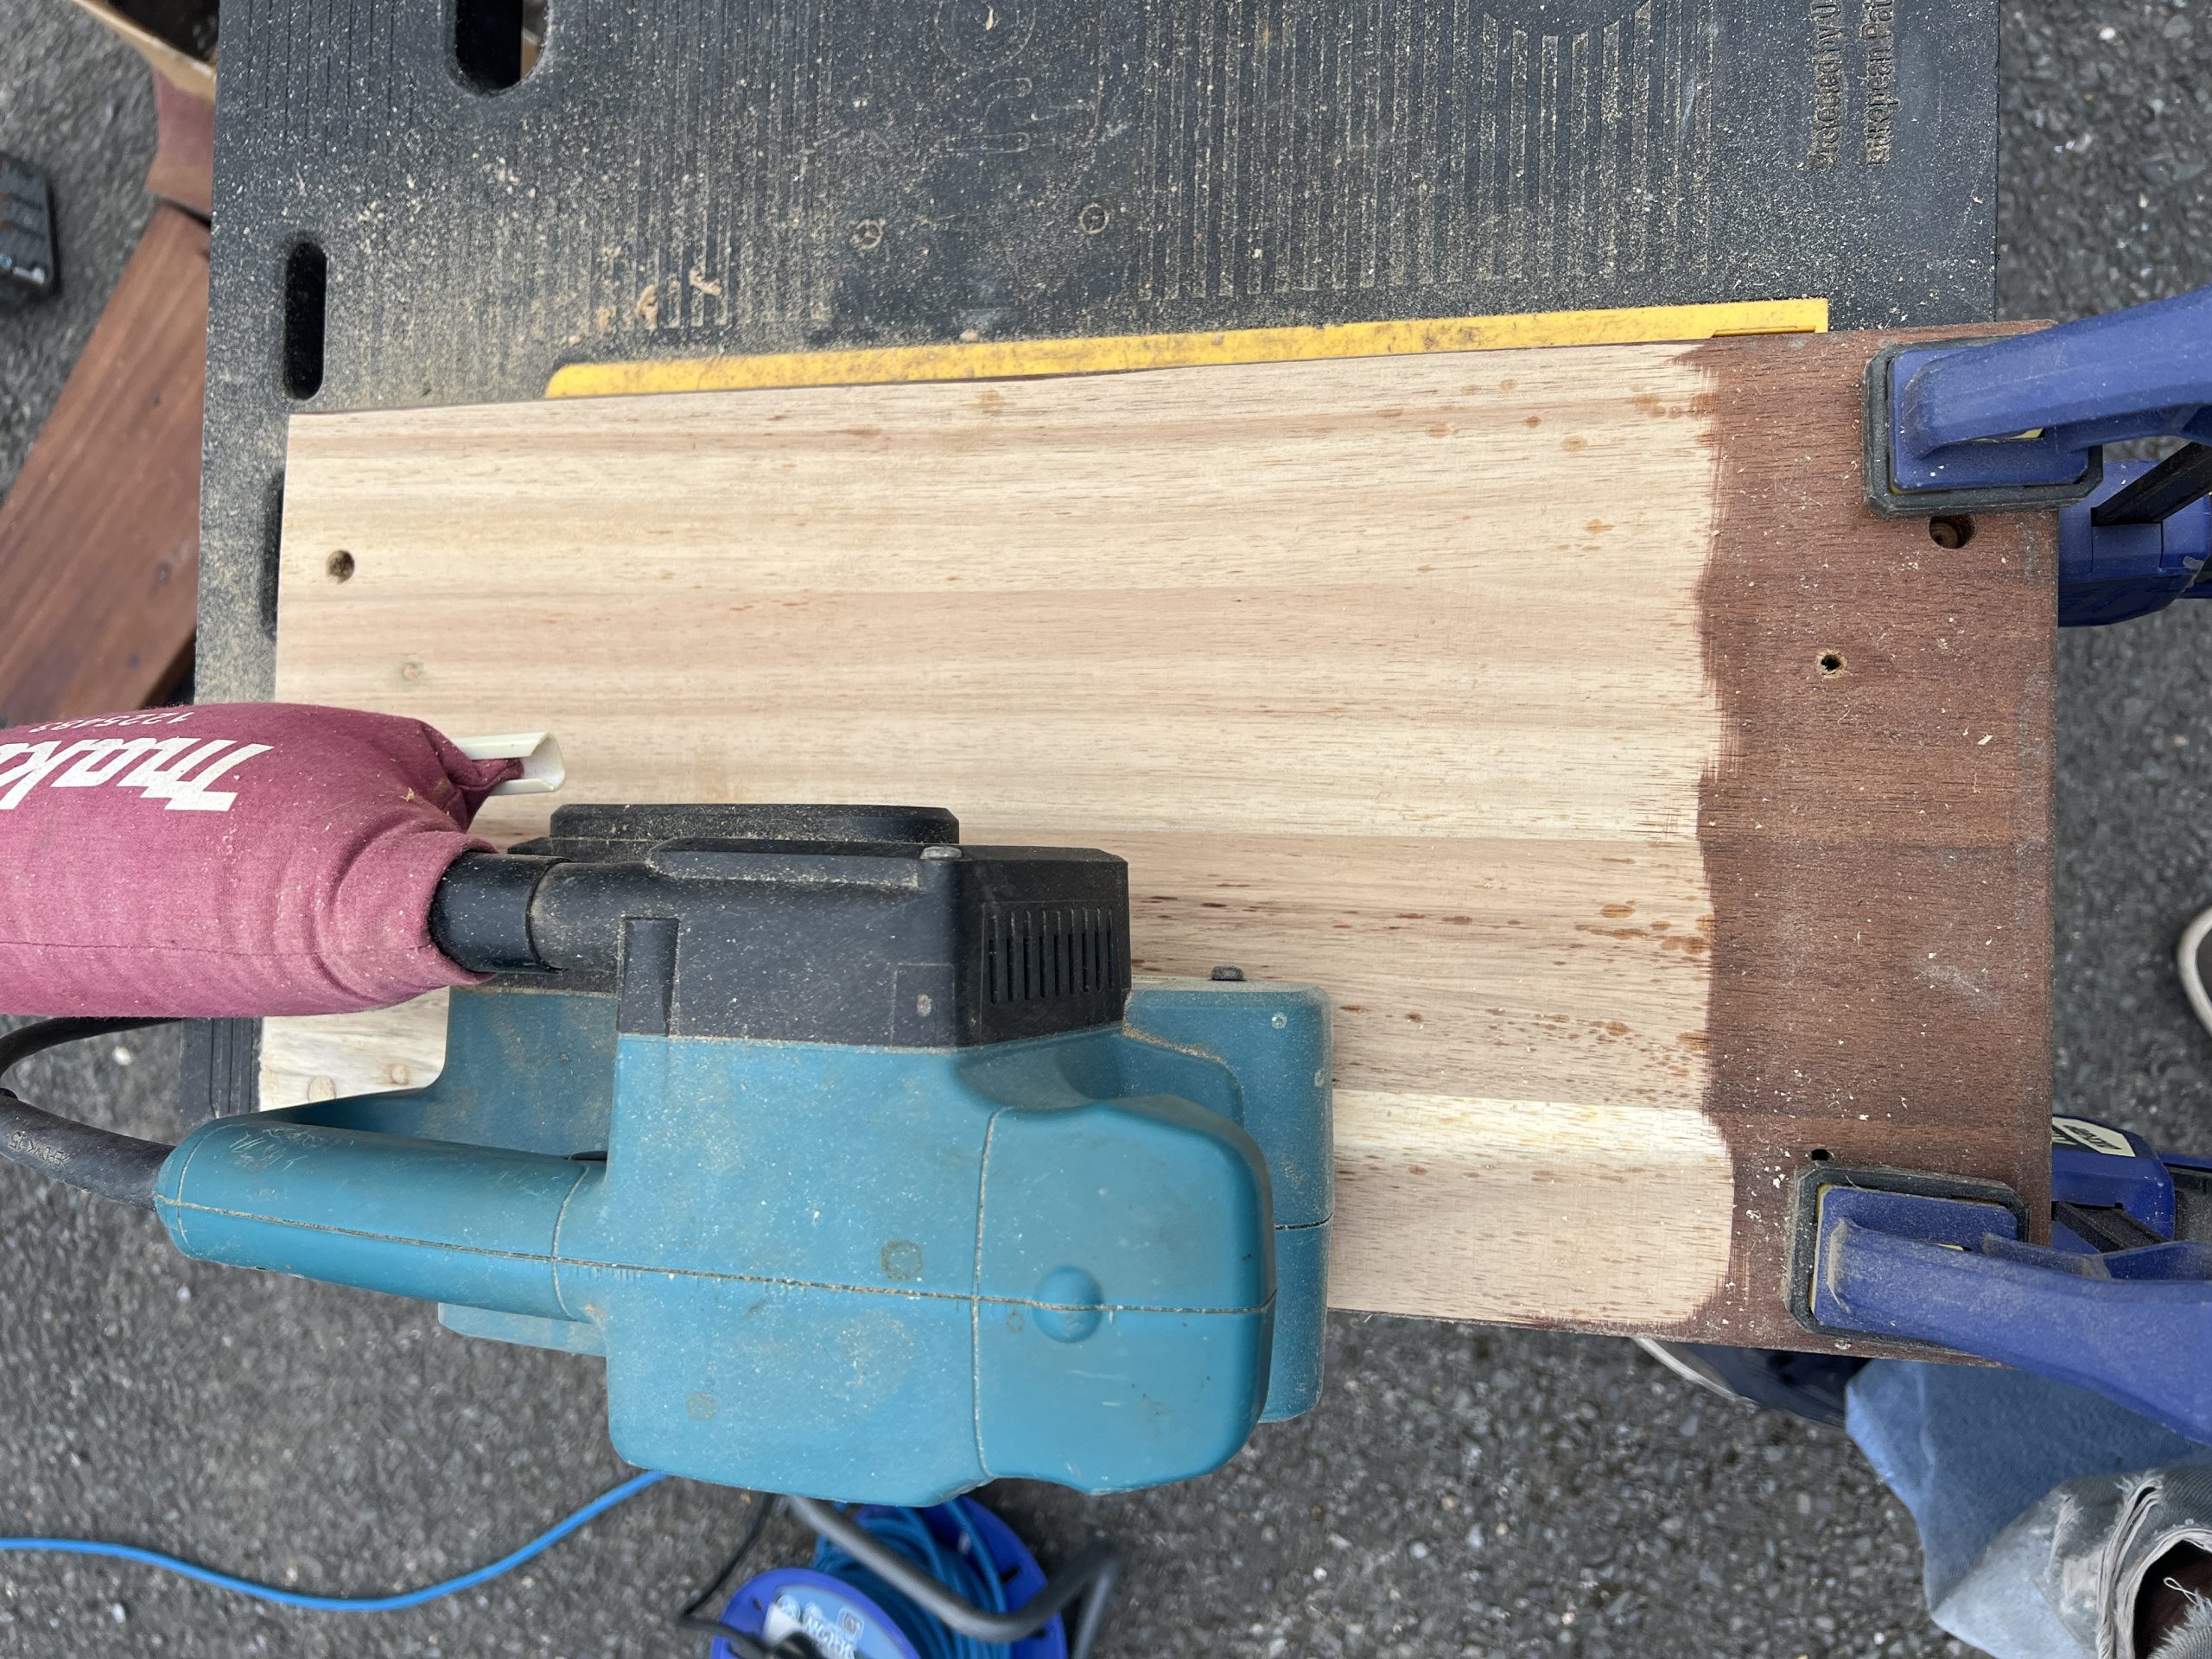
Belt sanders are really useful tools. One single belt has done 3.5 sq metres of hardwood and failed varnish and still has plenty of life left. It removed this massive pile of sawdust in under 2 hours.

Epoxy Sealed Wood – Refinishing the timber
For epoxy sealing wooden spa steps I chose to use Warm Weather Clear Penetrating Epoxy Sealer as England was unseasonably warm in April 2025. Furthermore the warm weather formula will penetrate a little further as the solvents are less volatile. We laid out the acacia pieces and applied the first coat.
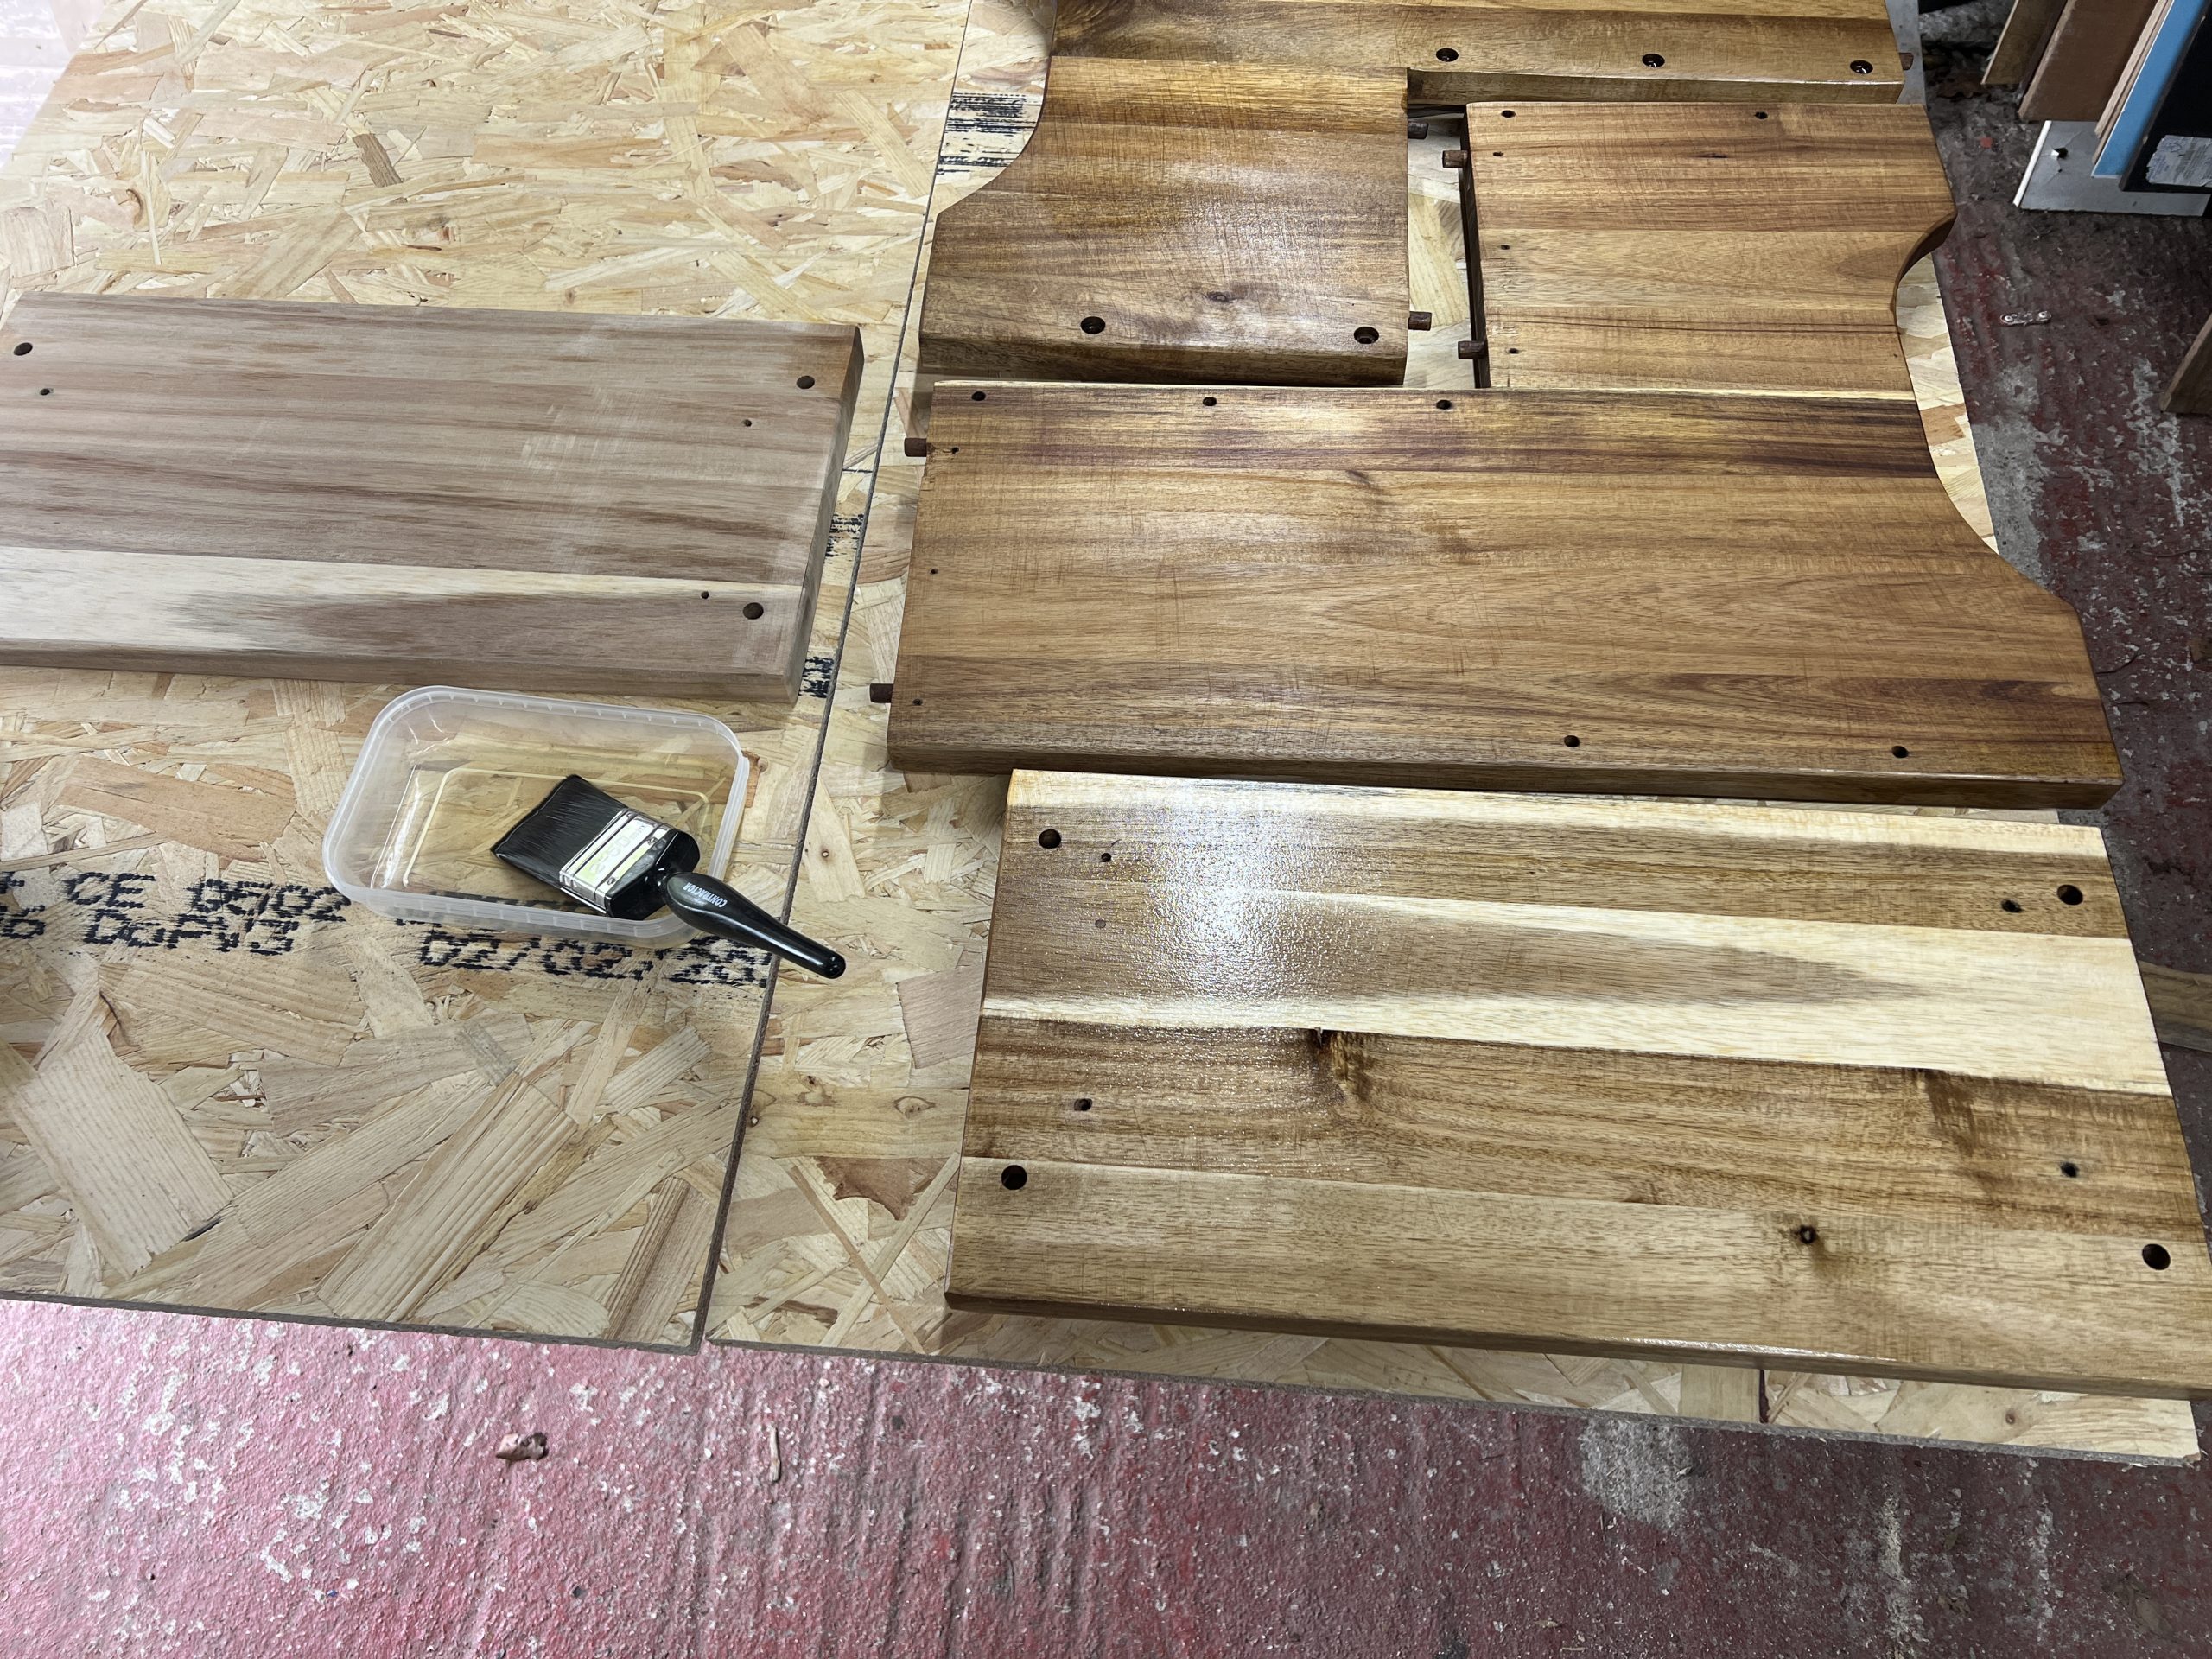
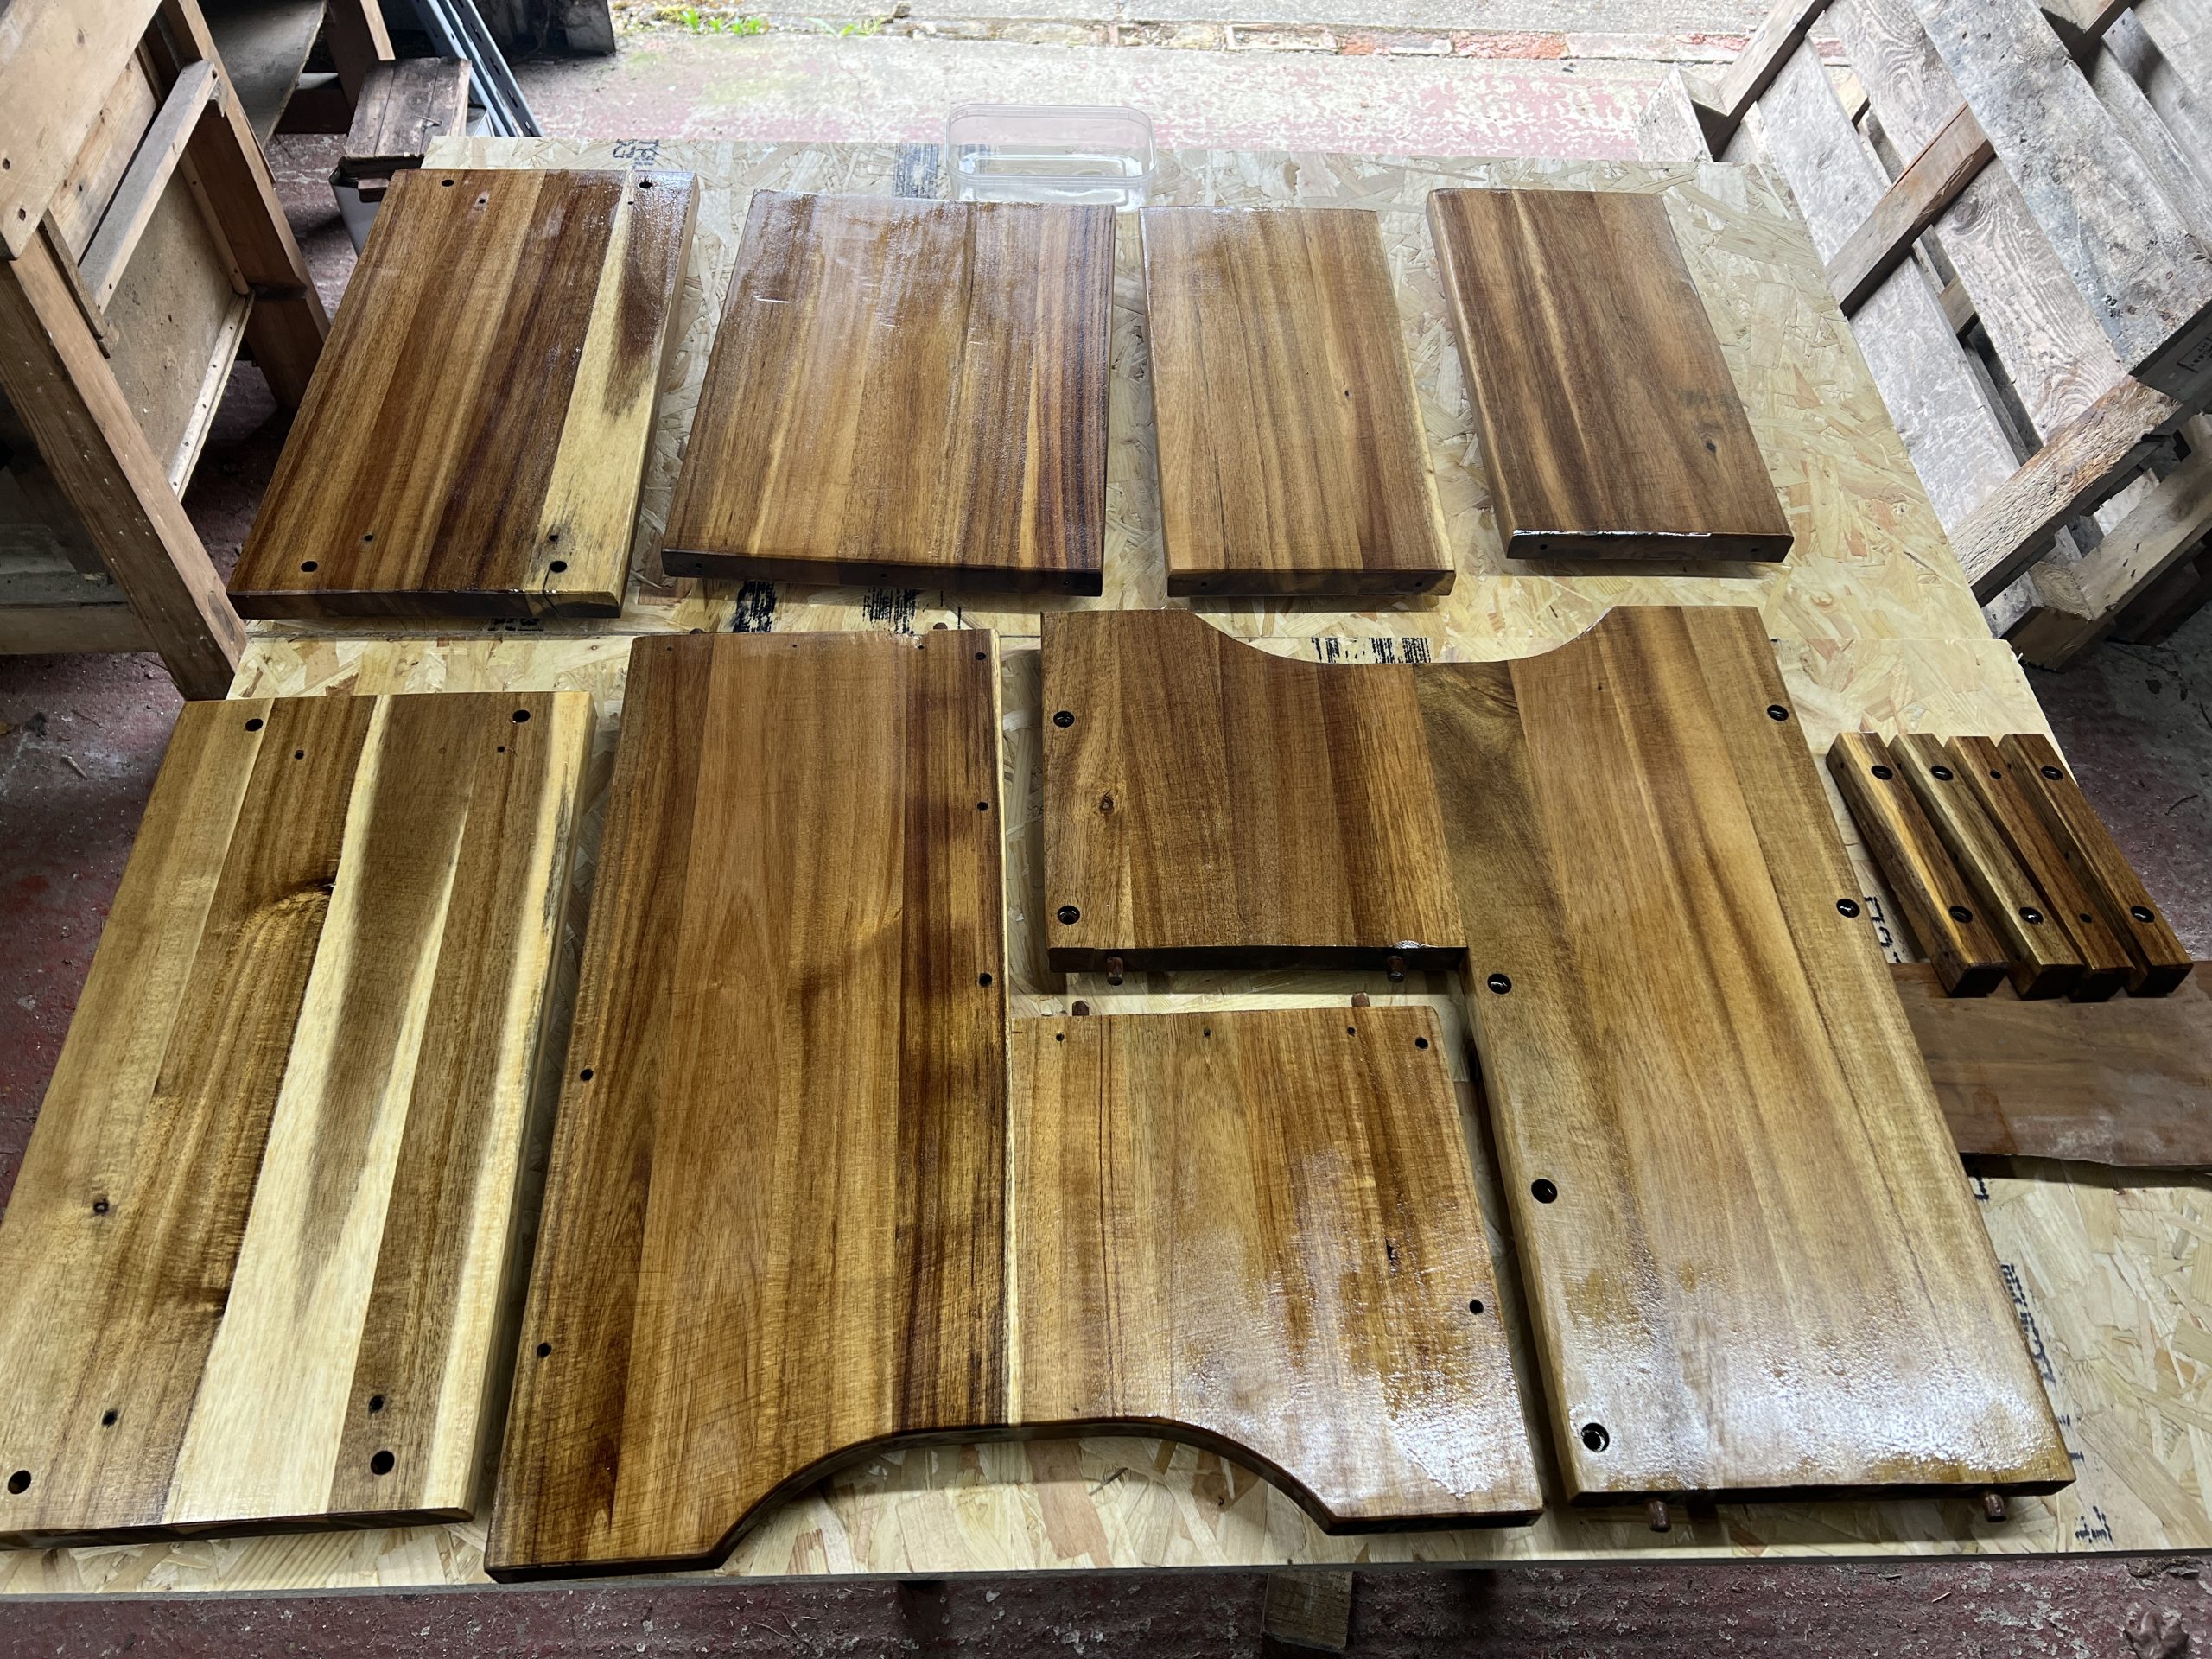
The steps had both sides given 4 coats over the next 2 days. We mixed a total of just under a litre of CPES, although some remained when finished. This is what our epoxy coated wooden steps looked like after these 4 coats:
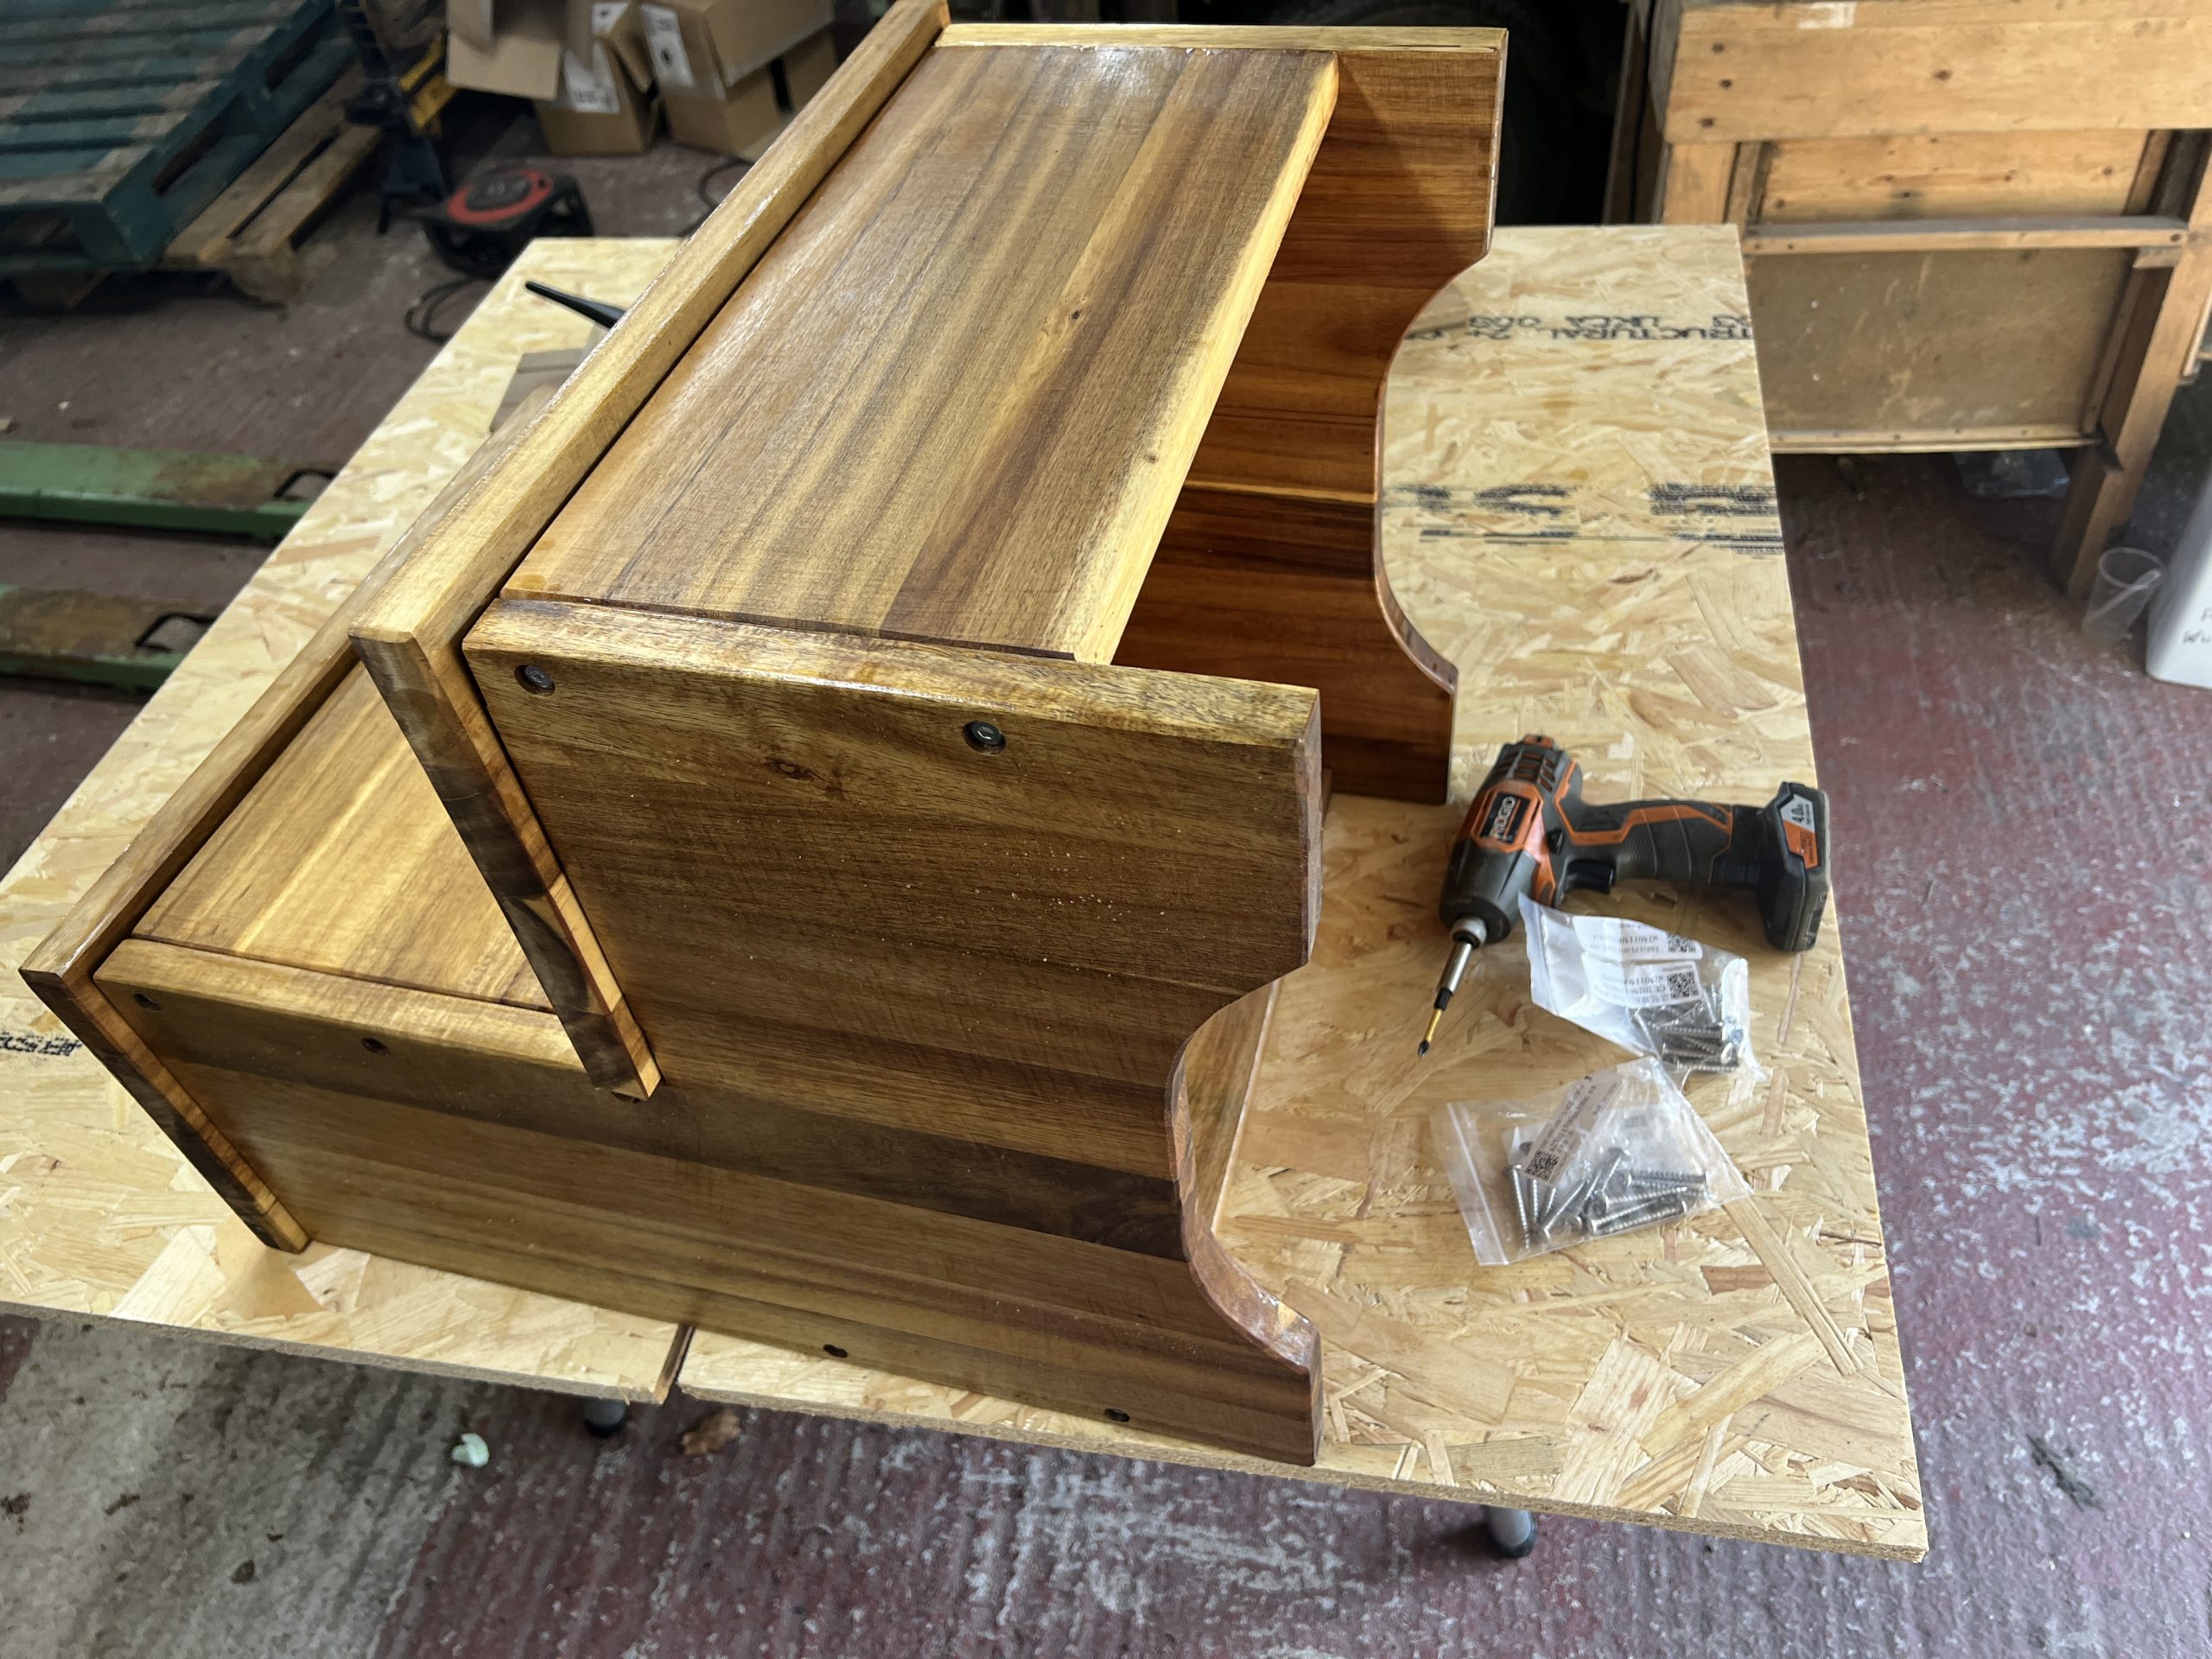
We then reassembled the spa steps using new fasteners, including stainless flat head screws, in case we ever had to dismantle the epoxy sealed wooden spa steps again.
Epoxy Sealed Wood – Initial Cost
Whilst we mixed nearly a litre, the actual requirements for this were closer to a half litre. Let’s assume for the purposes of this we used 3/4 litre, and as this is acknowledged as a sacrificial finish, that we purchased the Smiths CPES in a 2 litre pack. This leaves spare for recoating when required. 2 Litres CW CPES in 2025 cost £84.
Refinishing cost:
- 2 hours sanding (+ 1 off 120 grit belt)
- 2.5 Hours painting – 4 coats
- £31.50 – 3/4 litre Clear Penetrating Epoxy Sealer
Epoxy Sealed Wood Outdoors – A Durability Study
Here we will log the deterioration of the steps over time, and the maintenance required to keep them sealed. Pictures really can paint 1000 words…
April 2025 – Initial Installation
We then put the epoxy sealed wood in front of our hot tub at the end of April 2025. Here it get’s full sun until the evening when a yew hedge will shield it from the last of the day’s sunlight. ‘Here’ is in Kent, Wrotham. Remember this environment completely destroyed the poorly applied factory varnish finish in just a year. We show the original steps for comparison. This gives an idea of how much nicer the new finish is than the original stained one.