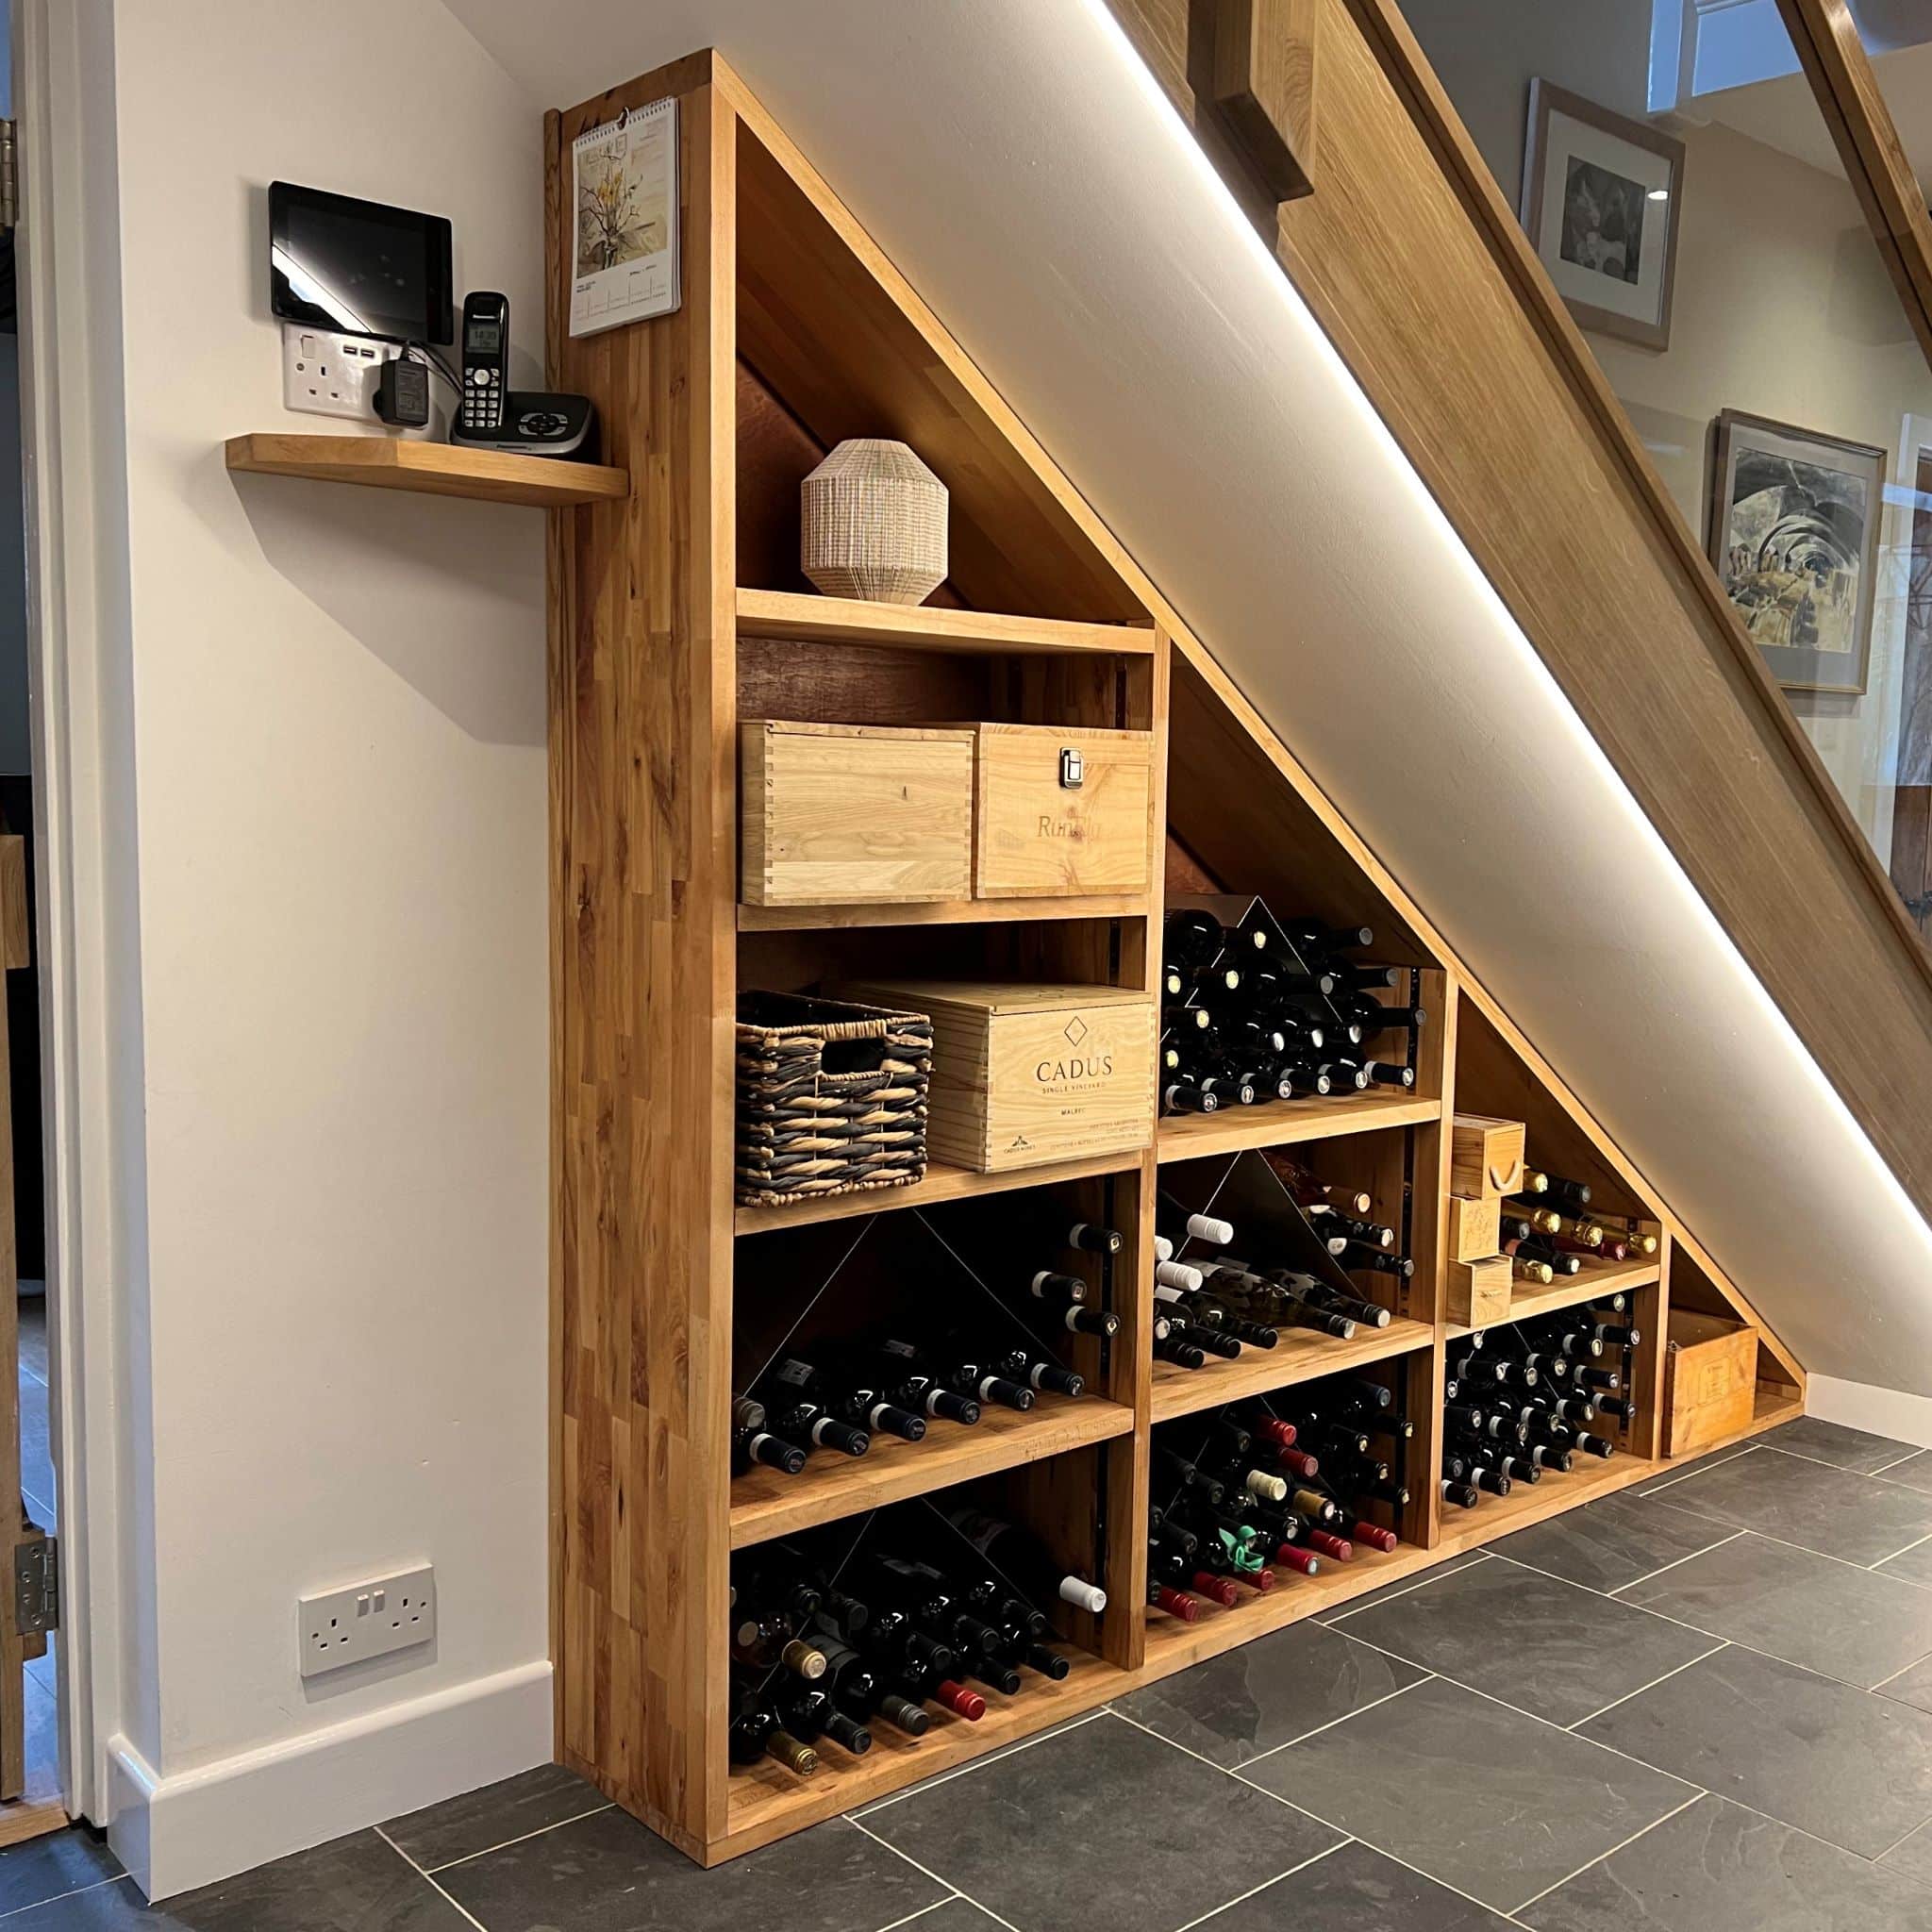
Instead of a cupboard with a small door and a pile of shoes with no order, I designed and built this under stairs winerack. It was reasonably cheap, can be reallocated at will and offers amazing versatility.
This is what we are aiming for (well what I aimed for anyway). Click on it for a full size version.
Design your under stairs wine rack
Click on any image to see a larger version with more detail.
The below sketch was designed to see how best to fill the space under the stairs that was going to hold my wine. Starting with the outer perimeter, you can layout various options inside of it, until you come up with one you are happy with.
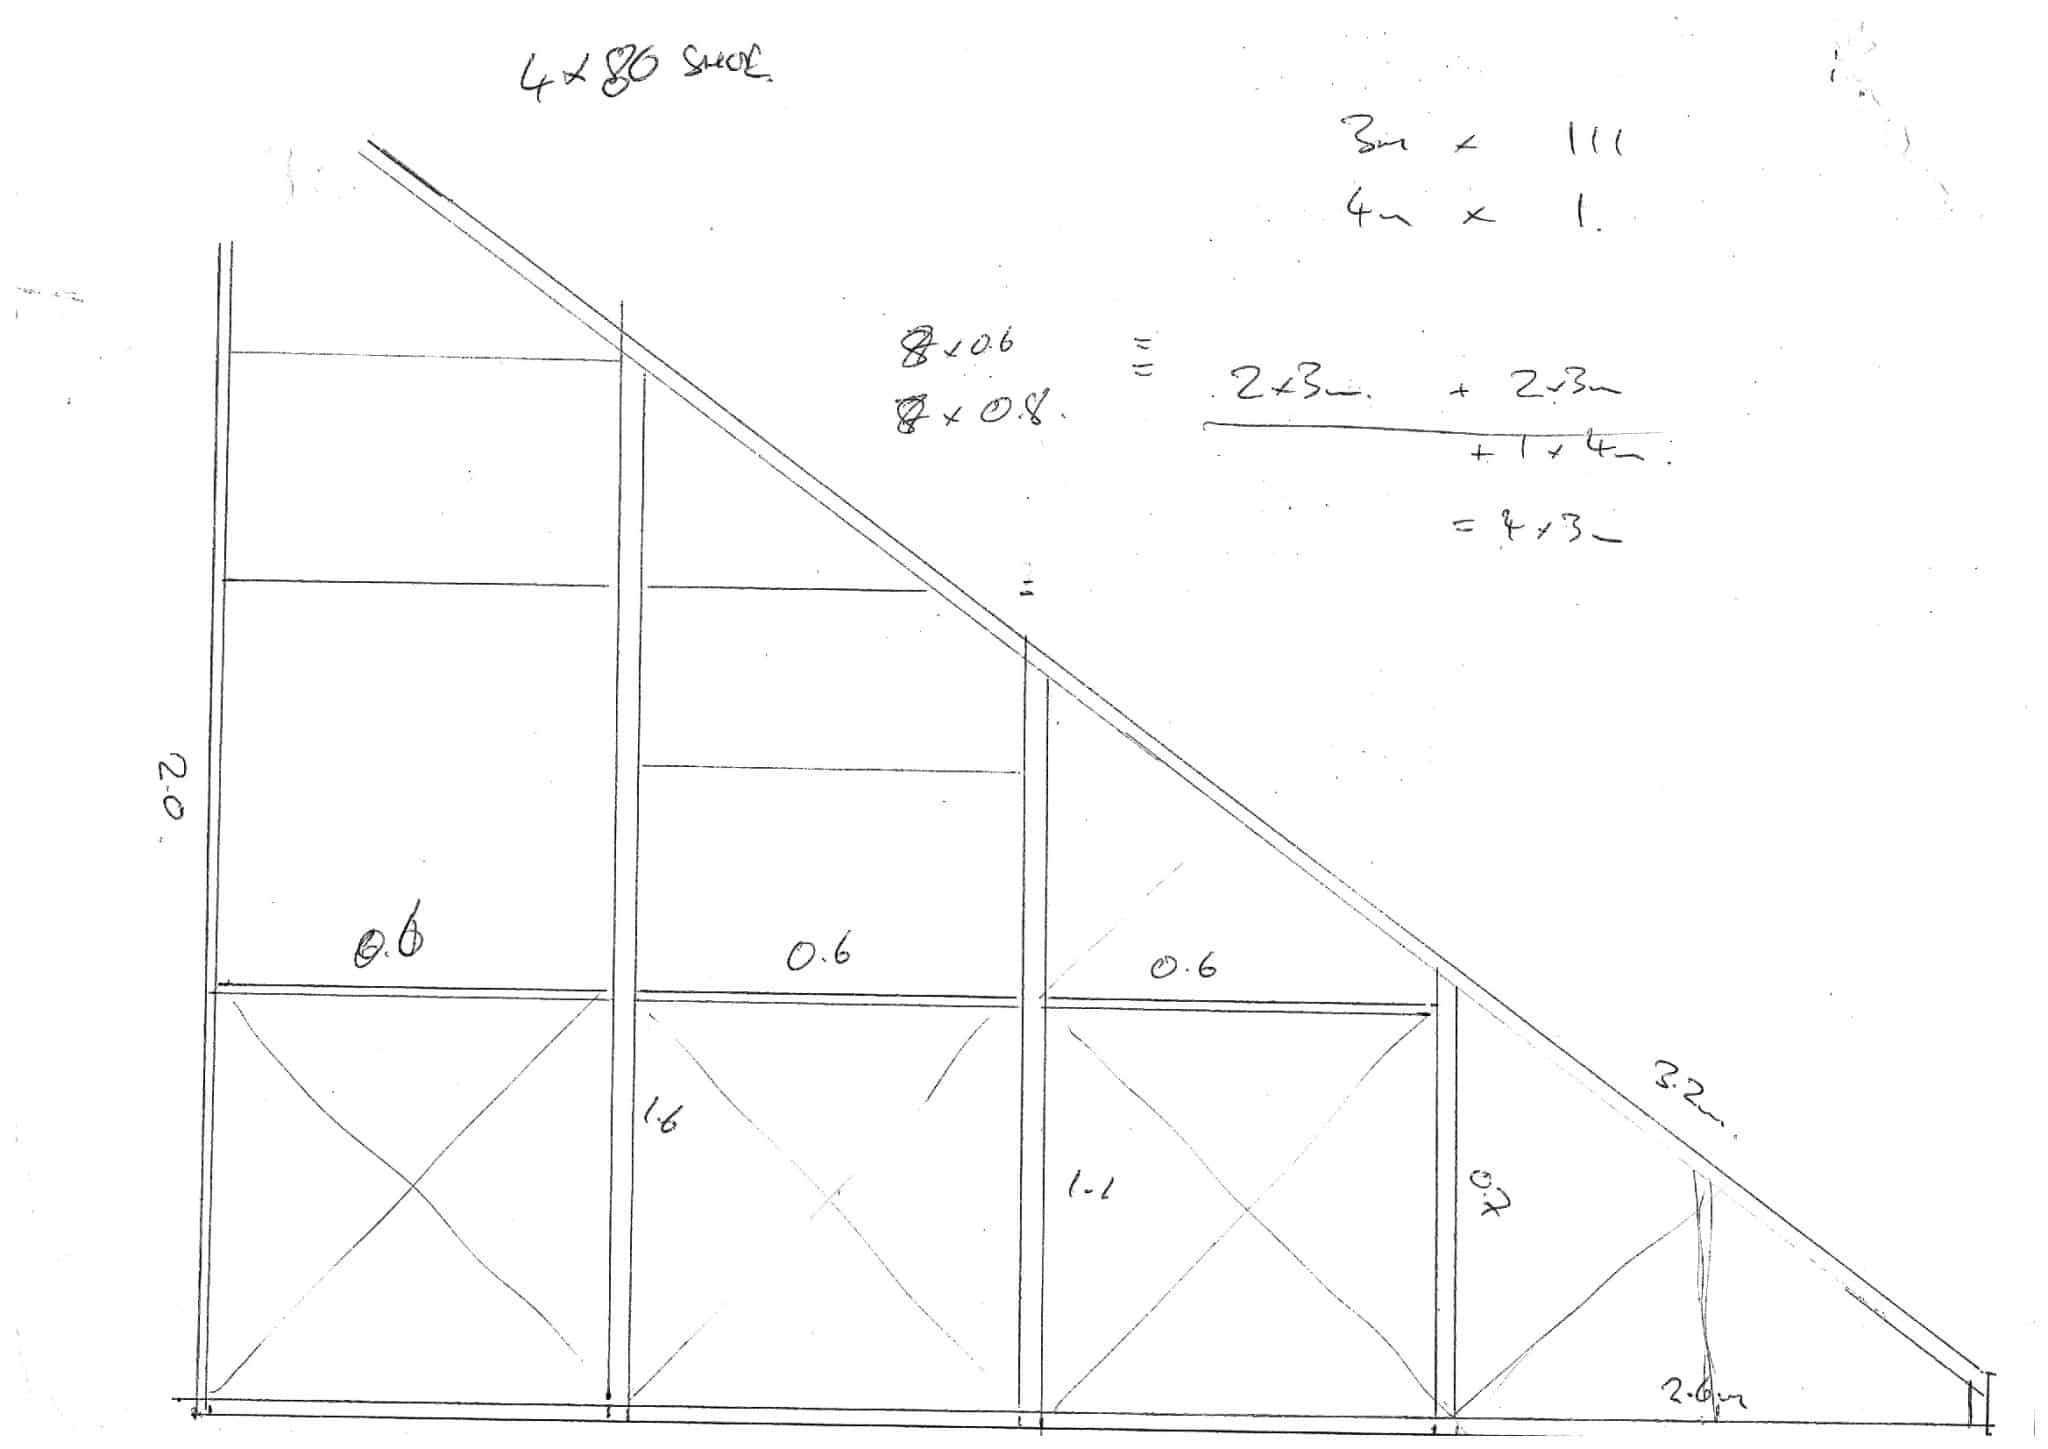
Sadly by the time I got round to scanning my sketch our son’t kitten, Teddy, had managed to chew the corner of the paper. Just assume that the design is triangular, and doesn’t end in a chasm.
This original design was based around the ‘wine cube’, which are available in 60 and 50cm versions, holding respectively 40 and 24 bottles each. As the timbers used for my under stairs winerack were pretty massive, 60cm spacing between the verticals was used to minimise the number of verticals.
The purpose of this sketch was to calculate the amount of materials that would be required, and provide a basic design for construction.
Materials for an Under Stairs Winerack
The Frame and shelves
I purchased most of these materials in 2022, so prices may have gone up somewhat. It cost me under £500 in materials.
I like wood, so decided to build a custom under stairs winerack using beech worktop, which is relatively cheaply available. It’s 635mm wide normally, and that is too deep for any set of shelving designed to hold wine.
Stripping it in half however gives you shelves about 315mm wide, perfect for my purposes. You will need a decent saw with a decent blade of course. You now have twice the length of worktop too.
I bought my worktops from kitchen surplus.
I paid :
- 3m length (2 used) : £95
- 4m length (1 used) : £120
And of course, you will pay for delivery on such large items.
This material is to be used for the frame and the shelves themselves.
Under Stairs Wine Rack Shelf Supports
In order to allow the storage to be reconfigurable, I decided to use bookcase strips. These are a simple timeless design that you can fit yourself to this under stairs wine rack.

You can buy bookcase strips here, around £10. Don’t forget to buy the clips while you are buying the strips, four per shelf! I used 6 strips in total, let’s call that £75 with the clips to hold the shelves too.
You will need a 1/2″ router to fit the concealed bookcase strips. Please don’t try using a 1/4″ router on these hardwood sections – it’s really not up to the job. You will also need the proper cutter
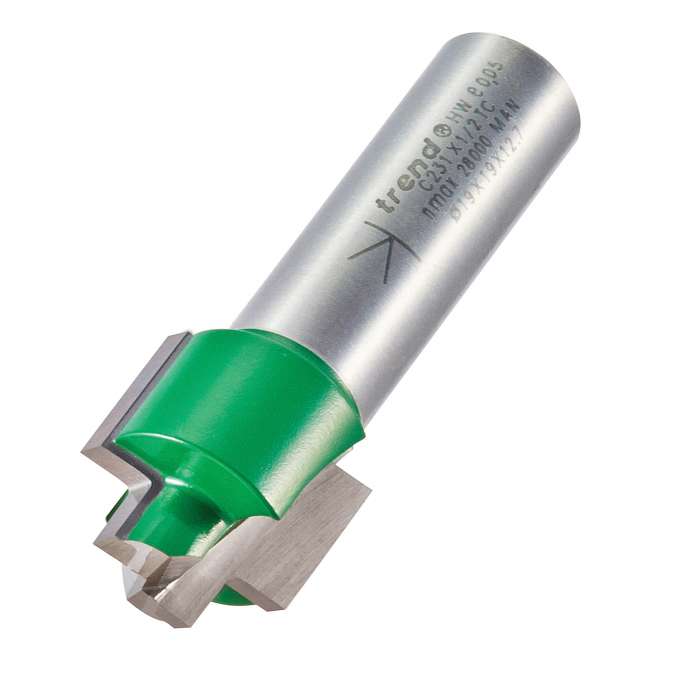
You can buy that from Trend themselves, around £30.
If you are in the ‘I don’t own a 1/2″ router or they scare me and I dont’ want to use one’ category, there is a solution.
You can buy raised bookcase strips that don’t need the rebate cutting out. They don’t look as good, and you will have a gap at the sides of your shelves on your under stairs winerack, but they are easy to fit and you do not need a router.
The back of the understairs wine rack
The under stairs wine rack has to perfectly fit the under stairs area. The frame has to be absolutely vertical, with all verticals parallel and exactly the same distance apart. The easiest way to hold the frame in the right place, and allow it to be built then moved, is a sheet of 18mm plywood. Mine took just one sheet, around £40 at your local timber merchants.
Constructing the Wine Rack
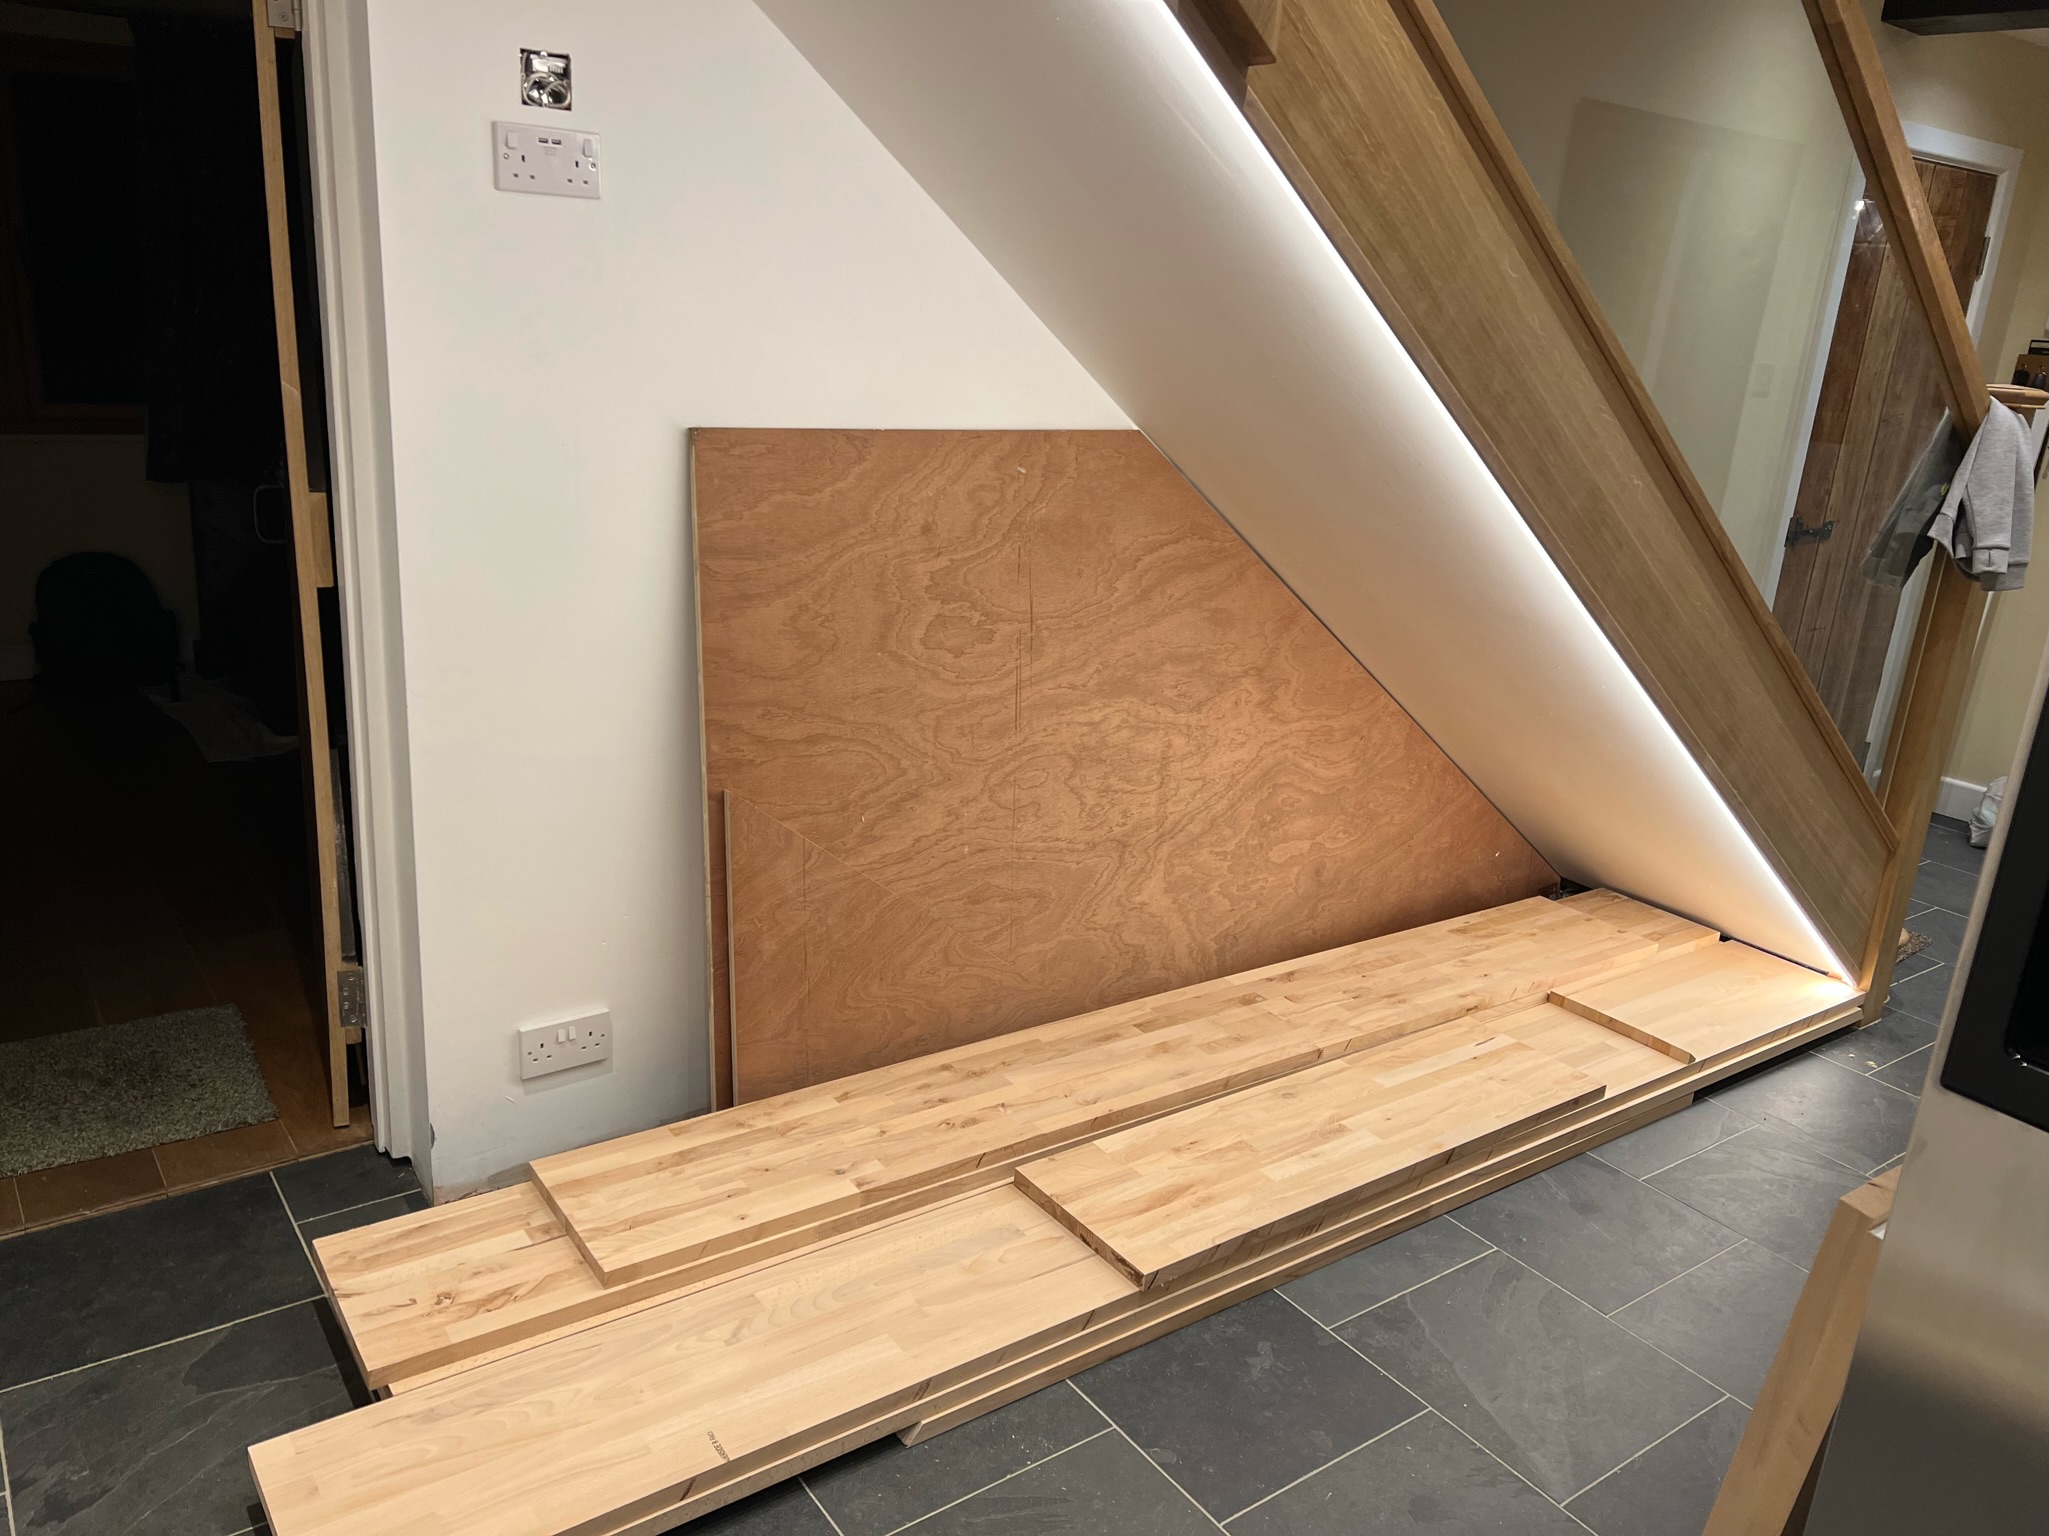
Plywood back for the winerack first
The first thing to construct is of course the backboard. Your under stairs winerack has to perfectly fit the space available. I am lucky that I have just had the downstairs of the house redone, so I have a nice level floor to work from as well.
Measure the distance out that you wish your wine rack to cover. I have power and intercom points located on the wall that I need to leave clear, and my perfect length was 2,440 mm, leaving the intercom and power neatly spaced in the middle of the gap. This was of course by design when the points were put in.
So. The full width of a metric 8 * 4 foot sheet of plywood for the backboard. Now run a ruler up the wall to find the height at both ends. A line laser makes this very easy if you have one.
Cut the sheet of ply to the angle of the staircase. Below you can clearly see the location, and the space I am leaving for the power and intercom. That’s stil big enough to store a ot of wine in my under stairs winerack.
My offcut was plenty big enough to turn round and cut the final section from the offcut too. It’s cut and on the floor with the big piece.
The Beech Frame
The first task is to cut the 635mm beech worktop in half. You will need a decent table saw, with a sharp blade.
You MIGHT manage to get the first cut to exactly halve the worktops, but it’s quite unlikely.
As a tip I would suggest making sure that the side to the guide on your table saw is slightly smaller than the side that is away from the guide. Once you have done the first cut, you can then take the larger piece, and run it through the saw against the guard to give you two identical width pieces.
Alternatively you can cut two 300mm wide sections from one worktop. You may choose to do this if your chop saw will only cut 300mm, and you do not wish to buy another one.
Always ensure you leave one factory finished clean edge however you choose to cut the frame pieces for your under stairs winerack.
Once you have your timber then you need to cut the frame for your under stairs winerack. You will need a decent sliding mitre saw, with a sharp blade, that can cut at least the width of your timber (315mm).
- Start with the base. One square end, one angled end, same length as your plywood back
- Then the top piece. Two angled ends, the full length of the rising edge of the plywood back
- Then the verticals at the ends of the of the backboard. Mine are both cut and visible in the photo above
- The left end, flat at the bottom, angled at the top and at the bottom of the near pile of beech in the photo
- The right end, also flat at the bottom and angled at the top. It’s the tiny triangular piece to the right hand end in the photo above for my one
All of these are screwed together and to the baseboard with 5 * 60 woodscrews. Please drill pilot holes first.
The inner verticals
Now it’s time to make the other vertical pieces for the under stairs winerack. Each one has a flat bottom and an angled top.
I spaced mine at 60cm between the verticals, so the shelves are 60cm wide. The left over space at the foot of the stairs isn’t going to be shelved.
Each one has a flat base and an angled top. They are again all screwed to the base and to the top and bottom with 5 * 60 woodscrews with pilot holes.
The Under Stairs Wine Rack Shelves
While the frame is all screwed together is a good time to check the quality of your joinery. If your measurements and fitting were perfect, you may be able to just cut a set of 598mm wide shelves to fit between your verticals. If less so, you may require a little bit of variation. Either way, now is a good time to finalise your layout of shelving, and cut your shelves to fit. If they are different lengths, mark the back edge to indicate where they fit best.
Well. This under stairs winerack won’t hold any wine at all yet. We still need something to hold the shelves in place. Let’s remove all of the beech worktop from the plywood, and start routing.
Routing the Bookcase Strips
The bookcase strips are designed to hold shelving between the verticals.
As the top of the under stairs winerack slopes down, in each shelving cavity one side is higher than the other.
You have two choices here:
- Fit bookcase strips top to bottom on both sides – the higher bit of one side will never be used
- Fit the strip on the high side just up to the top of the low side. If routing you wil have to stop routing at a predetermined distance, and finish the cut with a chisel
I chose to do the latter, and it looks like so:
Nice neat and tidy.
Once you have decided how far up you are to rout, mark the timbers if required – set your router guide to a sensible distance. Mine is spindle to guard 6cm here, which leaves the strip 5cm back from the front of the shelving and still gives very stable shelves.
Now run the router up both sides of each inner vertical to your marks, and the inside edge of your high end outer one..
If you are finishing the bookcase strips as above, just tidy up the top of the rout to a square end to take the bookcase strip.
Sealing the Under Stairs Wine Rack / Shelving
All of your timber is now cut and machined as required. You need a surface finish on the wood to prevent it taking stains from spills and handling over time.
First you should perform any final sanding that is required on your timber to achieve the surface finish that you want. Work down to 400 grit or finer for a beautiful soft finish.
I used Smiths Clear Penetrating Epoxy Sealer on my under stairs winerack. This isn’t just because we sell it, it’s because it’s the simplest fastest means of putting a finish on that will:
- Protect the timber from staining
- Protect the timber from water damage
- Bring out the grain
- Require no maintenance in a low UV light environment
Treatment of this entire rack used just over 1 Litre of CPES, and took almost no time at all to do.
It works as well on the plywood as it does on the beech worktop too.
This video shows how simple and fast the finishing of all this timber was.
Compare that with the time it will take you to varnish, wax or oil. The CPES will be more durable too, as it has penetrated into the fibres of the wood and is not sitting on top awaiting scratches and damage.
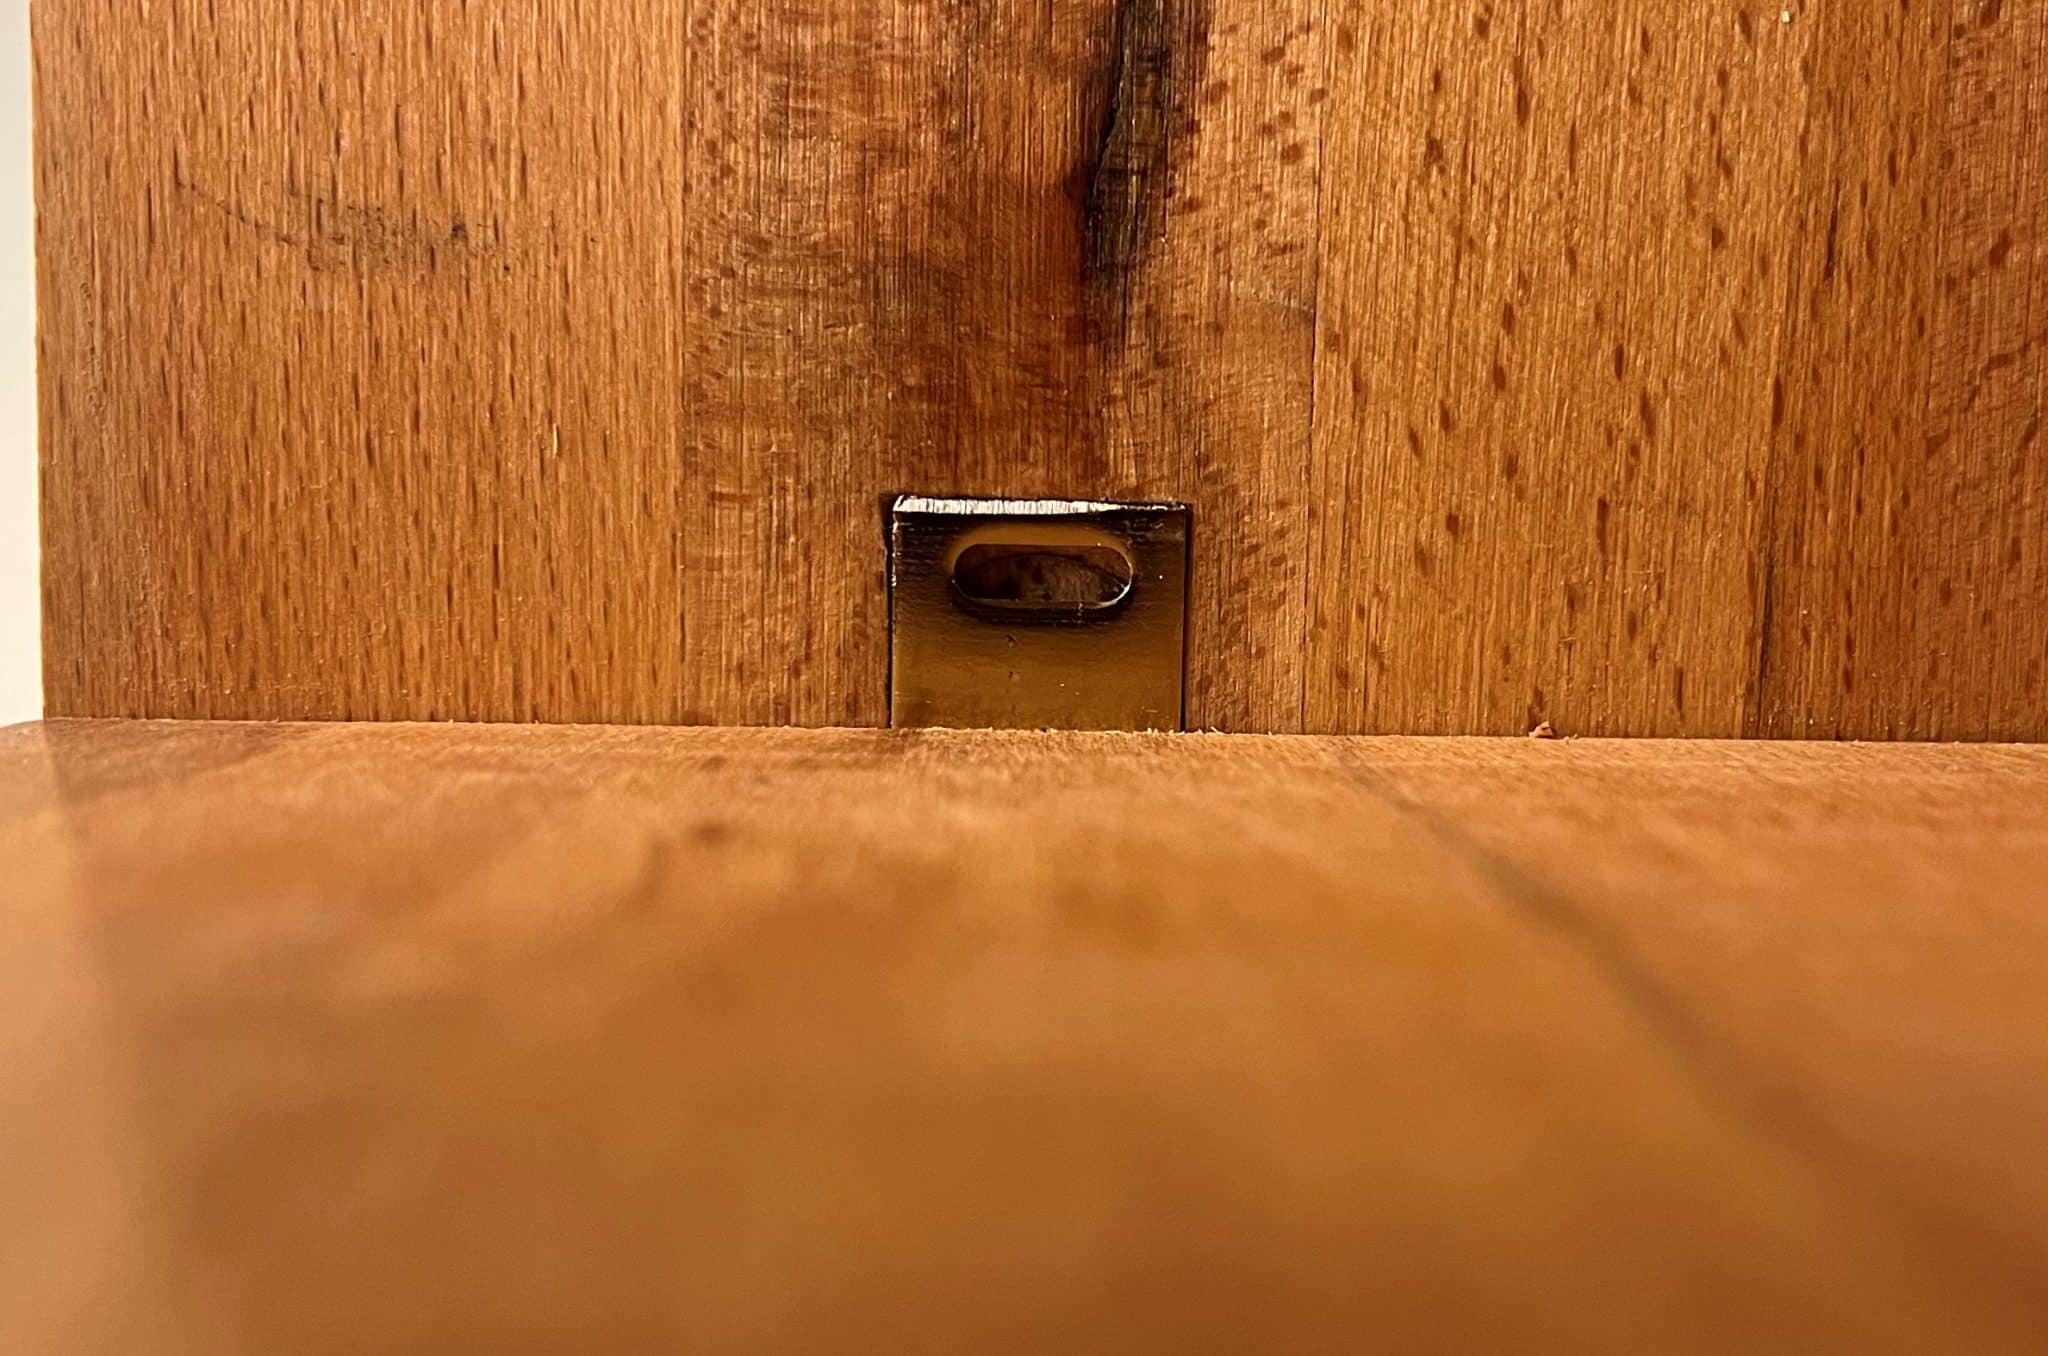
Fitting the Bookcase Strips
The important thing with Bookcase strips is that they must all be level. In order to do this start every bookcase strip from the bottom of your vertical and cut the top to length. Now all of the slots will line up across every bookcase strip, and your under stairs wine rack will have level shelves that sit on 4 supports.
Workign from your tallest vertical down:
- Cut your bookcase strips to length
- Fit them
Once upon a time these were fitted with tiny little brass flat head screws, 4 * 3/4 usually. You had to drill pilot holes, and still half of them snapped. Much as the Brass screws looked fabulous – they were a pain.
Now you can buy small Pozidrive headed woodscrews, so you can use (small) impact drivers to fit your bookcase strips. I bought a pack of Screwfix’s Turbogold 3 * 20, which were perfect for the job. Please – drill pilot holes.
The more modern screws make this job fast and easy. As a corollary – availability of these screws has also made small brass slotted head ones prohibitively expensive!
You can probably use your offcuts on the shorter sections – assuming your strips have the first slot an identical distance from the end at both ends.
Reassemble and Fit your Wine Rack
Now you can reassemble all of the pieces of your under stairs wine storage solution into it’s final shape. This is going to be heavy, even without the shelves, and it is also a large object. Be sure to assemble it somewhere where you can physically bring your winerack in to the space under the stairs.
If your floor is nice and flat, mine was, you can just leave the winerack under your stairs and have done with it.
If there is movement, or it isn’t sitting flat with the wall, then you may need a line of engineering spacers in underneath the front of the base to hold it level and back to the wall.
You should do this in preference to trying to screw it to the wall. There is a LOT of weight in this under stairs winerack once you add wine, and it is better supported along the entire front edge of the base than hung from the wall!
Build your Wine Seperators
I originally designed my wine rack to carry cross separators, to become wine cubes. I realised durign construction that this was an unnecassary complication, and that I could use a far simpler means of keeping bottles accessible and safe.
I went to my local metal fabricators, Bush Engineering, and asked them to cut me some simple strips of 1mm stainless. At 20cm wide and 86cm long, when folded in half at 90 degrees they fit perfectly into a 60cm wide shelving unit.
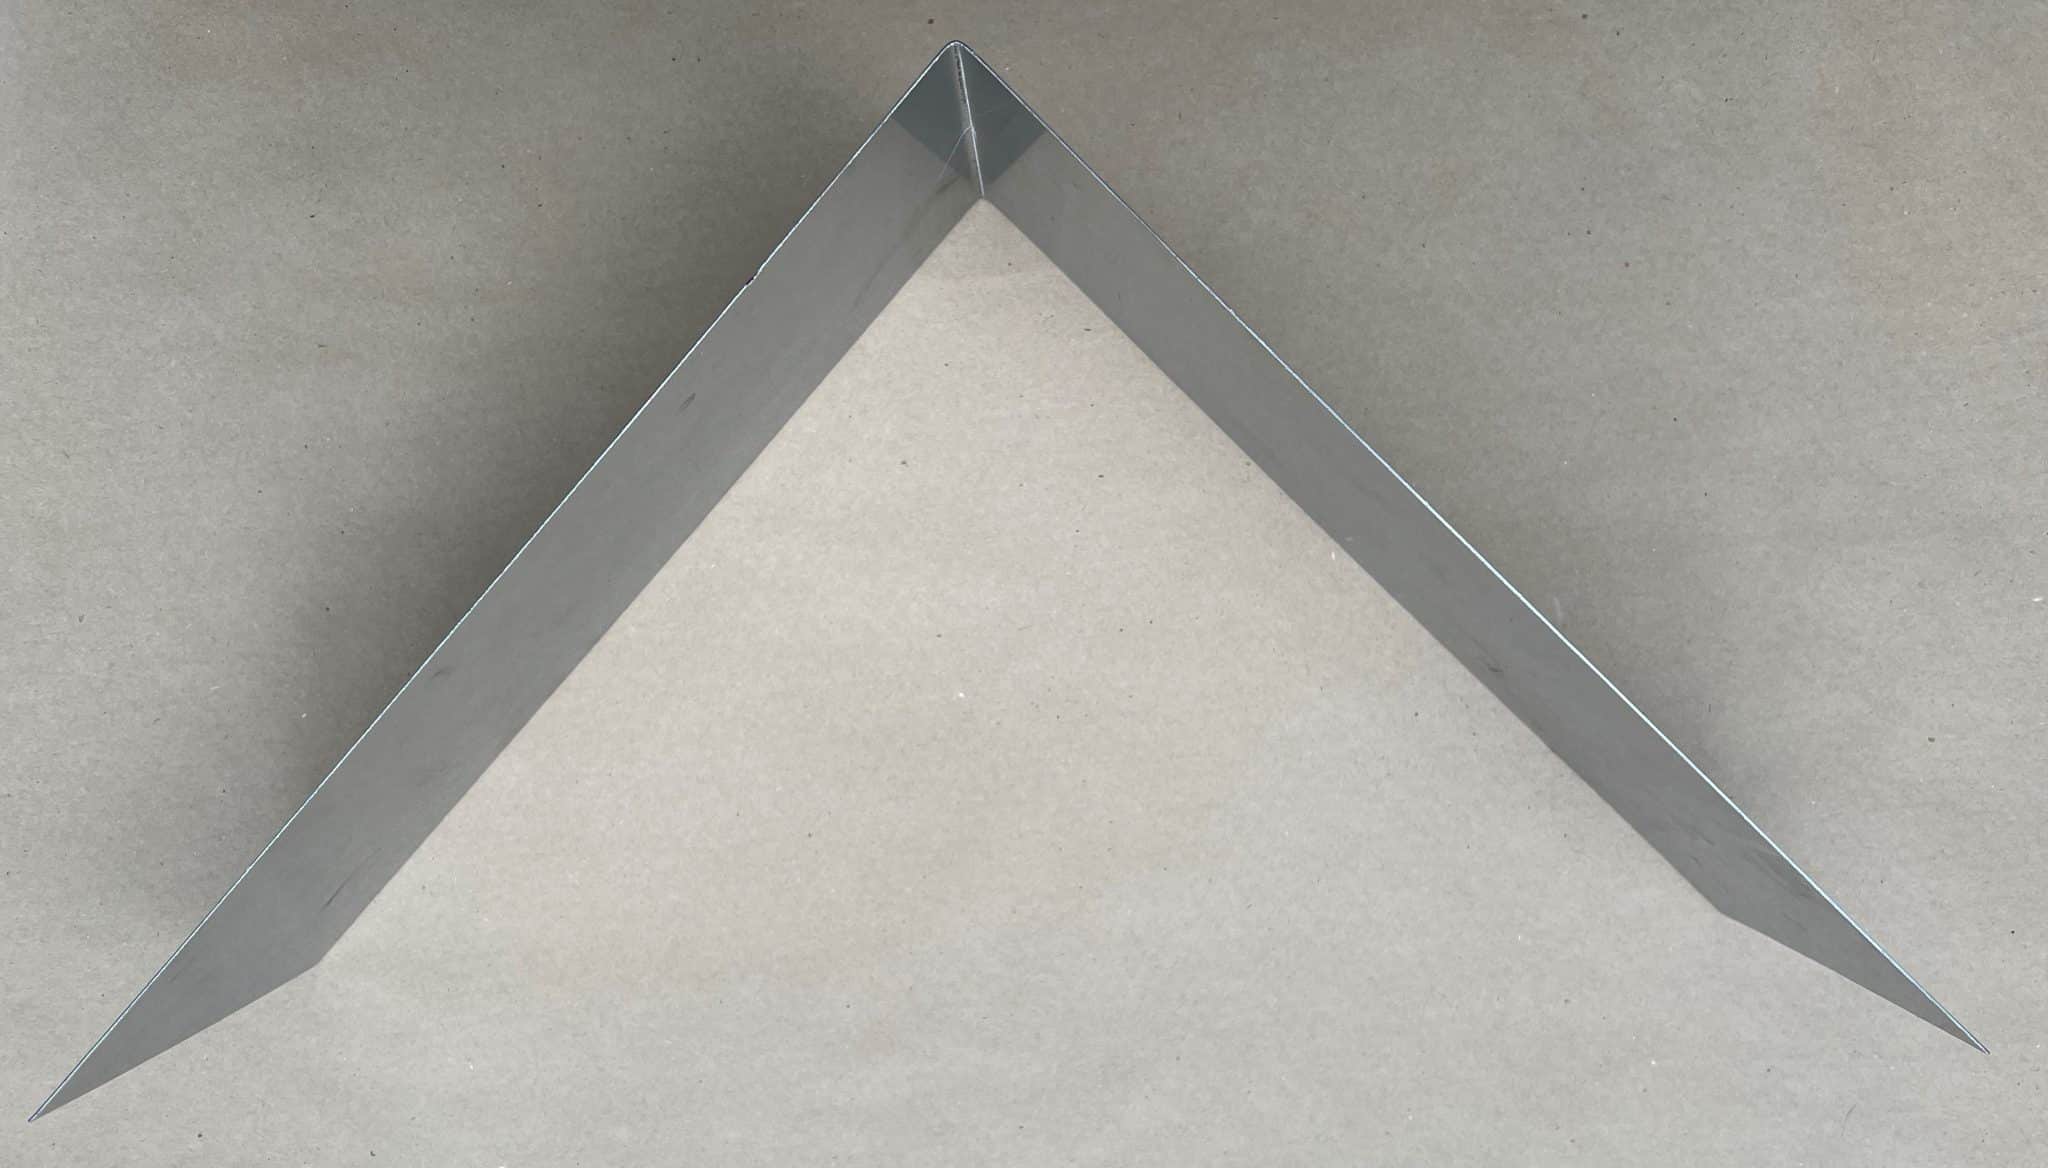
Not wanting to scratch my under stairs winerack or cut my fingers, those sharp edges get filed smooth.
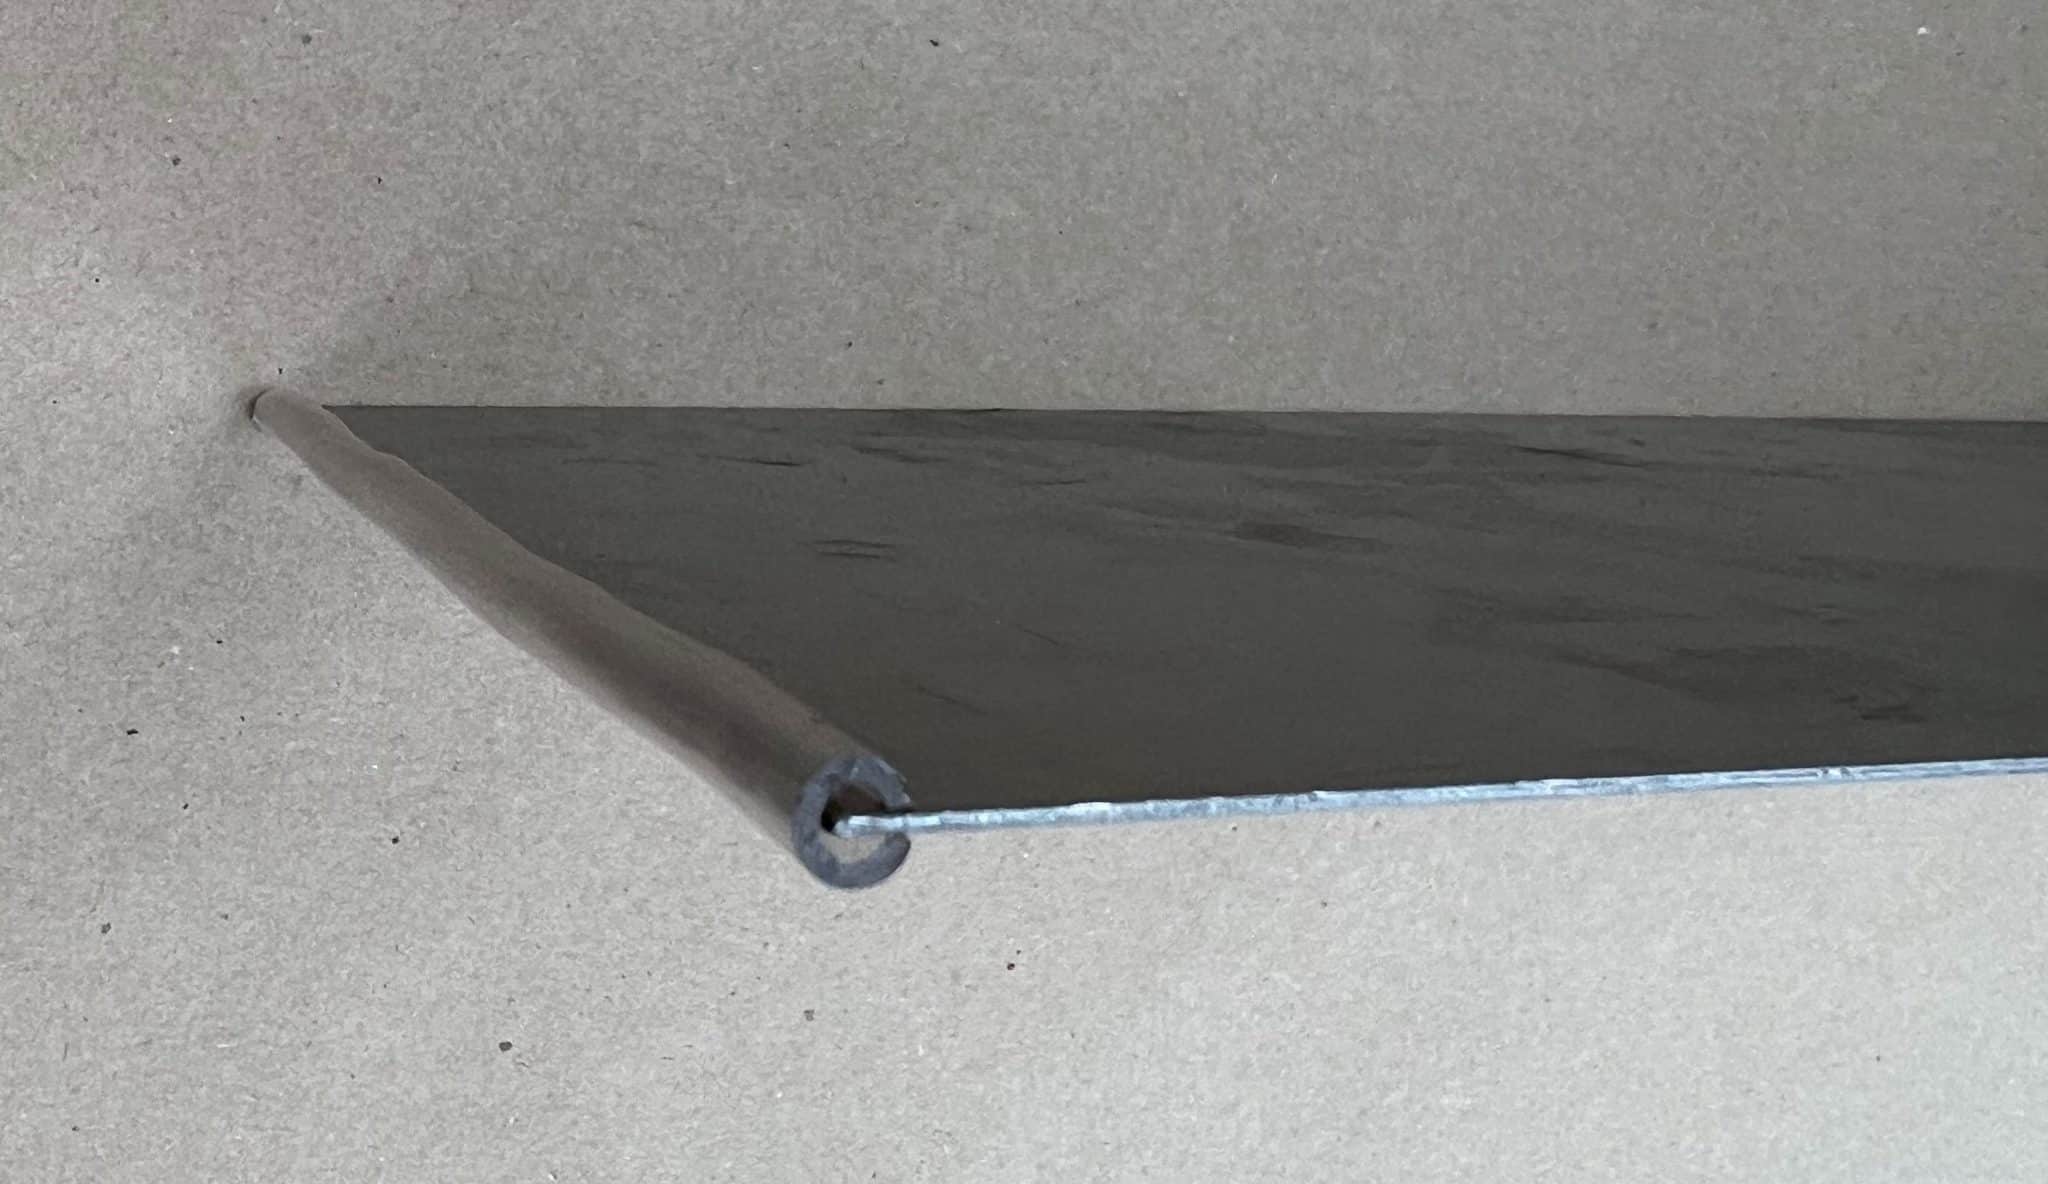
Final protection is to take some 3mm internal diameter pvc tubing (sold for airline feeds for fish tanks), cut to 20cm lengths, and carefully slit down one side with a stanley knife.
Simply slide these onto the cut ends of the sheet like so:
The separators are then simply slid into place. The pvc tubing offers silencing as well as protection keeping the metal off the wood when bottles are stored.
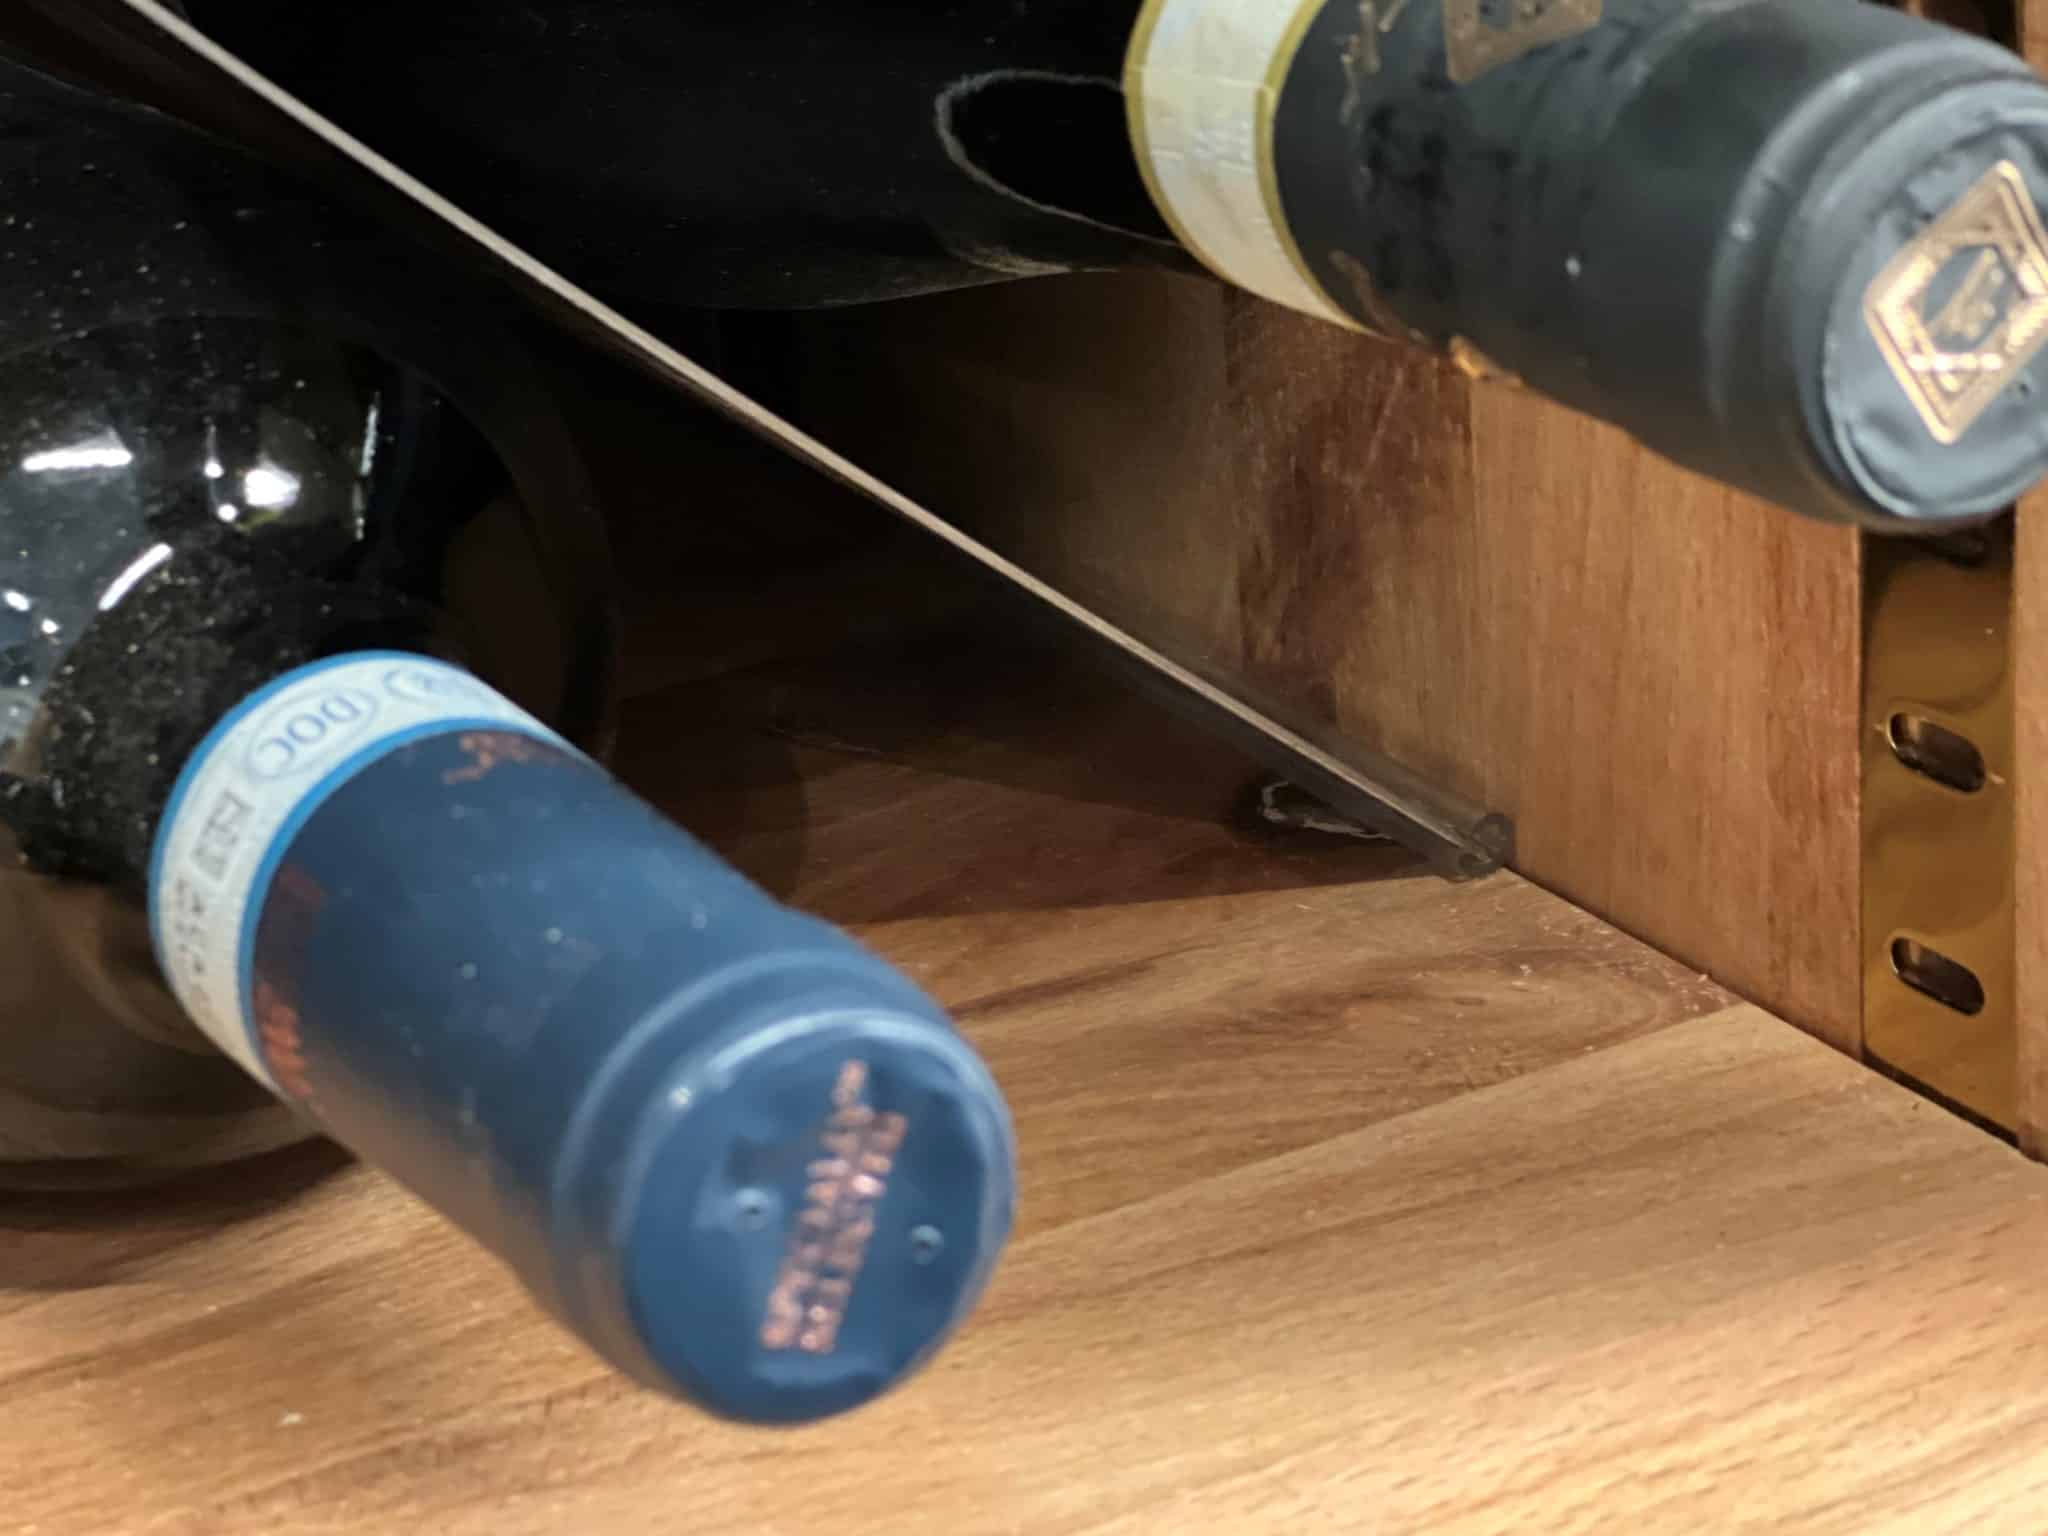
You now have the ability to segregate your Aglianico from your Barolo, and allow easy access to all.
If I were to redo this I think I would use 1.5mm stainless, but in use the 1mm is acceptable.
Shelve out your Under Stairs Winerack
Work out what spacing you want for your shelves. I put mine in at about 32cm between the shelves. It allows for easy placing of the separators and storage of around 20 bottles on each shelf.
4 bookcase clips per shelf, then the shelf, then the separator.
I bought a few wine boxes from my local supplier of such, the wine box merchant, and put them on a couple of the shelves to allow for versatile tidy storage of other things. They are beautifully in keeping with the ethos of the under stairs winerack.
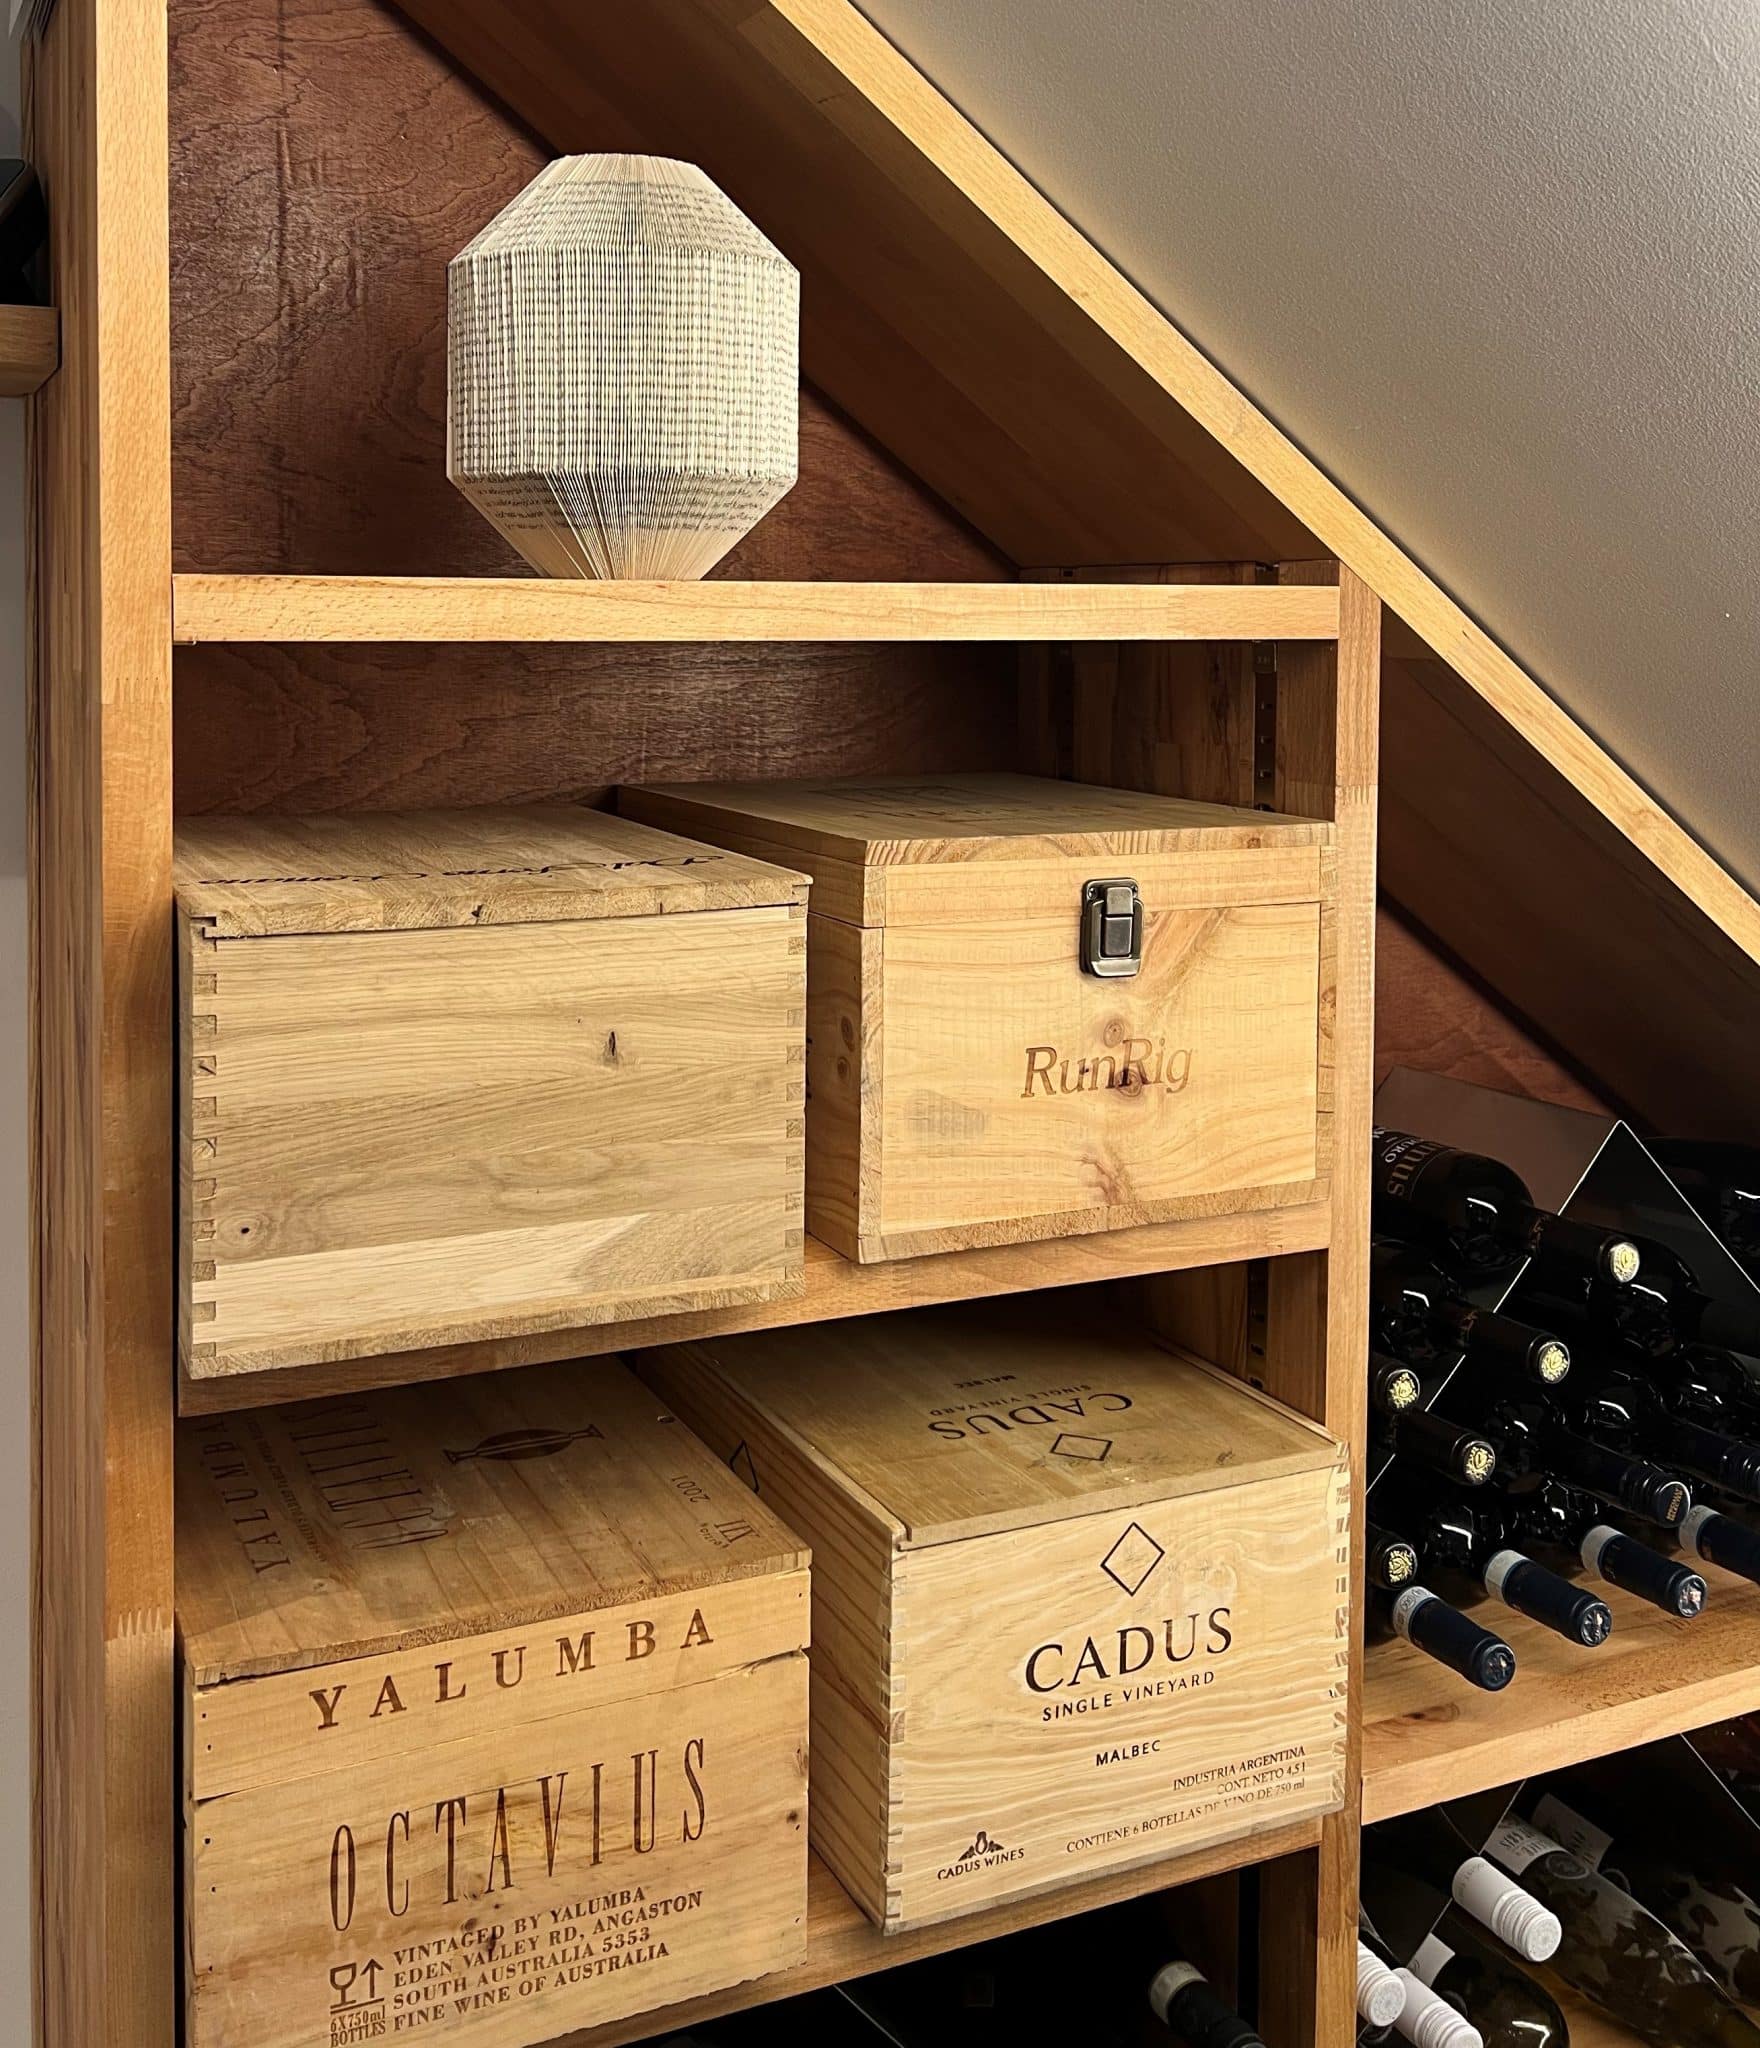
Finish your wine store
I added an oak trim strip to cover the plywood back, sealed with CPES of course, and fitted the skirting board around the corner of the room that could not be done till the wine store was finished.
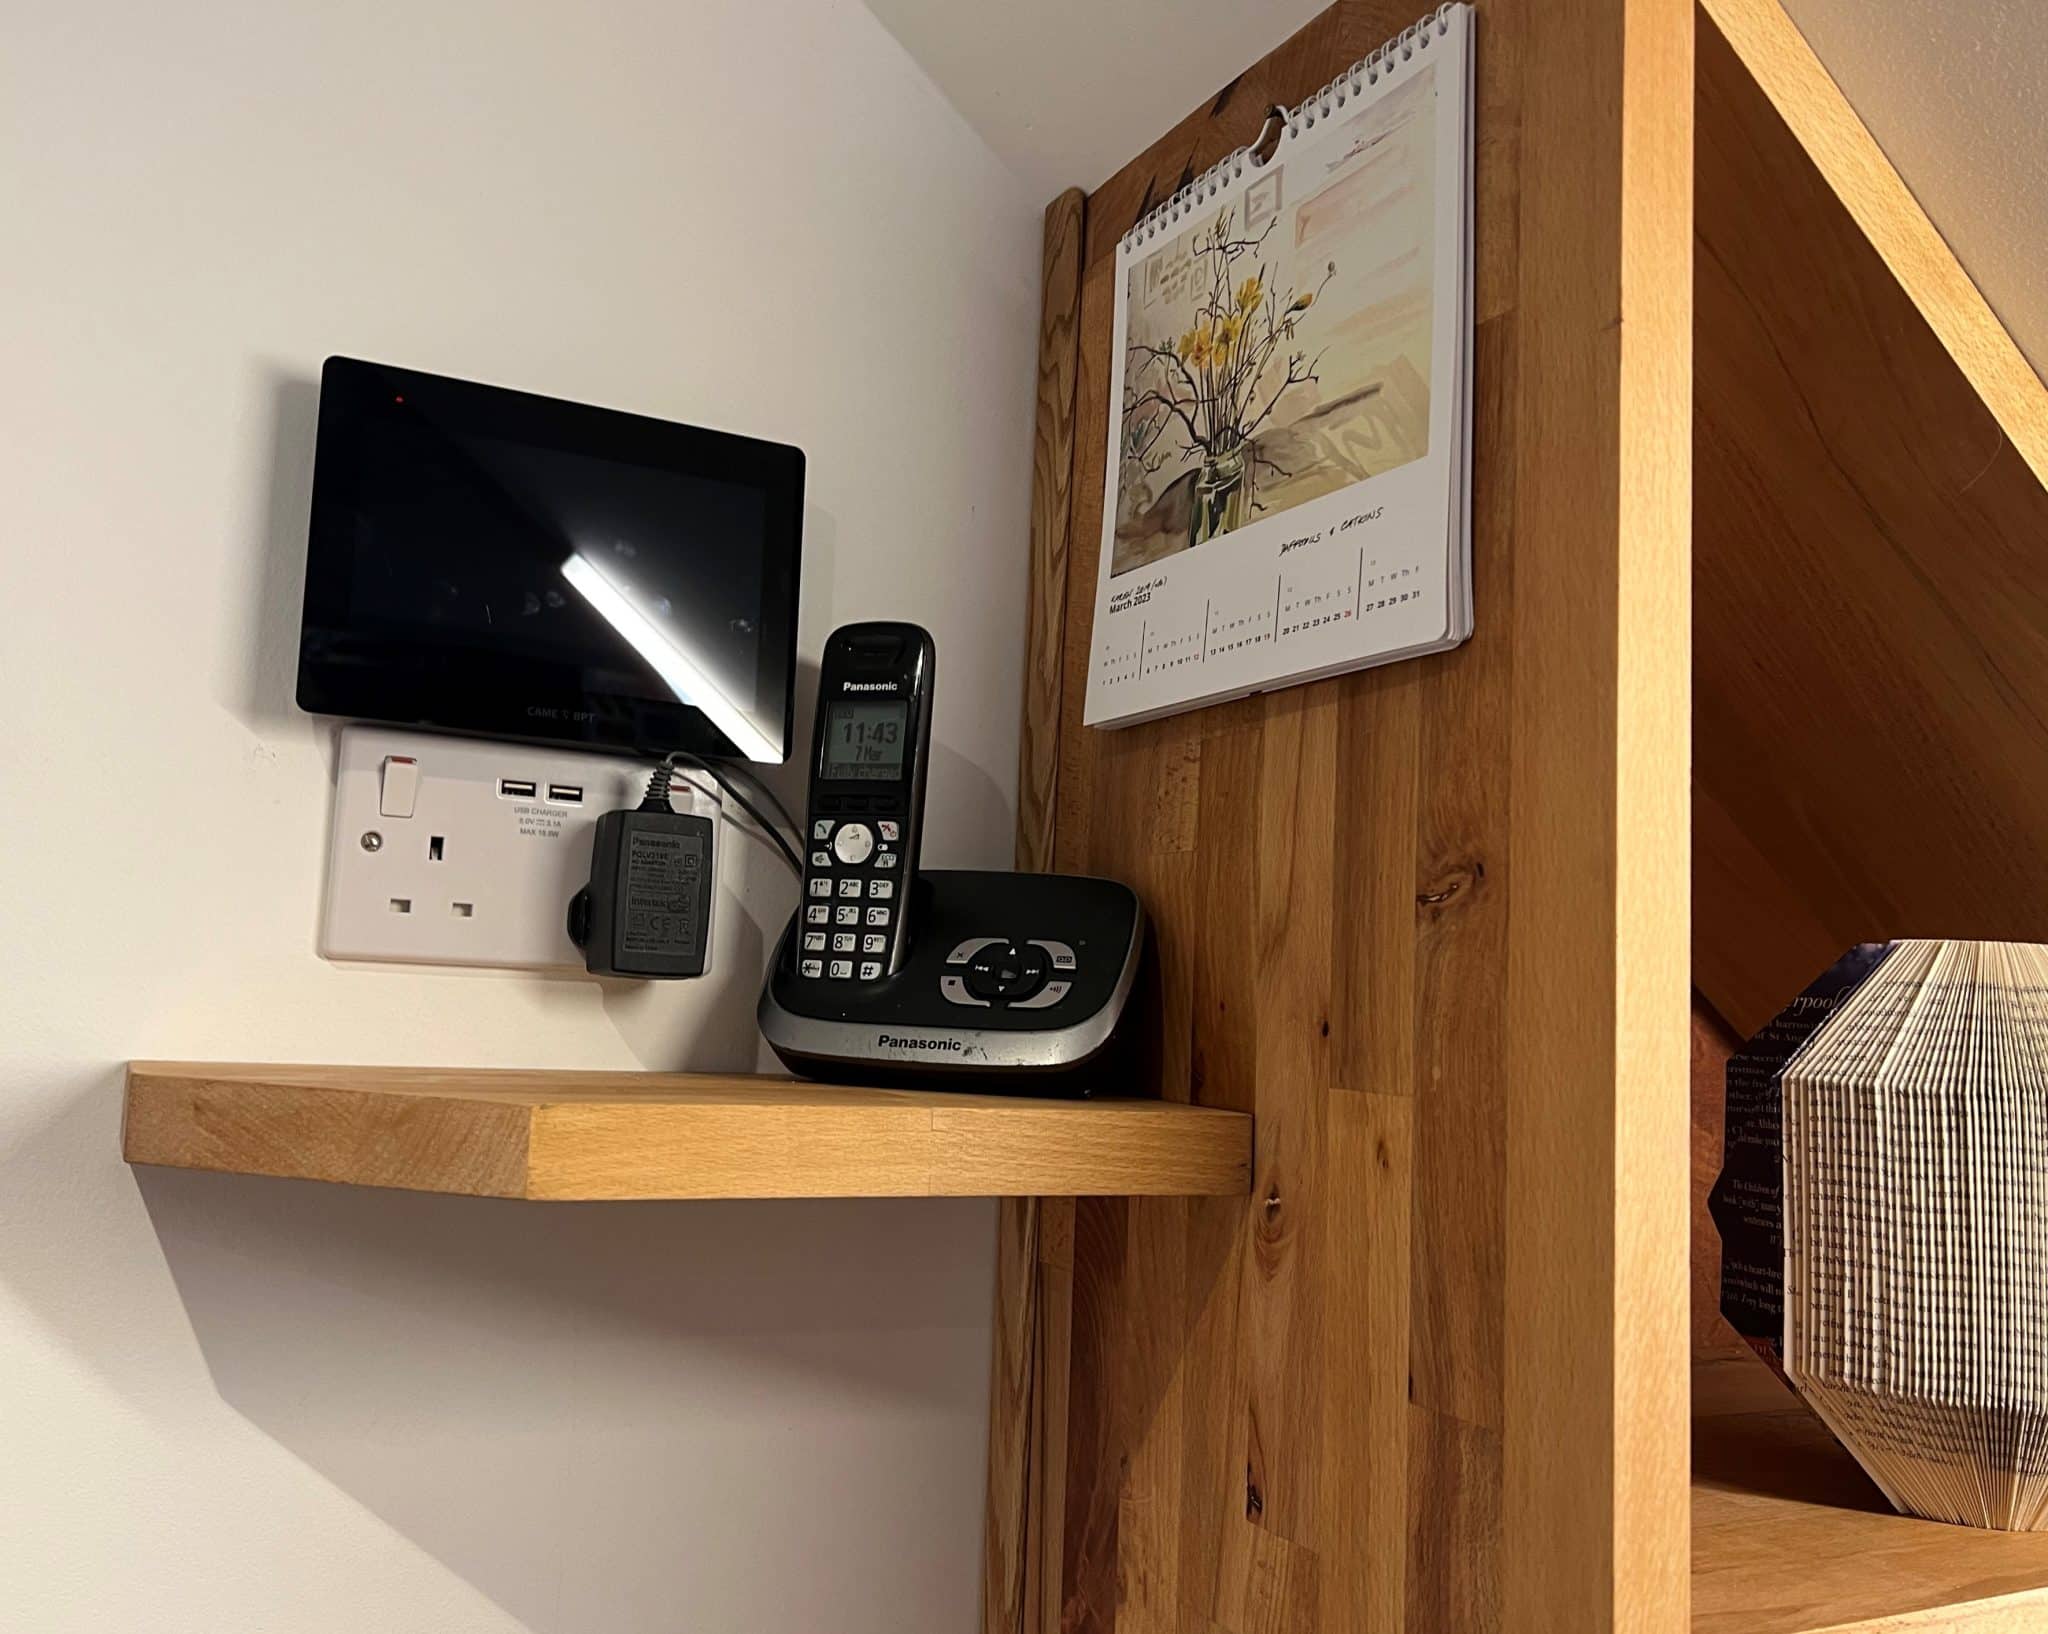
Then, because I like them, I fitted a floating shelf under the power and intercom panel to hold the house phone.
Spending a little time with a soldering iron and heat shrink tubing shortening all of the power and phone cables to the right length makes it look ever so smart too.
Finished Under Stairs Wine Storage Solution
For a budget of around £500 including the CPES to finish the timber, but excluding the bookcase router bit which I already owned, I now have this wonderful under stair winerack.
It’s a real talking point, and quite the most sensible thing I have ever found under the stairs.
The lighting is a 24v COB strip light (EBay) fitted into an aluminium angle section (TLC Electrical wholesale). It’s dimmable, part of the kitchen lighting circuit and the driver (EBay again) lives under the first stair behind the little bit of skirting board.
