To show you how I approach edge sealing plywood, I will use a real life problem. I wanted to create a bath panel to match the flooring in my new bathroom. The bathroom is tiny, little more than 2 metres cubed, and so it had been relatively cheap to floor it in Walnut. It looked great, the new bath looked great, but I could not face having a huge cheap plastic bath panel to look at. The plywood was going to need to be sealed though, as it would get wet, kids and adults ensure that happens. Having made something beautiful, you need to make sure it lasts.
A Hand Made Walnut Bath Panel
There were plenty of ‘walnut effect’ bath panels available, but I thought that the best way to make one of those look really nasty would be to put it next to real walnut. I decided to buy more walnut floorboards, and a panel fabricated to size.
Making the Bath Panel
Rather than just gluing the floorboards together on their tongues, I decided to glue them on to a substrate of 10mm Plywood. The additional weight would not be massive, and the 10mm ply would be dimensionally stable. Manufacture of engineered floorboards is done this way, where the plywood gives dimensional stability to the solid wood face. Engineered boards are required in wet areas and areas where underfloor heating is to be used; the plywood is far more dimensionally stable than regular timber. I lined the floorboards up one after the other. Each board was then individually glued and screwed from the back through the ply panel with the screws seating into the back of the floorboards. Each board could be done one at a time, and all joints made nice and tight before proceeding with the next. The sealing of the plywood can’t be done until the panel is finished to size.
Do not use PVA Wood Glue

This was my big mistake with this project. I thought that gluing the boards would add significant additional strength to the end result. I happily glued each board down with 3 or 4 lines of PVA adhesive. The next morning my nightmare became true, the construction had bowed so badly from the moisture that I had introduced to it. Perfectly flat plywood and floorboards, held down with weights whilst setting, had warped. Worse it had warped into a structure so strong that I could not easily straighten it.
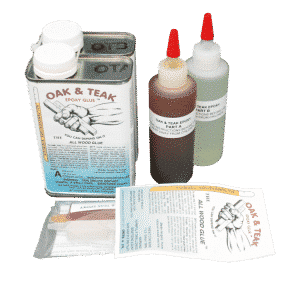
If I do anything like this again I shall use a non water based adhesive between the boards and the ply, probably Oak and Teak Epoxy. I am sure other glues would be fine for this laminating, just ensure that they are not water based, as it was the water that warped the boards. The cure involved two massive steel sections, both glued and screwed to the panel.
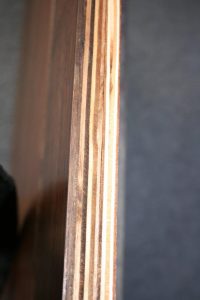
The steels were first cleaned of rust, and then phosphated by treating with Phosphoric Acid to ensure good adhesion of the adhesive. Smiths Oak and teak Epoxy was used, which bonds very strongly to the phosphated iron and to the panels themselves. Whilst this fix worked, do please save yourself some time, and use a non water based wood glue in the first place. I certainly wish that I had! The glued and screwed steels are shown below.
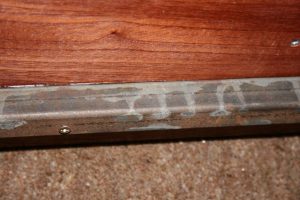
The phosphating marks on the steel are clearly visible on the steels in this shot:
Finishing The Bath Panel
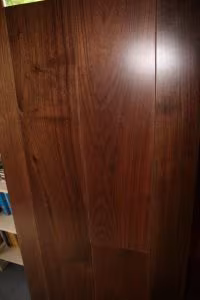
The bath panel was made slightly over size, and was then cut to rough size with a skill saw. Once close the final cut to size was performed with a router against a straight edge. This technique leaves a lovely finished edge, and the finished panel is shown below.
Edge Sealing Plywood to make it water safe.
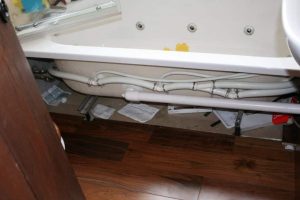
We now have a bath panel with massive strength, with a lot of exposed edges of plywood from both the engineered floorboards and the base plywood panel. One of these edges will sit directly on the floor, which is going to get wet, and the other just under the rim of the bath. Sealing is required on both of these plywood edges.
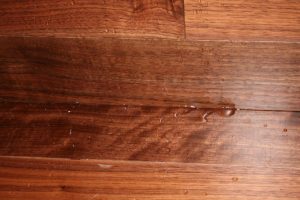
As I have a young boy for testing the waterproofing of bathroom components, all plywood edges needed sealing badly. Waterproofing plywood edges is imperative. As children love throwing water around I decided to seal with CPES all faces that were not factory finished with 2 part polyurethane, ie the walnut floorboard surface itself. This is what that bottom edge of plywood is subjected to each bath time.
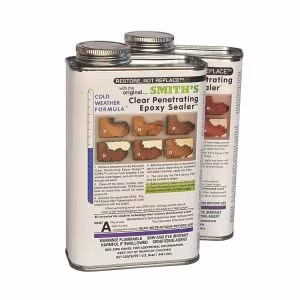
Smiths Clear Penetrating Epoxy Sealer was used to seal the edges and faces of the plywood. Particular attention is given to the edges, as they offer exposed end grain which will naturally wick up water. Fortunately the edges also wick up the CPES very readily.
Apply coats until they stop taking any more sealer, allowing the solvents to evaporate (the smell to dissipate) between coats. Typically 3 coats are enough. No further treatment is required as the CPES will not be exposed to sunlight, so no UV protection is required.
Sealed and beautiful.
What about Buffalo Board?
Buffalo, and other manufacturers Phenolic coated plywoods, is sold for it’s durability. The coated surface resists just about anything. It’s really a shame the edges don’t. If you want to protect your expensive phenolic surface plywood, you shoud Seal the Edges of Buffalo Board before final fixing of it.
Sealing Plywood Results
One year old – Summer 2016
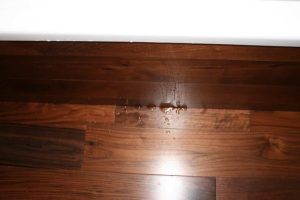
The bath panel above was constructed in January 2015 and has been in daily use with our tester since fabrication. It shows no sign of water damage or ingress after well over 300 ‘rinse cycles’. The following picture was taken in early summer 2016, and slight discolouration is visible from the dirt that resides at floor level, but no damage to the wood, which is still as firm as when it was first treated.
We anticipate a beautiful bath panel that will outlast the bathroom. We will update the photos above every so often as befits any good durability story.
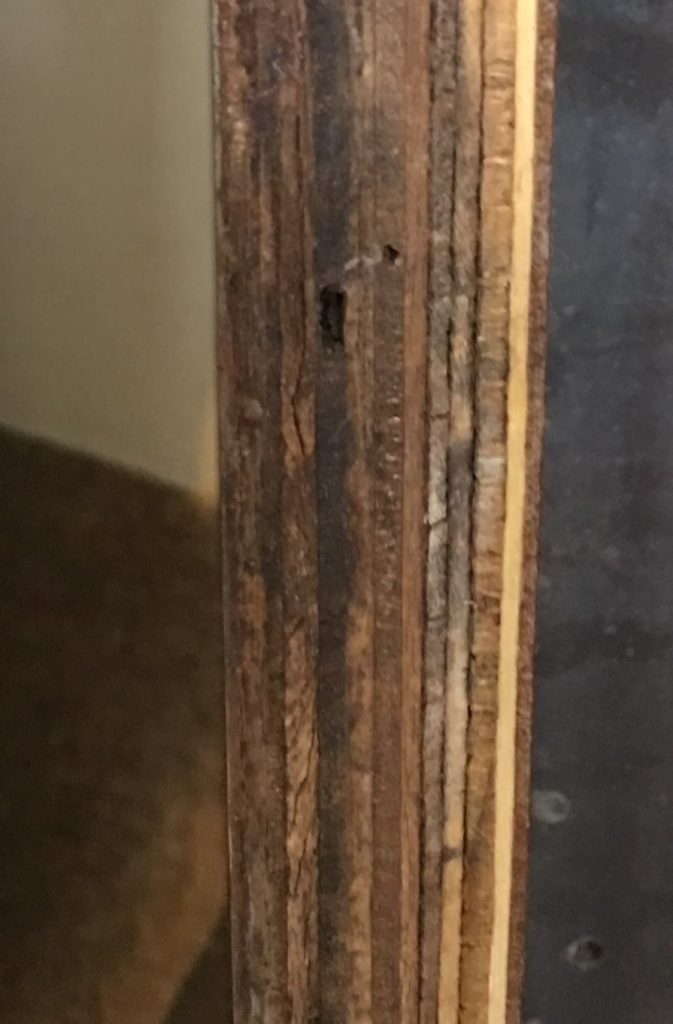
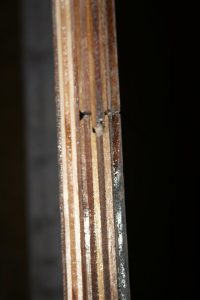
This is Summer 2019 – It’s 4 years old now.
The edges are still firm, no rot is visible – not even near the defects in the cheap plywood used for the flooring.
This plywood would not have survived anywhere near this long without treatment – with it it is as good as new.
Endurance testing proving that Sealing Plywood enhances durability
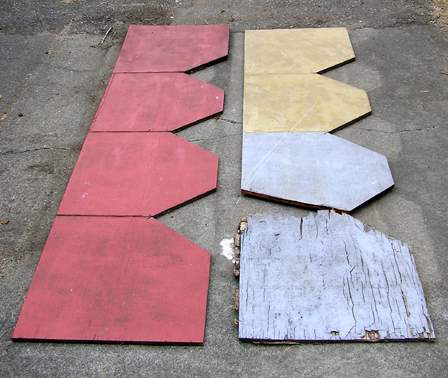
The Rot Doctor in America recently completed some endurance testing of plywood with and without Clear Penetrating Expoxy Sealer – CPES sealing treatment. You can see the results of this testing here: Exterior plywood exposure testing with CPES.
You can find further Tests of the Performance of Clear Penetrating Epoxy Sealer Here.
Penetration of CPES into Plywood is also demonstrated here.
Want to have a go:
These are the products I did use, and should have used. Using Oak and Teak to actually laminate the floorboards to the plywood backing will avoid warping. Warping will ruin your day if you use a water based adhesive.
CPES of course is used to waterproof the parts of the plywood that could get exposed to water. Once you have made something beautiful – keep it that way.
-
Price range: £63.75 through £353.00 Select options This product has multiple variants. The options may be chosen on the product page
-
Price range: £15.00 through £675.00 Select options This product has multiple variants. The options may be chosen on the product page